Save to My DOJO
Occasionally, you may need to revert to a previous version of ESXi. The reasons for this can vary from the infamous Purple Screen of Death to unexpected behavior resulting from unsupported hardware or misbehaving drivers. Here’s an example of the latter scenario. Your first impulse would probably be to apply a fix and hope for the best. Alternatively, you can revert to a previous ESXi installation, one you know was working fine before upgrading.
In today’s post, I’ll briefly explain what goes on at the disk partition level when ESXi is installed and upgraded at a later stage. This will give you an understanding as to why and how the version rollback procedure described works.
Installing ESXi
So, what I have in mind for this post is the following. I’m going to install a nested instance of ESXi 6.5. If you don’t know how to do this, have a look at the following posts.
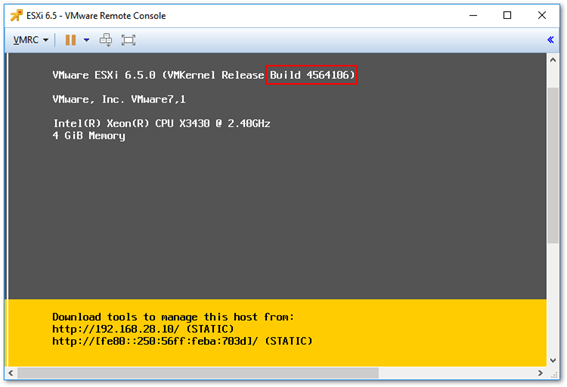
Checking the ESXi version and build from the console (DCUI)
Once installed, we’ll take a peek at the disk partitions ESXi creates during the installation and then proceed to upgrade it to a later version. Finally, we’ll roll back to the original version.
A special kind of partition
I may have touched on ESXi partitions in past articles but I don’t recall going into any detail. For the purposes of this post, the one piece of information to cling to is the dual boot bank architecture ESXi implements for redundancy and recovery purposes.
These boot banks are nothing more than two disk partitions, each 250MB in size, called bootbank and altbootbank. In older versions of ESXi – I believe prior to ESXi – the partition size was set to 48MB. When ESXi is first installed, the bootbank partition is populated with the hypervisor core files and marked active. At this point, the altbootbank partition is empty.
Below is how the bootbank partition looks like when ESXi is first installed. The state.tgz file, I pointed out in the screenshot, is, in fact, a backup of the host’s state and configuration. The backup is performed every hour by running the /bin/auto-backup.sh script as a cron job.
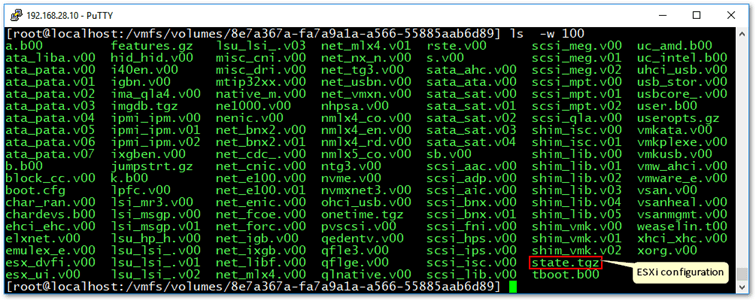
The hypervisor files and configuration as listed under a boot bank partition
Here’s how the altbootbank partition looks like after a host is first installed. It’s empty save for a couple of files. However, when the host is upgraded, the partition is then populated with the files from the upgraded version and marked active. When the host is rebooted, the bootloader will then point to this partition instead of the previous one.
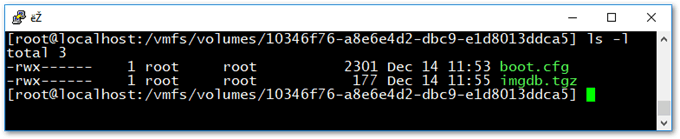
The altbootbank partition is empty right after ESXi is installed save for a couple of files
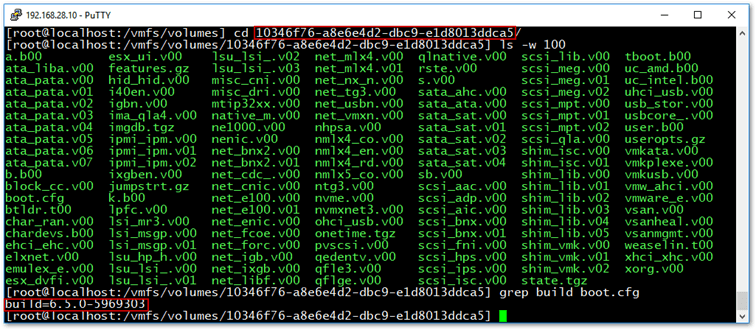
If you run something like grep build boot.cfg, you can determine which version of ESXi is present on the selected partition assuming it’s already been populated.
[root@localhost:/vmfs/volumes/10346f76-a8e6e4d2-dbc9-e1d8013ddca5] grep build boot.cfg
build=6.5.0-5969303
As mentioned, both partitions are sized 250MB. You can easily spot them by running df -h /vmfs/volumes from shell.
Two other commands you may find useful are esxcli storage core device partition showguid and partedUtil showGuids. The first command lists all the partitions present on the host’s primary disk or bootable medium. The second command maps partition types to a GUID. As can be seen from the next screenshot, bootbank and altbootbank correspond to partitions 5 and 6 respectively and are both of type Basic Data.
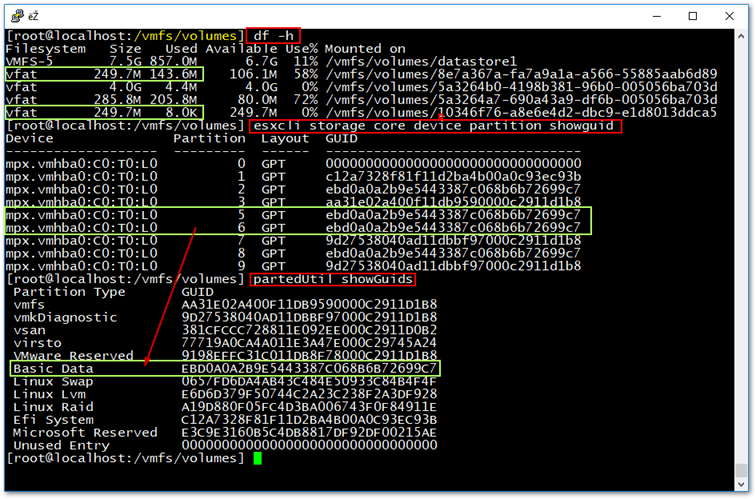
Shell commands will help you determine which partition is which
Likewise, you can use the ESXi host client or vSphere Web client to view the partitions on ESXi. The two boot bank partitions are the ones boxed in red in the next screenshot.
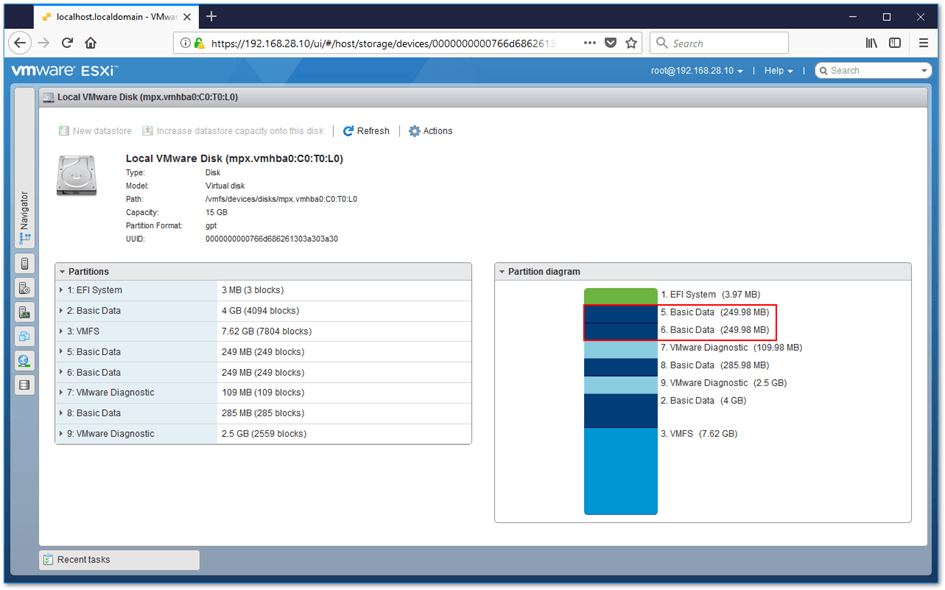
Using the host client to list partitions on a host
Upgrading ESXi
I will now upgrade the 6.5 instance just installed to ESXi 6.5 U1. I’ll be using the ISO method as shown in the next video. Since I’m upgrading a nested ESXi, all I need to do is attach the relevant ISO and make sure the VM boots off it. The same applies to upgrading a physical host except that the ISO image is now booted off a USB device or CD/DVD disc.
The alternative would be to use the esxcli software command to upgrade using an offline bundle as explained in the Patching and Upgrading ESXi using ESXCLI commands post.
At this point, we can verify that the altbootbank partition has been populated with the files from the upgrade. As you can see from the next screenshot, this is indeed the case.
The altbootbank partition is populated after an upgrade. The boot.cfg file helps you determine the ESXi version at this location
You can also correlate the build number, listed at the bottom of the previous screenshot, with that on the ESXi versioning page.
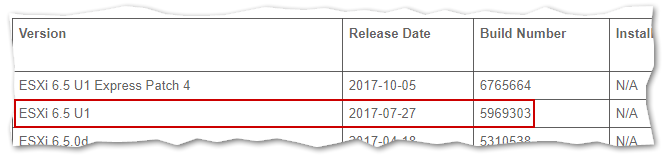
Correlating the ESXi version and build number with VMware’s online reference
Rolling back to the previous version
Suppose that after upgrading, the host starts crashing intermittently. You need the host stable asap as you cannot afford additional unplanned downtime during this time of day. This is where having two boot banks comes in super handy.
To roll back to the previous ESXi version, reboot the host from DCUI or type reboot at the shell prompt. Below, I’ve listed the steps carried out using DCUI as per the video below.
- Press [F12] while consoled (DCUI)
- Type in the root password.
- Press [F11] to reboot the host.
- Quickly press [Shift-R] when the host starts booting.
- At the VMware Hypervisor Recovery screen, press [Y] to roll back to the previous ESXi version.
The host should now be running the ESXi version installed prior to the upgrade. Note, that once this procedure is carried out, you won’t be able to go back to the upgraded version other than by installing it again.
Conclusion
Ideally, you won’t need to roll back ESXi anytime soon but it helps to know the option exists should you need it. One related topic I should definitely cover is backing up and restoring ESXi. So stay tuned for an eventual post on the subject. Speaking of backups and restores, did you know that vCSA 6.5 has an inbuilt backup and restore capability? How to natively backup vCSA to IIS using HTTPS explores how to backup the configuration of your vCenter Server appliance to a web server. You will find this and similar articles on our ever-growing VMware blog.
[the_ad id=”4738″][thrive_leads id=’18673′]


Not a DOJO Member yet?
Join thousands of other IT pros and receive a weekly roundup email with the latest content & updates!
More in this category


About the Author
Jason Fenech


5 thoughts on "How to Roll Back to a Previous ESXi Version"
Never had to rollback (fortunately!), but glad the option is there. Thanks for demonstrating how simple it should be to rollback juuuuust in case.
Glad I could be of help. Thanks!