Save to My DOJO
Table of contents
It is possible to install vCSA, or PSC for that matter, using the command line as opposed to the UI installer. An unattended vCSA installation is something I’ve been wanting to try for a long time but never really found the time, until now. Hence today’s post, is a step by step tutorial on how to run an unattended vCSA 6.5 install from the command line.
If you’ve missed the news, have a look at vSphere 6.5 Update 1 – What you need to know where I outline the latest features this recent vSphere update brings to the table. And if you do not fancy working from the command line, How to install vCenter Server Appliance 6.5 from scratch shows you how to install vCSA 6.5 the easy way.
Running an unattended vCSA installation
Step 1: Choose a FQDN such as vcsa65.acme.local and create the respective A and PTR records on your DNS server.
Step 2: Choose where you want vCSA installed along with the type of deployment. For this post, I’ll be installing a vCSA with an embedded PSC on an ESXi host itself managed by vCenter Server.
Step 3: Mount the vCSA ISO image and navigate to \vcsa-cli-installer\templates\install. The folder contains JSON configuration files which you can edit and then use with the vCSA command line installer. The JSON file used in conjunction with command line parameters, provides a way to run an unattended vCSA installation.
Make sure that the JSON file chosen reflects the deployment type selected. As per Fig.1, I selected the embedded_vCSA_on_VC.json file to match the deployment type I’m aiming for.
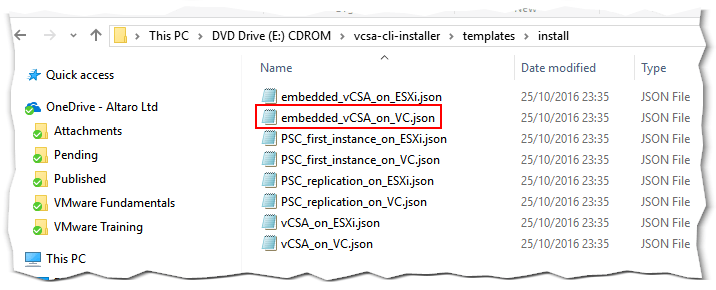
Figure 1 – vCSA install configuration JSON files
Step 4: Copy the selected JSON file to a local folder on your computer; where you’re running the installer from.
Step 5: Using Notepad ++ or similar (Fig.2), edit the JSON file as follows. Refer to this link for a complete list of parameters.
Section 1 and 2: Target vCenter Server details
| Hostname | The FQDN or IP of the ESXi host or vCenter Server on which vCSA is installed. |
| username & password | The credentials needed to access vCenter Server or ESXi |
| deployment.network | The portgroup to which vCSA connects to. |
| datacenter | The datacenter where vCSA is deployed. Applicable only if targeting vCenter. |
| datastore | The name of the datastore where vCSA will reside. |
| target | The IP address of the ESXi host on which the datastore is mounted. |
Section 3: vCSA deployment details
| thin.disk.mode | Determines if the vCSA’s disk are created using thin disk mode. |
| deployment.option | Refer to this to review the available deployment types. |
| name | The name assigned to vCSA’s VM; as displayed in the inventory. |
Section 4: vCSA network details
| ip.family | The IP version used (4 or 6) for the network configuration. |
| mode | Determines if static and dhcp network settings are used. |
| ip | The IP address assigned to the vCSA. |
| dns.servers | A comma-separated IP address list of DNS servers configured on vCSA. |
| prefix | Subnet mask in prefix format (Ex. 255.255.255.0 = 24, 255.255.240.0 = 20). |
| gateway | The IP address of the default gateway set on vCSA |
| system.name | The FQDN (hostname) for the appliance. |
Section 5 & 6: vCSA OS and SSO details
| password | The root password used to access vCSA’s via SSH, VAMI or otherwise. |
| ssh.enable | Set to true to enable SSH access by default. |
| password | This is the password for [email protected]. |
| domain-name | The SSO domain name (you can leave it as is). |
| site-name | The SSO domain site name. |
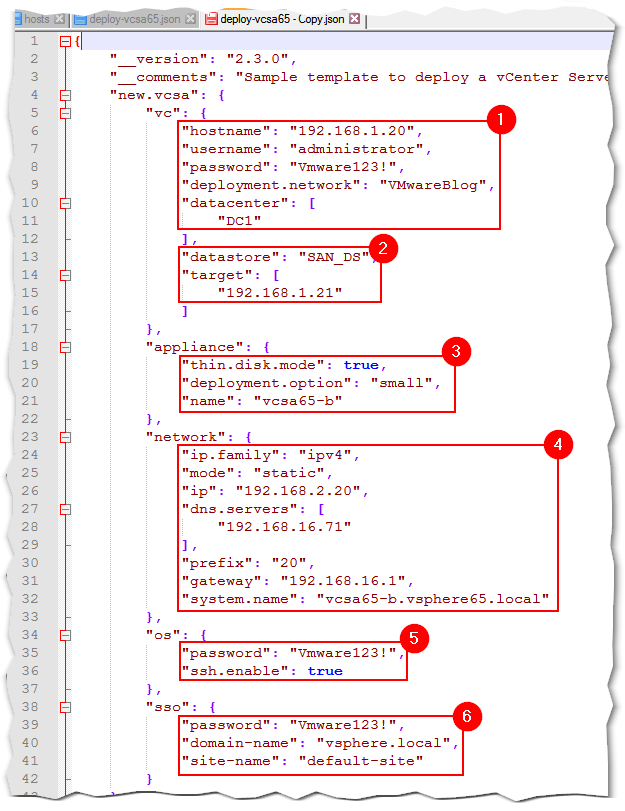
Figure 2 – Editing a vCSA install configuration JSON file
Step 6: Retrieve the SSL thumbprint for the vCSA’s machine certificate. You can easily do this by pointing your browser to https:\\<vcsa IP or FQDN>\psc. Copy the thumbprint value as shown in Fig.3. Navigate to Certificate Authority, make sure Machine_SSL_Cert is selected and click on Show Details. Highlight the thumbprint on the Entry Details dialog box and press Ctrl-C and copy it to Notepad or something similar.
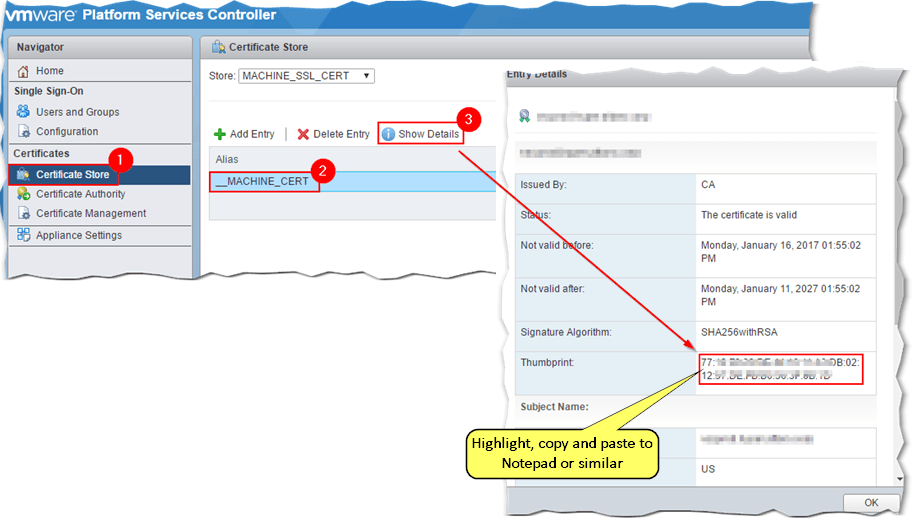
Figure 3 – Retrieving the parent vCSA’s SSL certificate thumbprint
Step 7: Open an administrative command prompt and navigate to \vcsa-cli-installer\win32 on the mounted ISO image.
Step 8: Perform a verification check using vcsa-deploy install –verify-only. The full syntax is shown next.

As implied, you can simulate the installation process and verify the JSON configuration file at the same time without actually installing anything. The SSL thumbprint captured previously is used with the –deployment-target-ssl-thumbprint parameter (used for the SSL verification process). The –accept-eula parameter is used to automatically accept the EULA which allows us to run a fully unattended installation. Verification is a 4-step process. If all goes to plan, a Verification completed successfully message is displayed at the end of command’s output as shown next.
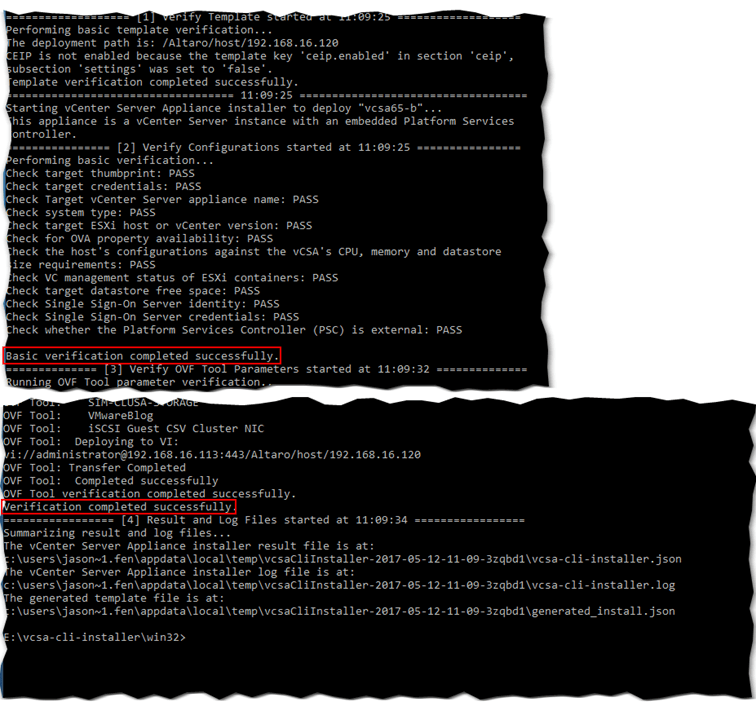
Figure 4 – Simulating an unattended vCSA deployment
Step 9: Deploy the vCSA
If the verification process looks good, run the same command this time omitting the —verify-only parameter. The first stage of the installation process deploys vCSA OVA to the respective host or vCenter Server.
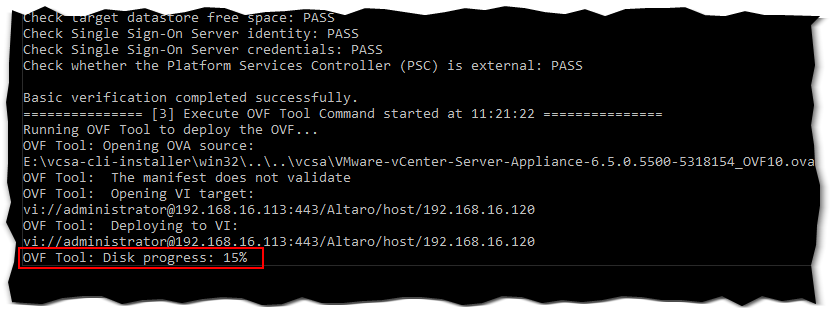
Figure 5a – Deploying a vCSA from the command line
Note that this is the same 2-stage OVA deployment / configuration process that you’ll go through when installing vCSA using the UI method. Fig. 5b, shows the second stage installation in progress.

Figure 5b – Deploying a vCSA from the command line
The Finished successfully line at the bottom (Fig.6), is an obvious telltale sign that the installation was successful. If things go south, have a look at the vcsa-cli-installer.log file for clues.
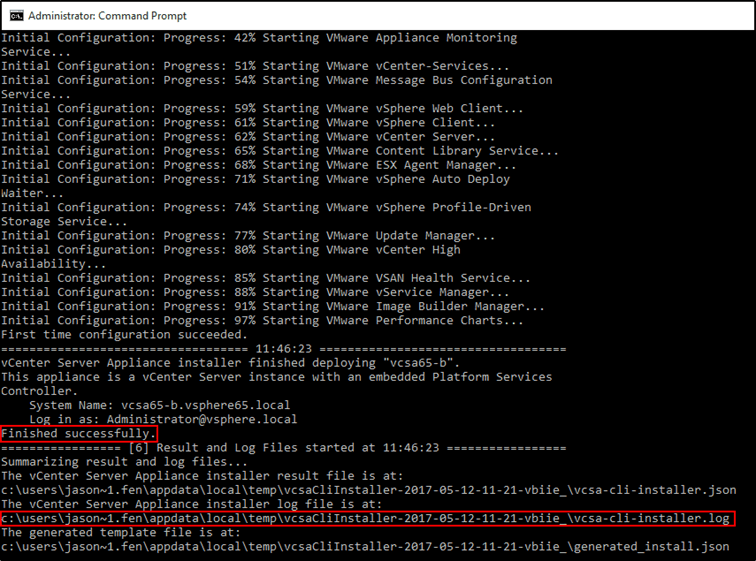
Figure 6 – A vCSA command line unattended install completes successfully
Conclusion
That’s all there is to installing vCSA from the command line. I think that this is a quicker option to using the UI method albeit a little bit more tedious. However, if like me you find yourself deploying vCSA on a frequent basis on the same vCenter Server (or ESXi host) and datastore, then this is one option to keep in mind.
Speaking of which, if you’re planning on upgrading vCSA 6.5 anytime soon, do have a look at 3 ways to update vCenter Server Appliance 6.5.
Regardless, it always helps to have second options. Above all, you can apply this knowledge to good use in your automation quests.
[the_ad id=”4738″][the_ad id=”4796″]


Not a DOJO Member yet?
Join thousands of other IT pros and receive a weekly roundup email with the latest content & updates!


7 thoughts on "How to run an unattended vCSA installation"
How do you perform step 6 before the vCSA has been deployed?
Hi. In the post I’m installing vCSA on a host that is itself already managed by an existing vCSA. You current environment determines which JSON file to use. Hope this helps!