Save to My DOJO

Table of contents
Virtual machine cloning is a feature exclusive to vCenter Server but you can still workaround this restriction if you’re running unmanaged ESXi. In today’s post, I will cover how to clone VMs on ESXi without vCenter Server using a vSphere client and shell commands.
The gist of it is that given a source VM, you first create a target VM with identical hardware and resources as assigned to the one you’re cloning, the source. Next, copy the source VMDK files (disks) to the target VM’s folder. Finally, attach the copied VMDKs to the target VM and verify that the clone boots up and works properly.
Note: If the VM being cloned includes snapshots, you must delete them first before using the cloning procedure here covered. Alternatively, try using vmksftools as per this KB. For further details, do have a look at Learn how and when to use vSphere Snapshots on this blog.
How to Clone Virtual Machines
Step 1 – Enable SSH on ESXi
Shell access is enabled from DCUI. Alternatively, you can start the TSM-SSH service using the embedded host client for recent releases of ESXi such as 6.5 or via the legacy vSphere client for older versions. Last but not least, PowerCLI is one more tool at your disposal as explained in Manage ESXi services using PowerCLI.
Step 2 – Determine the datastore, folder and VMDK names
Obtaining this information should be easy, since a standalone ESXi, more often than not, comes with a single local datastore. Regardless, you can get the details using a vSphere client or PowerCLI.
Using the host client, pull the settings for the VM and expand Hard Disk taking note of the Disk File value as you do. The bit enclosed by the square brackets corresponds to the datastore where the VM files reside. The bit immediately following the datastore name, is the VM folder name; it could be the case that the VM has multiple disks residing on different datastores and folders as per the example listed below. Finally, take note of all the VMDK filenames.
The same details can also be obtained from the Hardware Configuration pane while the VM is selected.
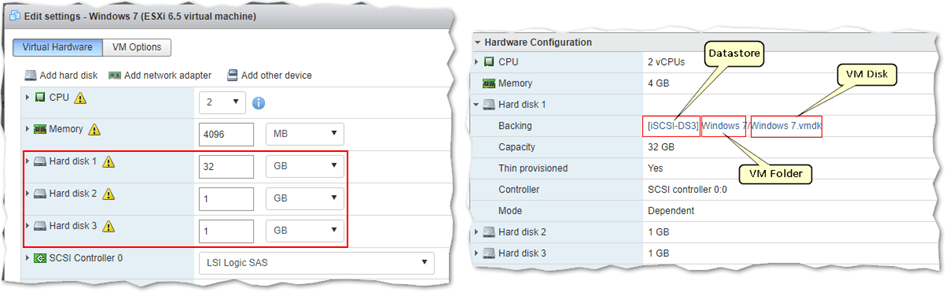
Retrieving the VM datastore, folder and VMDK information using the embedded host client
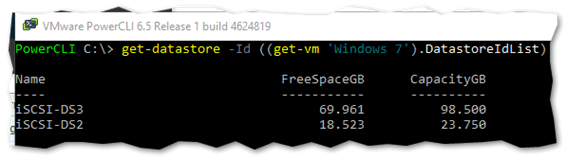
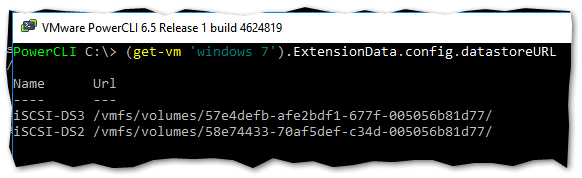
If you wish to use PowerCLI, you can execute either of the one-liner statements next listed. Both will return a list all the datastores associated with a given VM. In the example given, I’ve targeted a VM called Windows 7 which has three VMDKs (disks) spread across two datastores.
get-datastore -Id ((get-vm 'Windows 7').DatastoreIdList)

(get-vm 'windows 7').ExtensionData.config.datastoreURL
At this point, you should have:
- The Datastore name for the VM.
- The VM folder name.
- A list of VMDK filenames corresponding to the VM’s disks.
Step 3 – Create the target VM
Using the host client or otherwise, proceed to create a new VM. Delete the hard drives that is created for you by default. Ideally, You should also create the VM with the same hardware configuration as the source VM.
Important: The Guest OS Family and Version options of the target VM must match those of the source VM.
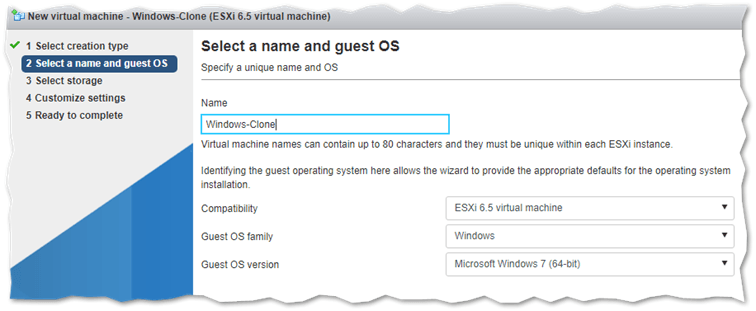
Assigning a name to the VM and selecting the guest OS type
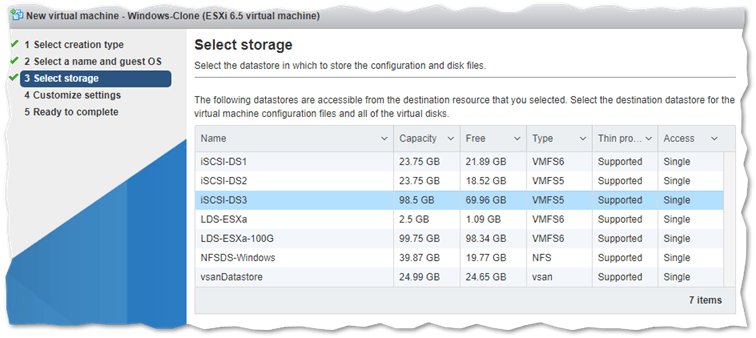
Selecting the datastore where the VM is created
As already mentioned, delete the default disk the wizard creates for you. We will go on and add one later in step 5.
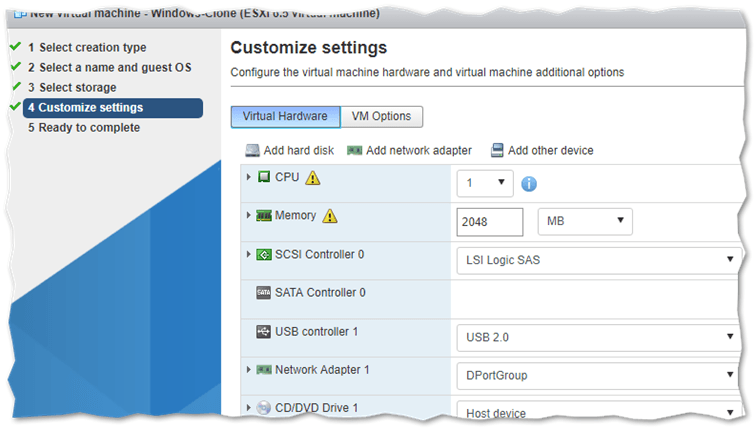
Finalizing the VM’s virtual hardware
Step 4 – SSH to ESXi
Using an SSH client such as putty, log in ESXi as root and carry out the following. The idea here is to copy the VMDKs from the source VM to the one we just created. Although technically not cloning, we will still be running an almost exact replica once we’re done.
Note: The datastore, folder, and VMDK names will differ from those cited here for obvious reasons.
a. Navigate to the folder of the VM you want to be cloned. In this case, I’m cloning the Windows 7 VM.
cd /
/volumes/iSCSI-DS3/'Windows 7'
b. Copy the source VMDK files to the folder of the VM previously created, Windows-Clone in my case. We need to copy the VMDK files – both the descriptor and flat file – noted down in Step 2. I’m skipping copying the second and third VMDK on account of them being dummy disks created for this post just for illustrative purposes.
cp 'Windows 7_1.vmdk' ../Windows-Clone/
cp 'Windows 7_1-flat.vmdk' ../Windows-Clone/
An alternative method:
If for any reason you can’t or won’t use shell, you can still carry this step 4 using the datastore browser instead. If you do, you can skip Step 1 as well.
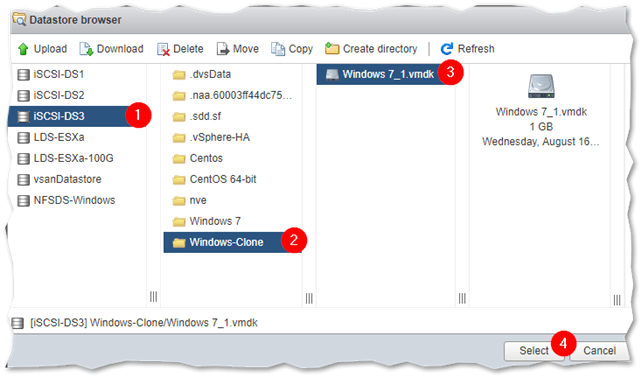
To copy the VMDK(s), simply navigate to the source VM’s datastore and folder, right-click on the VMDK(s) and select Copy. You are then prompted to select the destination folder, which in our case corresponds to the target (cloned) VM’s datastore and folder.

Using Datastore Browser to manage files
Note: In datastore browser, the disk descriptor and flat files are displayed as one. You will still find that both files are created if you inspect the folder contents while SSH’ed to ESXi. Have a look at The Anatomy of a VMware Virtual Machine for further information about what constitutes a virtual machine.
Step 5 – Attach the copied VMDK to the target VM
Now that we finished copying the VMDK(s) to the target VM’s folder, we need to them via the VM’s hardware settings. Before powering up the VM, make sure to disable the network card first. This allows us to change the networking configuration thus avoiding a potential IP conflict with the source VM.
To add the disk, I’ve used the ESXi host client as follows:
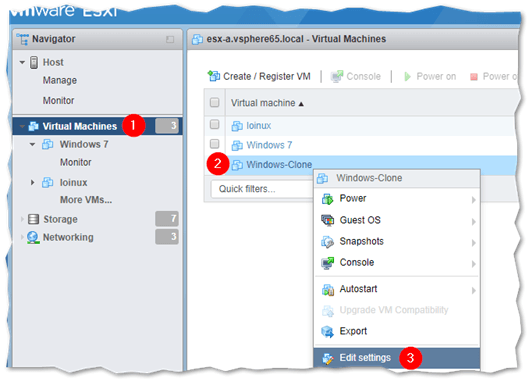
Pulling up the VM’s settings in host client
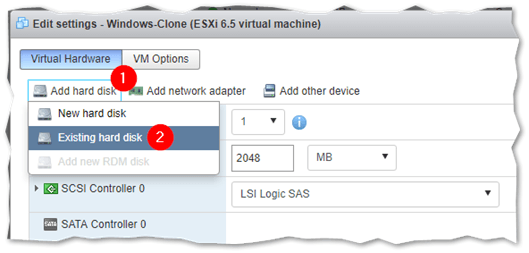
Adding an existing hard disk to a VM
Selecting the VMDK to attach using the datastore browser
As expected, the cloned VM booted up just fine after powering it up.
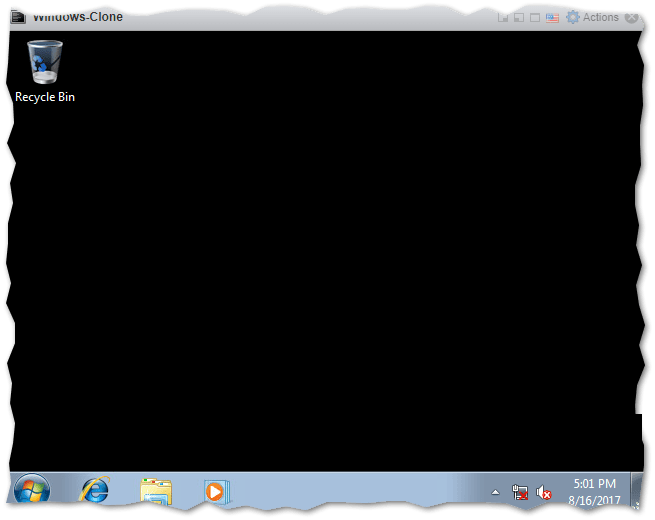
The cloned Windows 7 VM successfully boots up
Conclusion
So there you have it. For those of you using vCenter, cloning virtual machines is an out-of-the-box feature, something you take for granted. Cloning virtual machines on unmanaged ESXi calls for some elbow grease as evidenced by the procedure outlined in this post. Just to remain in theme, if you’re having issues cloning Linux VMs, keep an eye on this space for the upcoming 4 steps to fixing a missing network card on Linux VMs post.
[the_ad id=”4738″][the_ad id=”4796″]


Not a DOJO Member yet?
Join thousands of other IT pros and receive a weekly roundup email with the latest content & updates!
More in this category


About the Author
Jason Fenech


11 thoughts on "How to Clone VMs Without vCenter in 5 Easy Steps"
You use cp, but that looses the sparse properties of a file. You really want to use vmkfstool –clonevirtualdisk instead: vmkfstools –clonevirtualdisk dir/disk.vmdk -d thin dir-new/disk-new.vmdk, which will generate disk-new.vmdk -and- disk-new-flat.vmdk for you.
Maybe an interesting addition: rename the vmdk file to match the vm name.
vmkfstools -E OldFileName.vmdk NewFileName.vmdk
Hi Jonas,
Thank you for sharing! That’s a great additional step. Structured vmdk names is important.
You can also Export an OVF and import it to a New VM.