Save to My DOJO

VMware Update Manager Download Service is a product that acts as a patch repository for the hosts in your infrastructure. It is comparable to WSUS in the sense that it downloads the patches from the internet, which can, in turn, be leveraged by VMware Lifecycle Manager on the compatible vCenter systems in your environment.
It is particularly useful in highly secure environments that, quite rightly, block internet access for the infrastructure components. UMDS can be configured with a network interface with proxy access to the internet to download the patches and a network interface that is accessible by the vCenter servers on port 80 and/or 443.
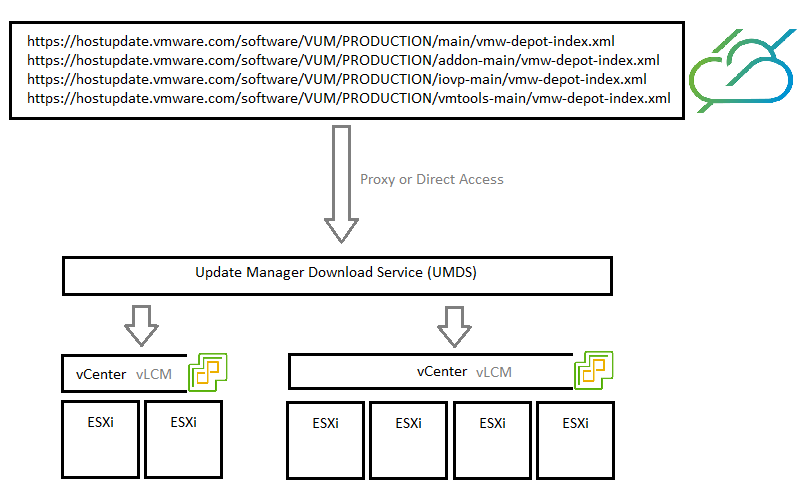
Just like for WSUS, another benefit of using UMDS is that you only download the patches from the internet once instead of doing it on each vCenter. Which will be interesting in large environments or if you have bandwidth limitations.
It is important to note that UMDS supports patch recalls like the one that happened with vSphere 7.0 Update 2. Meaning if your system downloaded and exported a patch that is later recalled, it will be removed from UMDS the next time it runs.
Prerequisites
Considerations
Considerations should be given prior to getting started with Update Manager Download Service.
- vCenter Server instances is only supported with UMDS installed in the same version, 7.0 Update 2 in our case. Note that it will probably work across minor versions though.
- The UMDS server must have HTTPS access (port 443) to at least VMware’s public repositories. You can obviously allow *.vmware.com/* to simplify your proxy rules and allow for more flexibility. You can also add additional repos such as vendors like HP, Dell…
- All vCenter servers that will use UMDS must have access to it on port 80 (http) or 443 (https) according to which one you configure.
- UMDS updates are not supported. If an instance of UMDS is already installed you need to uninstall it first along with its PostgreSQL database. However, the patch store can be retained.
- You need a Web server to distribute the patches to the vCenter instances. The easiest is to install it on the UMDS server itself if you can. If you do not want to use a web server you can still export the patches to a location of your choice and import them to vCenter but then do you actually need UMDS?
Also, if you want to use the FQDN of the server instead of the IP address to connect vLCM, make sure that there is a DNS record in your environment.

Space requirements
While you don’t need particularly large disks to run UMDS, you will still need some amount of storage to store all the patches that you download. How much will depend on the number of vSphere versions you want to cover.
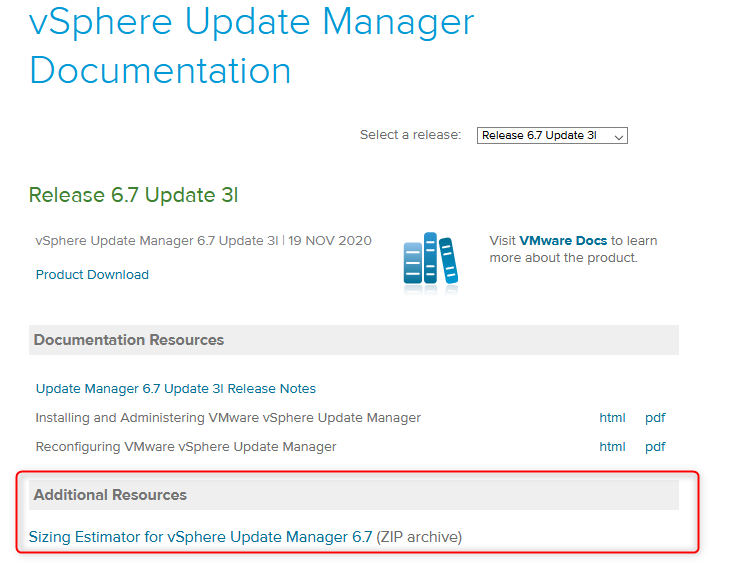
VMware provided a sizing estimator tool up until vSphere 6.7 Update 3 which I couldn’t find an updated version for in version 7.0. However, it will still give you a ballpark idea of how much space to allocate to your Linux server even though vSphere 7.0 is not on the list.
As an example, the server in my lab downloaded 3.6GB of data for vSphere 7.0.x.
Compatibility
Update Manager Download Service used to be available both on Windows and Linux platforms up until version 6.7 Update 3. Starting UMDS 7.0, only 64-bits linux OSes are supported. You will need to make sure that you pick a Linux distribution and version from the list of supported Operating Systems by VMware.
- Ubuntu 14.0.4
- Ubuntu 18.04
- Ubuntu 18.04 LTS
- Ubuntu 20.04 LTS
- Red Hat Enterprise Linux 7.4
- Red Hat Enterprise Linux 7.5
- Red Hat Enterprise Linux 7.7
- Red Hat Enterprise Linux 8.1 (libnsl package version 2.28 or later required)
In this blog we are running Ubuntu 20.04 LTS so your mileage may vary when it comes to Linux commands.
Note that UMDS 7.0 works with both images and baselines. Meaning UMDS will download updates as well as components.
How to install UMDS 7.0
The bundle for VMware’s Update Manager Download Service is embedded in the vCenter appliance ISO. Once again, make sure to retrieve the UMDS bundle from the vCenter ISO of the same version as the vCenter that will connect to it.
- The first step is an obvious one but we’ll mention it. Download the vCenter ISO in the right version if you don’t already have it. Then extract the archive (VMware-UMDS-7.0.2.00000-8786438.tar.gz in my case) which is located in the umds folder to the location of your choice.
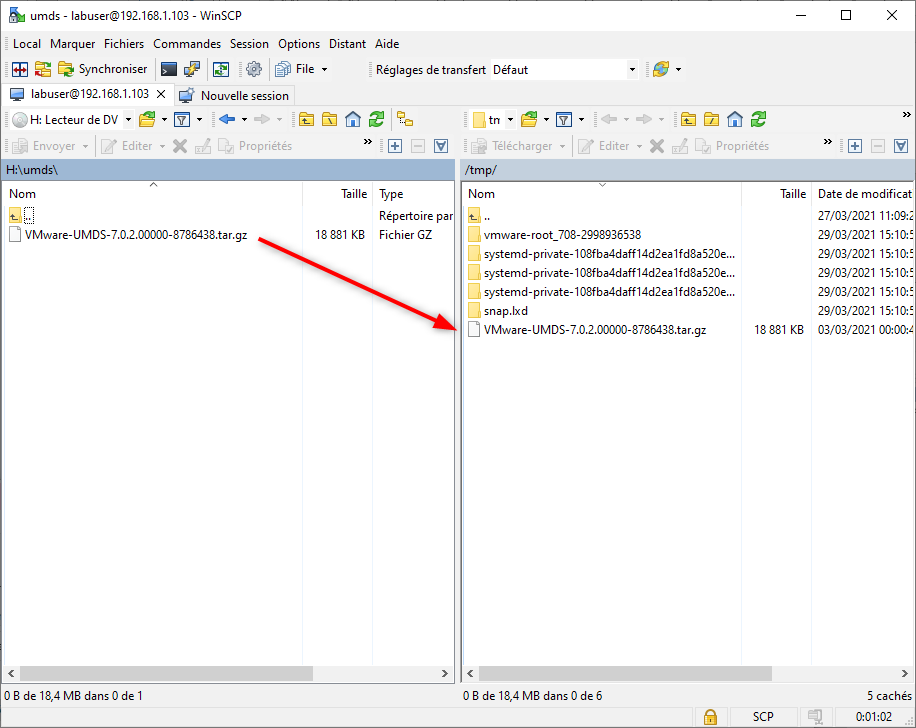
- Open WinSCP and connect to the UMDS server. Then copy the UMDS archive to /tmp.
Note that if SSH is not available on this server, you can connect the vCenter ISO to the VM and extract it from there.
- Create a umds folder under /tmp.
mkdir /tmp/umds
- Extract the archive to /tmp/umds.
tar -zxvf /tmp/VMware-UMDS-7.0.2.00000-8786438.tar.gz -C /tmp/umds

- The installation of UMDS is done with a perl script that you launch with elevated privileges.
sudo /tmp/umds/vmware-umds-distrib/vmware-install.pl
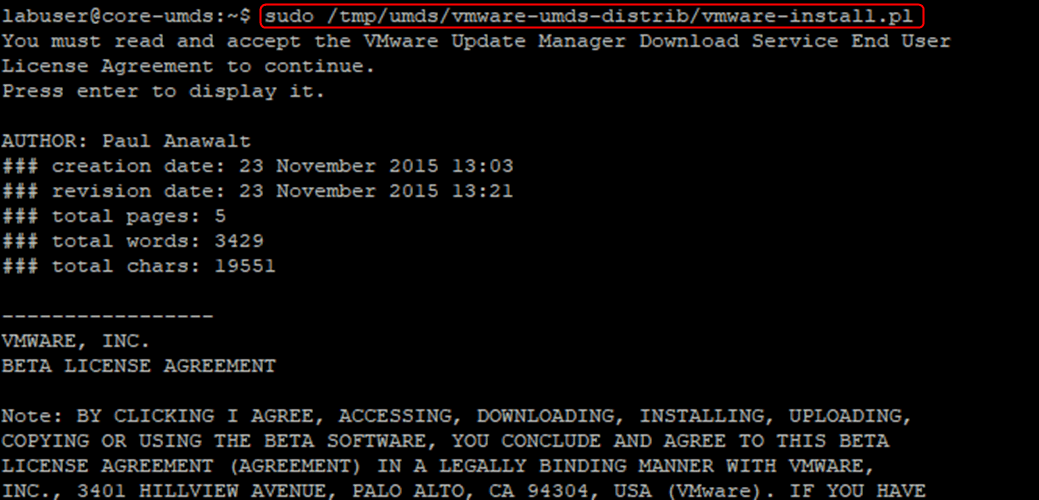
- You will first have to accept the EULA and then the script will ask you several questions.
- Press Enter if you are OK with the default /usr/local/vmware-umds install location and to create the folder.
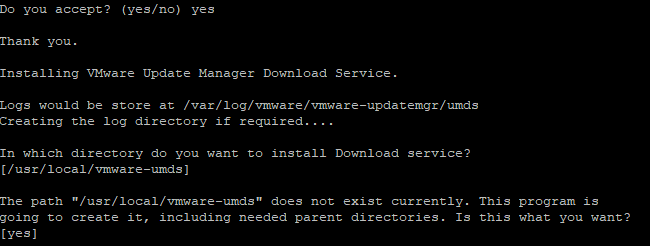
- You can choose to configure a proxy if your environment requires it. Note that you can change it later. I leave it to the default as I don’t have any.

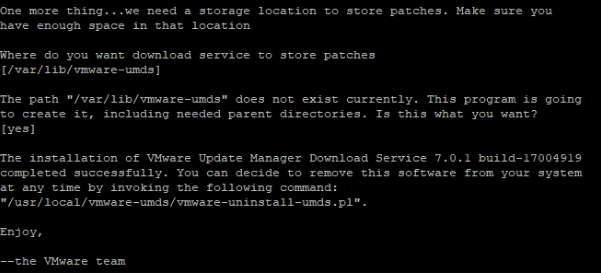
- The last step is to accept the default patch store location if it works for you or type a different one. You can also change this setting later on. This is where the patches are downloaded to. If everything goes to plan, UMDS is now installed on your system, easy.
Configuration of UMDS 7.0
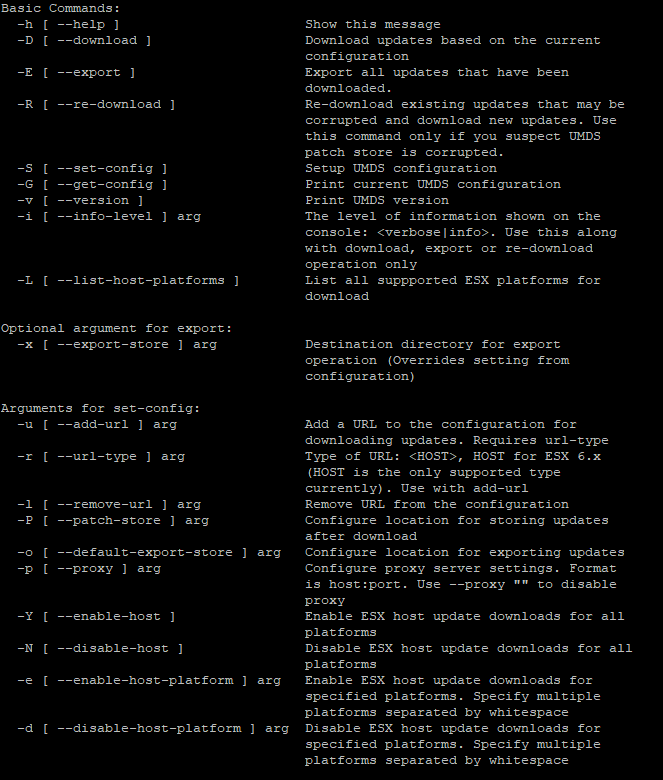
All interactions with UMDS are done through /usr/local/vmware-umds/bin/vmware-umds. In the next few steps, I elevated my session to avoid permission warnings. You can find more about how to use the command with the “–help” parameter.
- We will first disable all the vSphere versions so we can enable only the ones that will be relevant to our environment. There is no point in downloading patches for vSphere 6.5 if it is not in use by your company.
/usr/local/vmware-umds/bin/vmware-umds -N -S

- You can now enable only the vSphere versions you want to download with the “-e” parameter and the “-S” switch which is required when making a change. In my case I only added vSphere 7.0. You can add more by running the command for each one of them.
/usr/local/vmware-umds/bin/vmware-umds -S -e embeddedEsx-7.0-INTL
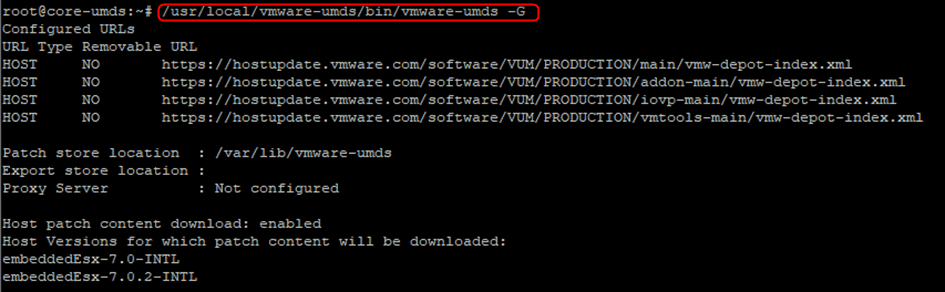
- Check the UMDS configuration with the “-G” parameter. It will display only the versions you chose in the previous step.
/usr/local/vmware-umds/bin/vmware-umds -G
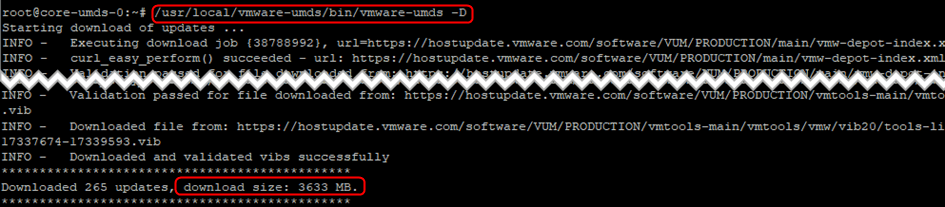
- Trigger the download of the patches with the “-D” switch. It may take a little while depending on your bandwidth and how many vSphere versions you enabled. In my case, it took a little while as it had to download 3.6GB of patches.
/usr/local/vmware-umds/bin/vmware-umds -D
Installation of the Web Server
The web server is what allows vCenter to retrieve the patches from the UMDS server. As mentioned previously, you could do without it, in which case UMDS becomes less relevant.
- As usual with Linux, I suggest you start by running “apt-get update” or “yum update” according to your distro.
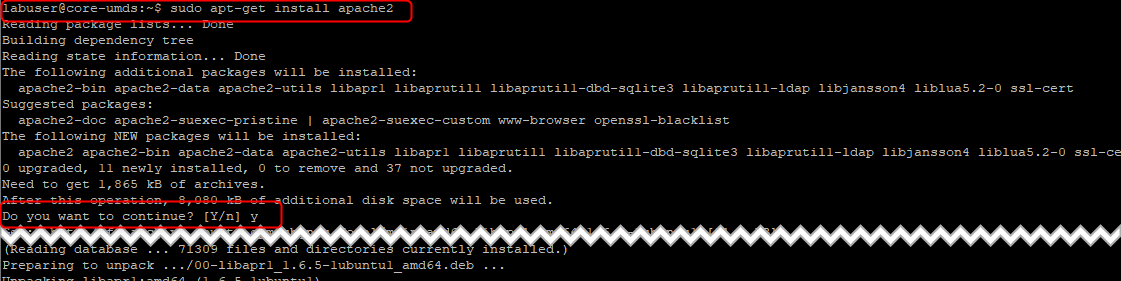
- Install Apache from the public repo.
sudo apt-get install apache2
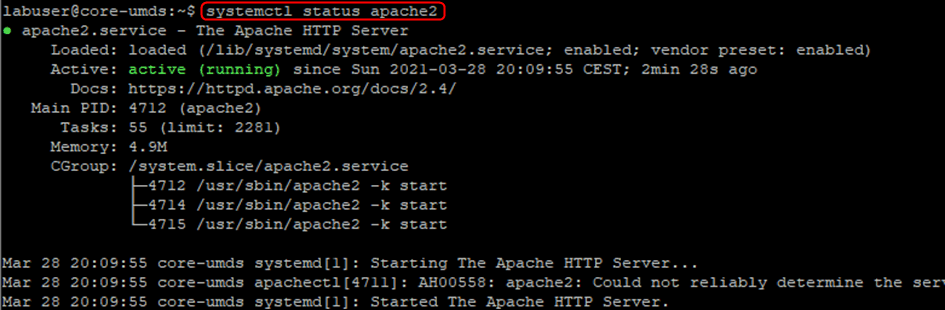
- You can check that its current status is “active (running)”. I also suggest you reboot the server to ensure the web server starts automatically. If it doesn’t you may have to run “systemctl enable apache2”.
Systemctl status apache2
- We will now create a folder in the root of the webserver to export the downloaded patches to. You cannot export directly to the root.
mkdir /var/www/html/umds-export
- Set the UMDS Export location to that folder using the “-o” parameter, with “-S” again.
/usr/local/vmware-umds/bin/vmware-umds -S -o /var/www/html/umds-export/
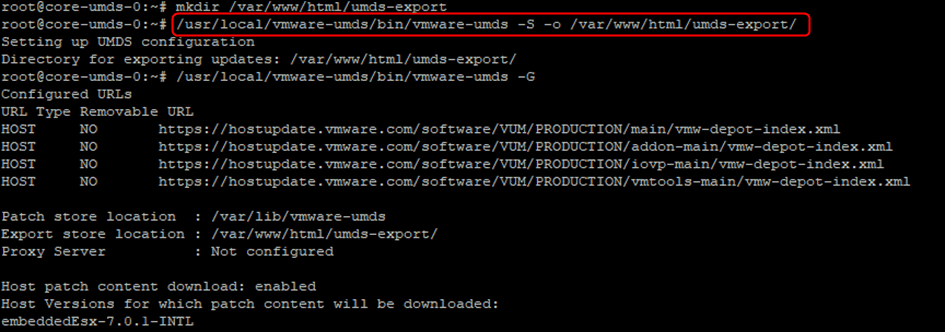
- Once again you can check that the change was made.
/usr/local/vmware-umds/bin/vmware-umds -G
![]()
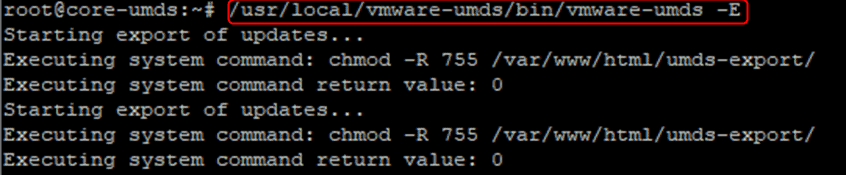
- We now need to export the patches to the webserver with the “-E” switch.
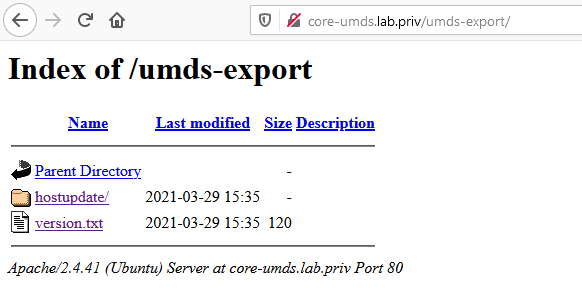
- You can check in a web browser that you see the content when browsing to the UMDS server.
http://core-umds.lab.priv/umds-export/
Configuration of vSphere Lifecycle Manager
So far, we have installed and configured UMDS with a web server, downloaded the patches and exported them to the webserver. We now need to configure vSphere Lifecycle Manager to use it as a download source for the patches.
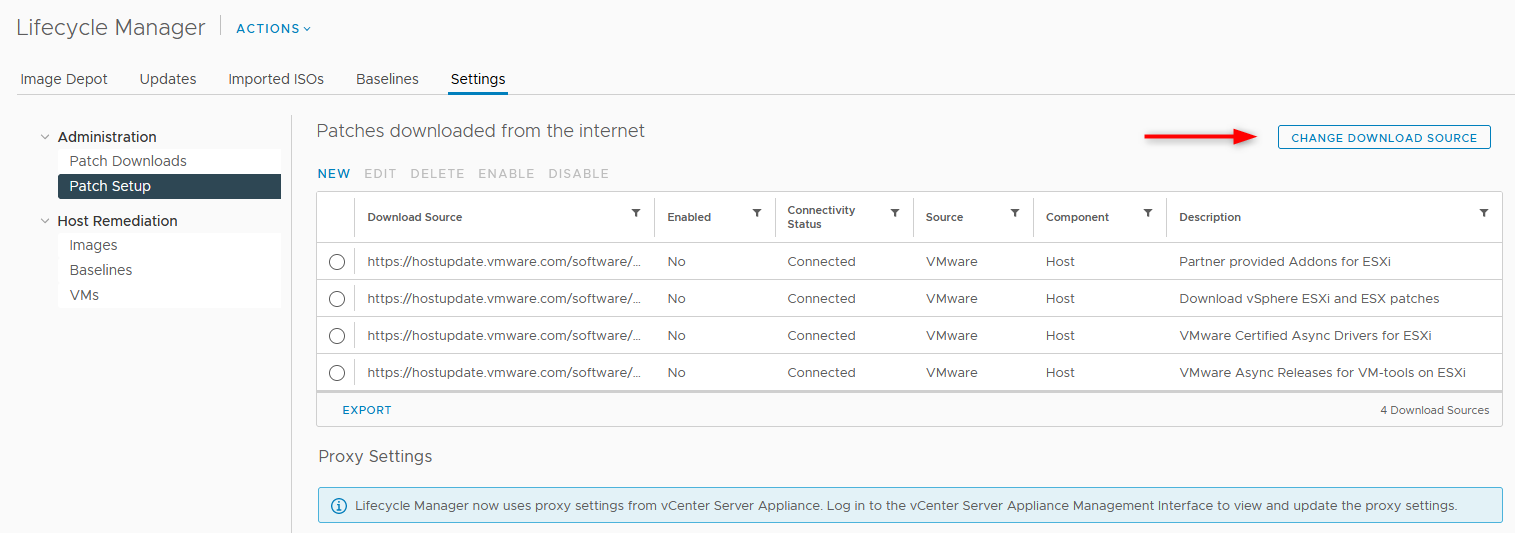
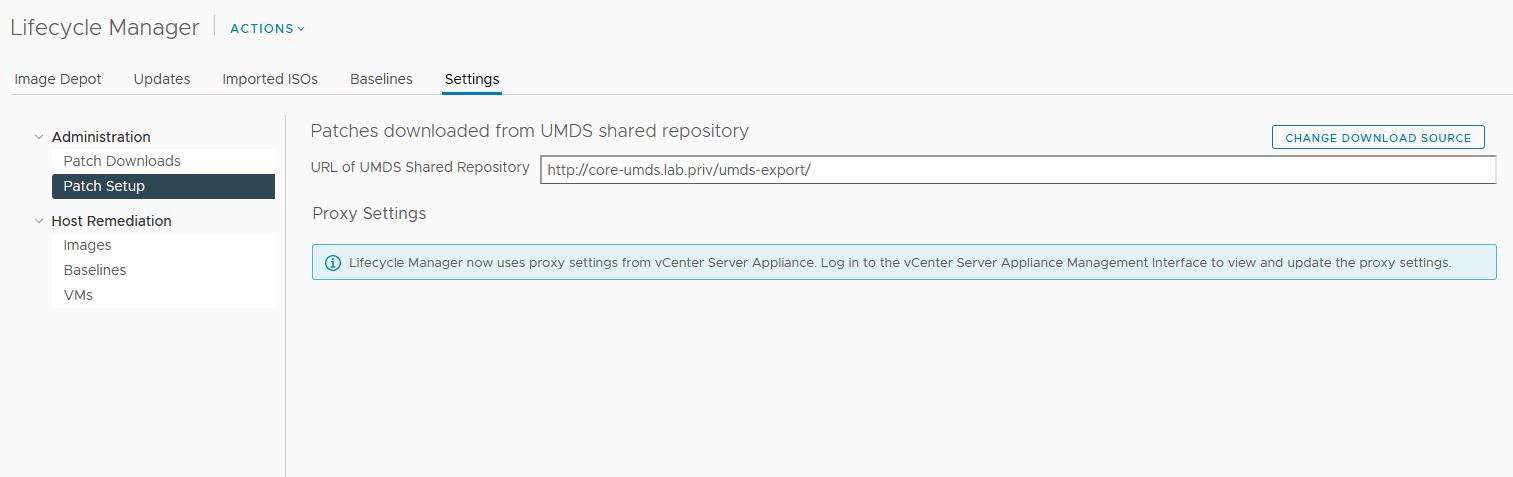
- Log in the vSphere client and go to LifecycleManager > Settings > Patch Setup. Click CHANGE DOWNLOAD SOURCE.
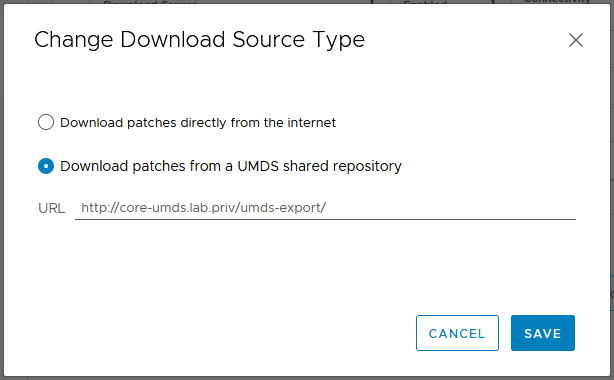
- Check Download Patches from a UMDS shared repository and type the URL where the patches are stored, then click SAVE.
http://core-umds.lab.priv/umds-export
- The Patch Setup window should now look like the following.
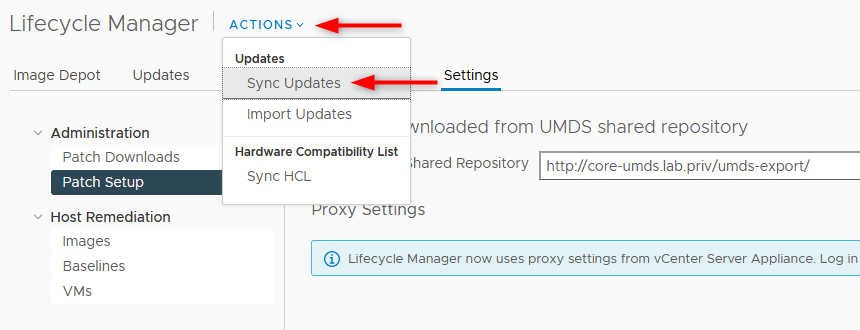
- You can synchronize the update in Lifecycle Manager like you would with the default configuration.
What to do next
You are now ready to pull the vSphere patches from UMDS 7.0 in your secure environment. In the current state you will have to manually trigger the UMDS download and export tasks. It is recommended to create a cron job to automate these 2 actions in a weekly fashion for instance.
Maintaining an up-to-date vSphere environment should be taken seriously. It is critical to ensure that all the latest security patches are installed and reduce the attack footprint on your servers.


Not a DOJO Member yet?
Join thousands of other IT pros and receive a weekly roundup email with the latest content & updates!
More in this category


About the Author
Xavier Avrillier

