Save to My DOJO
Table of contents
Automating your ESXi builds is a great way of gaining efficiency and standardization. We’ll go over the steps on how to configure ESXi unattended installations within your environment in this 2-part series. I’ll demonstrate doing this for scenarios when ESXi is on a network and when ESXi is on no network at all. There are pros and cons of each way, with a networked unattended install we can modify our ESXi configuration relatively easy by editing the kickstart file that gets referenced each time, however, we are constrained to the requirement of having to be connected to the network at the time of the install. Let’s go over the steps we must take in order to set up an unattended install for each scenario:
Steps for setting up ESXi installations
Unattended Network Install
-Create kickstart file
-Save kickstart file to NFS server or Web Server
-Edit vSphere ISO to look for kickstart file
-Boot to ISO and watch install complete
Unattended No Network Install
-Create kickstart file
-Edit vSphere ISO to look for kickstart file and place kickstart file on ISO
-Boot to ISO and watch install complete
Just starting out with VMware? Read this first
Creating the Kickstart File
First of all, what is a kickstart file? A kickstart file is a text file containing the configuration typically used for Linux installations. ESXi is NOT based on Linux it does not use the Linux kernel, it uses its own proprietary VMkernel, however, there are many similarities to Linux and Unix-like OSes and being able to use kickstart files for configuring installs is one of them. The kickstart file has a “.CFG” extension and is very easy to read and configure once you learn the formatting. Below is a template of a kickstart file that can be used, we will use this for our demo. We have an ESXi host with a 4 port networking card. So when you look over the vSwitch configuring you can see we are adding all 4 of those ports to the vSwitch:
#Accept the VMware End User License Agreement
vmaccepteula

# clear paritions and install
clearpart --firstdisk --overwritevmfs
install --firstdisk --overwritevmfs

#set the root password
rootpw --iscrypted $1$RYrDe0s7$saHQ6deVkNW8mQn8bgGDT1

#Host Network Settings
network --bootproto=static --addvmportgroup=1 --ip=192.168.0.10 --netmask=255.255.255.0 --gateway=192.168.0.1 --nameserver=192.168.0.1 --hostname=ESXHOST1


reboot

#Firstboot section 1
%firstboot --interpreter=busybox
sleep 30

#Enter Maintenance mode
vim-cmd hostsvc/maintenance_mode_enter

#suppress Shell Warning
esxcli system settings advanced set -o /UserVars/SuppressShellWarning -i 1
esxcli system settings advanced set -o /UserVars/ESXiShellTimeOut -i 1

#Add DNS Nameservers to /etc/resolv.conf
cat > /etc/resolv.conf << \DNS
nameserver 192.168.0.1
nameserver 192.168.0.2
DNS

#VSwitch Configurations
esxcli network vswitch standard add --vswitch-name=vSwitch0 --ports=24
esxcli network vswitch standard uplink add --uplink-name=vmnic0 --vswitch-name=vSwitch0
esxcli network vswitch standard uplink add --uplink-name=vmnic1 --vswitch-name=vSwitch0
esxcli network vswitch standard uplink add --uplink-name=vmnic2 --vswitch-name=vSwitch0
esxcli network vswitch standard uplink add --uplink-name=vmnic3 --vswitch-name=vSwitch0
esxcli network vswitch standard policy failover set --active-uplinks=vmnic0,vmnic1,vmnic2,vmnic3 --vswitch-name=vSwitch0
esxcli network vswitch standard portgroup policy failover set --portgroup-name="Management Network" --active-uplinks=vmnic0,vmnic1,vmnic2,vmnic3
esxcli network vswitch standard portgroup add --portgroup-name=ESXHOST1-prod0 --vswitch-name=vSwitch0
esxcli network vswitch standard portgroup remove --portgroup-name="VM Network" --vswitch-name=vSwitch0

#Firstboot Section 2
%firstboot --interpreter=busybox

#Disable IPv6
esxcli network ip set --ipv6-enabled=false

#Reboot
sleep 30
reboot
Copy the code above to a text file that is named ESXiLabConfig.cfg. Also, notice the section where we set the root password, this is the encrypted password hash of my password. This is the best practice for creating these kickstart files. Otherwise, people will be able to open up the .CFG file and see the root password in plain text. So how do we generate our password hash? There are numerous ways of getting this, I will show you how to do it using OpenSSL with Windows 10.
First, we need to install chocolatey. This is a package manager for Windows like Apt-Get is in a Debian flavored Linux distro such as Ubuntu. It allows us to install OpenSSL very quickly. We need to install OpenSSL so that we can generate our password hash to use in our CFG file. The password looks garbled up to us, but ESXi will still know what the password is. Using the password hash instead of a plain text password is little more secure to the human eye. To install chocolatey, run the following commands in an Administrative PowerShell console, then install openssl.light:
Get-PackageProvider -Name chocolatey

Install-Package Openssl.Light

Now that OpenSSL is installed we just browse to C:\chocolatey\bin. There are two bat files for installation. Click on “Win64OpenSSL_Light-1_1_0h.bat”. This will bring up a screen to install OpenSSL. Run through the installer window and now we have everything we need to generate our password hash. Quick and easy, isn’t PowerShell awesome?

Open up an administrative command prompt and type in the following two commands to generate your password hash. For the sake of the demo, I will use the password “MyPassword”:
cd C:\OpenSSL-Win64\bin

openssl passwd -1 “MyPassword”

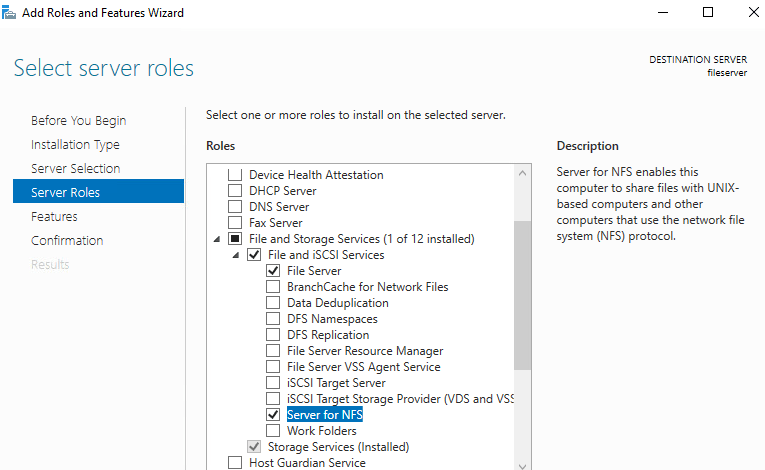
Now we have the password hash, copy that to the root password configuration section on the kickstart file and we are good to go. Now that we have our kickstart file created, we can test it. The CFG file needs to be accessible to the ESXi host upon install either via FTP, HTTP, or NFS. In this example, I’ll be using NFS. If you don’t have an NFS server set up, it’s super easy to set one up with a Windows Server. In Server Manager go to Add Roles and Features. Under the features section, expand “File and Storage Services” then under “File and iSCSI Services” we want to check the box for “Server for NFS”:
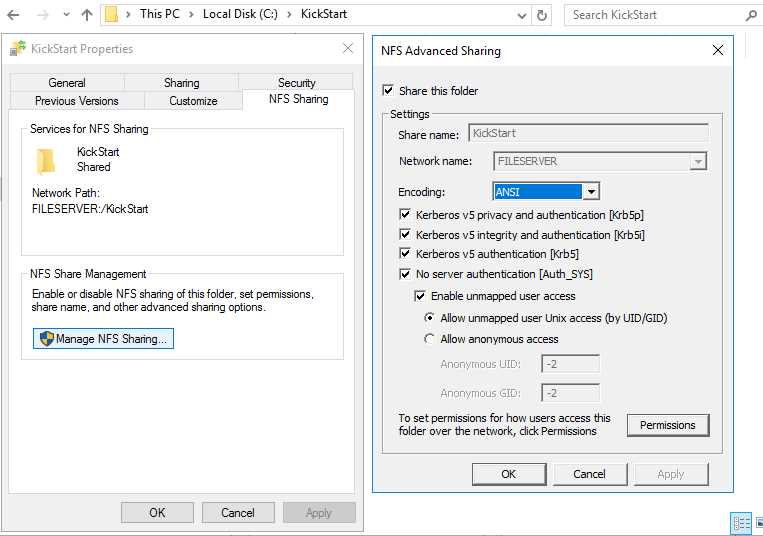
Run through the install and once completed, we can create our folder. I created one called “kickstart” on the C drive. Then right-click on it and go to the NFS Share Tab. Select the “Permissions” :
Check the button and check the box for “Allow root logon”
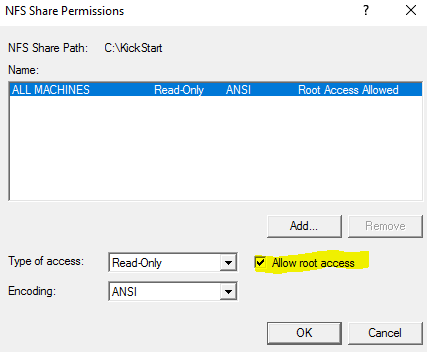
Click “OK” and we are all set. Place your kickstart file in the NFS share:

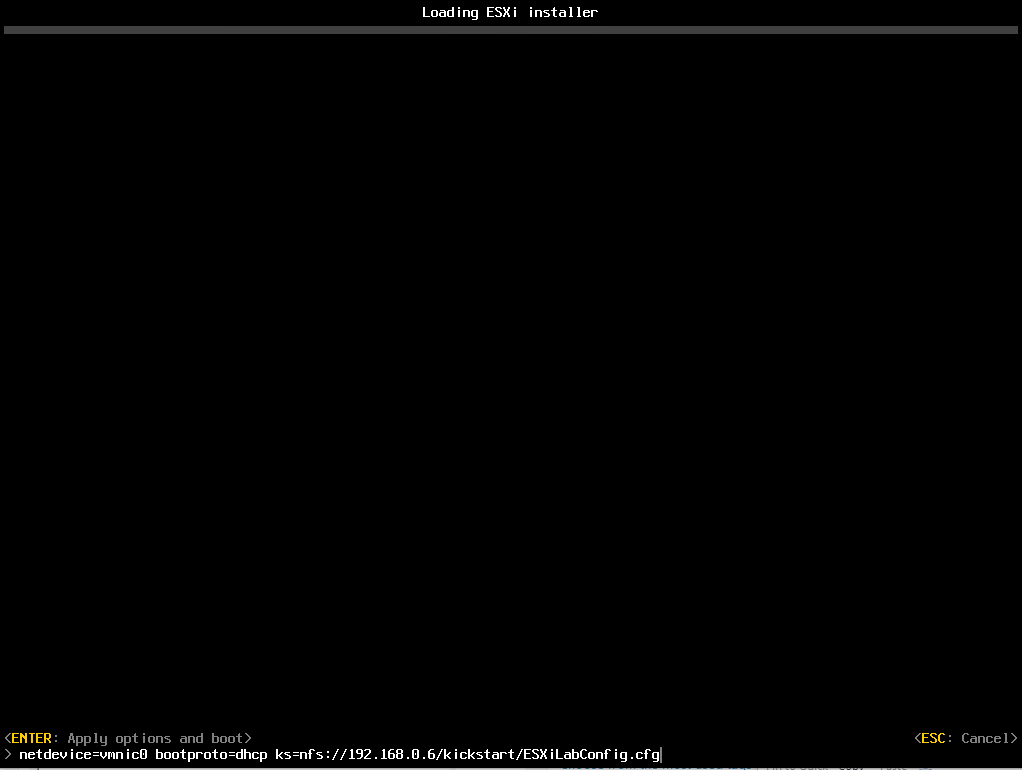
Now we boot to our ESXi install and right before it starts press Shift + O at the beginning of the install. This allows us to specify the kickstart file for install. Type in the following syntax to tell ESXi to use the file from our NFS share:
netdevice=vmnic0 bootproto=dhcp ks=nfs://192.168.0.6/kickstart/ESXiLabConfig.cfg
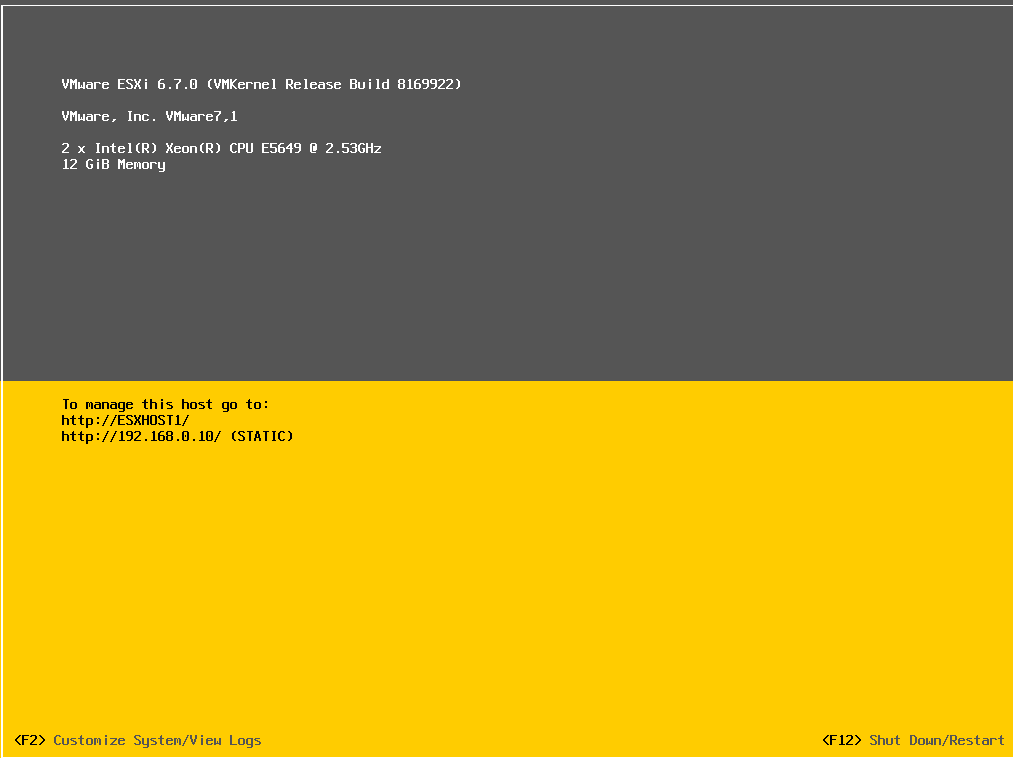
Now we let the install complete and we can verify our settings are there:
Next, we will take it a step further in part 2 where we will go over how to create an ISO to boot from that will let us skip typing in the location of the kickstart file.
[the_ad id=”4738″][thrive_leads id=’18673′]


Not a DOJO Member yet?
Join thousands of other IT pros and receive a weekly roundup email with the latest content & updates!
More in this category


About the Author

Luke Orellana


5 thoughts on "How to Configure ESXi Unattended Installations: Part 1"
Hello Luke,
How can I modify the script to install vsphere ESXi on a USB rather than on a disk.
Thanks,
Danjuma
You can just convert the ISO to a bootable USB. There are many apps out there than can do this. I’ve used Rufus before: https://rufus.ie/.