Save to My DOJO

Table of contents
NIC teaming in ESXi allows the hypervisor to share traffic among the physical and virtual networks. It also enables passive failover in the event of a hardware or network issue. It is definitely a good idea to have some sort of NIC teaming configuration on your ESXi host. The NIC team load balancing policy specifies how the virtual switch will load balance the traffic between the NIC team, however, if the networking equipment your host is connected to does not match the proper load balancing policy on the host, your newly configured ESXi host will have some troubles connecting. This is where being able to configure the load balancing policy through the ESXi console can come in handy especially if you are standing up a host at a remote location and another person is doing the “rack and stack” for you. The last thing you want is to power on the host and not be able to ping the host because you forgot to set the proper load balancing policy on the NIC team. Luckily, if you can still console into the ESXi host through out-of-band remote management, there is still a way to fix this.
ESXi Load Balancing Options
There are several load balancing options in ESXi and it’s important to know the difference between each one, especially when troubleshooting host connectivity.
Route based on the originating virtual port: The default setting in vSphere. This will cause ESXi to balance traffic based on the virtual port IDs on the switch. When a virtual machine is first introduced to a host, it is assigned a virtual port ID. The VM will then be assigned a NIC to use until the port ID is changed. This port ID does not change until the VM is deleted or migrated over to another host. The advantage of this type of load balancing is that it is very minimal to set up, you don’t need to configure your physical switch that the host is connected to. The downside is that this type of load balancing can be very inefficient depending on VM workloads. For example, let’s say you have 3 SQL servers that get assigned to NIC1 and some low resource VMs get assigned to NIC2. The load on each NIC won’t be distributed evenly and has more potential to bottleneck the NIC. Also, because of the way this works, the total amount of throughput is limited to just one NIC. So if you have 4 x 1GB Ports on a NIC. The VM will only be able to use 1 of them and is capped to 1GB throughput.
Route based on IP hash: The traffic is balanced based on the source and destination IP addresses. So if you have a SQL server that is servicing multiple IP addresses, the hypervisor is able to calculate the load and distribute the connection a crossed all of the NICs in the team. This is a much more efficient use of resources for guest VMs that communicate out to multiple IP destinations. The biggest thing to realize with this load balancing option is that the physical switch that the ESXi host is connected to must be configured for it at well with a port channel (also called an EtherChannel or aggregation bond). So if you configure a host for this policy and the switch or ports that it is connecting to are not set up for port channeling, you’re not going to get very far.
Route based on source MAC hash: Similar to how load balancing by port ID works, however the load is balanced based on Mac Address. So VMs that have multiple virtual NICs configured can have traffic dispersed among the NIC team per each virtual NIC.
Use explicit failover order: Effectively no load balancing is done. Uses the first active NIC on the list.
Configuring through the ESXi Console
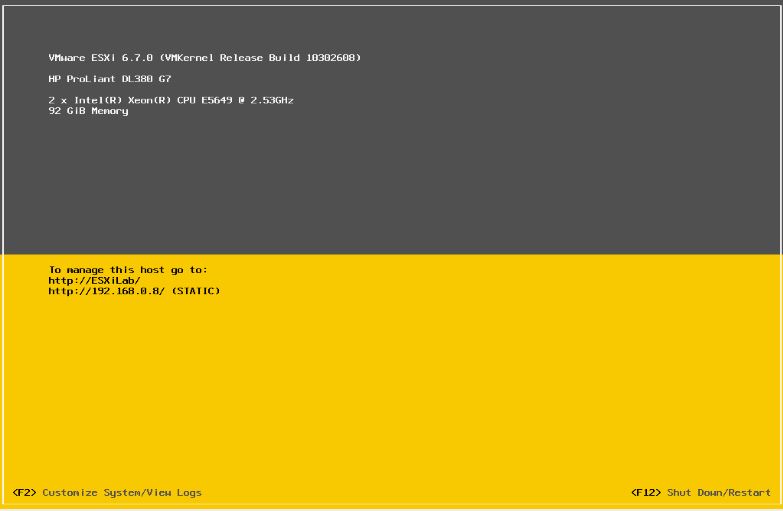
If you are ever stuck with a disconnected ESXi host in the wrong load balancing policy, fear not. There we can easily make changes through the ESXi console. To do this, log in to the console through your remote management solution or a crash cart and get to the DCUI screen:
Now press ALT + F1 to get to the console login. Log in with your ESXi credentials. Now we can start the magic. If we wanted to see what sort of load balancing our host is configured for vSwitch0 we can type in the following syntax:
esxcli network vswitch standard policy failover get -v vSwitch0

Another gotcha is if the port group is set to override the vSwitch load balancing settings. So you can set your load balancing on the vSwitch and then come to find out the load balancing on the port group is something else and you still can’t connect. To look up the load balancing settings per port group use the following syntax, in my example I’m looking at the “Management Network” port group and I can see that it is, in fact, overriding the vSwitch load balancing:
esxcli network vswitch standard portgroup policy failover get -p "Management Network"

To change the load balancing policy, we need to specify which policy we want and the syntax for each one is the following:
explicit: Use explicit failover order
portid: Route based on the originating virtual port
mac: Route based on source MAC hash
iphash: Route based on IP hash
So in our scenario, we want to change our load balancing over to “Route based on IP hash”, since we are using EtherChannel on the switch. To do this we will need to use the following syntax:
esxcli network vswitch standard policy failover set -l iphash -v vSwitch0
![]()
Also, since our management network port group is set to override our virtual switch load balancing configurations, we need to change the policy on this as well:
esxcli network vswitch standard portgroup policy failover set -p "Management Network" -l iphash
![]()
These commands have helped me in the past when I was dealing with a disconnected ESXi host that was newly deployed. As long as you have a good understanding of the different load balancing options and how your physical switch is configured, this should be a quick and easy fix. Let me know in the comments below if you’ve ever run into this scenario before. Troubleshooting host connectivity issues by switching the load balancing settings can be a very useful step, and being able to do it through the ESXi console makes it a quick and easy process.
If you’re having any trouble following this guide, write me a note in the comments box below and I’ll help you out!
Related post: How to create your own ESXi dashboard using PowerShell
[the_ad id=”4738″][thrive_leads id=’18673′]


Not a DOJO Member yet?
Join thousands of other IT pros and receive a weekly roundup email with the latest content & updates!
More in this category


About the Author

Luke Orellana

