Save to My DOJO
Anyone who’s been following this blog on a regular basis, has probably seen Virtual SAN (vSAN) mentioned a number of times. Like similar offerings on the market, vSAN is yet another iteration of what is known as Software Defined Storage or SDS which, simply put, is the abstraction of the storage layer from its underlying hardware. The rationale behind this concept lies in providing a simplified management and provisioning experience while concurrently reducing complexity and maximizing efficiency. This brings me to today’s subject matter which goes by the name of NSX. Similar to vSAN, NSX is VMware’s spin on virtualizing the network layer by embedding it directly in the hypervisor kernel.
Software-Defined Networking (SDN) which is what NSX is, turns out to be one of the cornerstones of a more encompassing idea referred to as Software-Defined Data Center (SDDC), a virtualized rendering of all the components defining a datacenter i.e. servers, storage and the networks that tie everything together.
A historical note of interest worth mentioning is that virtualization, surprisingly, is anything but a recent development. In fact, the CP-40 developed for IBM was the first system capable of running multiple operating systems in parallel and independently of each other using the same hardware. I’m talking way back in the late ’60s. Fast forward six or so decades, and not only do we take virtualized compute resources (virtualized servers, desktops, etc) for granted but we now demand the same level of virtualization prowess in both storage and networking departments.
So, what is NSX exactly?
I’m going to take a short-cut here and quote directly from VMware’s NSX product page;
“NSX embeds networking and security functionality that is typically handled in hardware directly into the hypervisor. The NSX network virtualization platform fundamentally transforms the data center’s network operational model like server virtualization did 10 years ago, and is helping thousands of customers realize the full potential of a SDDC. With NSX, you can reproduce in software your entire networking environment. NSX provides a complete set of logical networking elements and services including logical switching, routing, firewalling, load balancing, VPN, QoS, and monitoring. Virtual networks are programmatically provisioned and managed independent of the underlying hardware.”
NSX comes in three flavors; standard, advanced and enterprise each with its own feature set. The full details are available here.
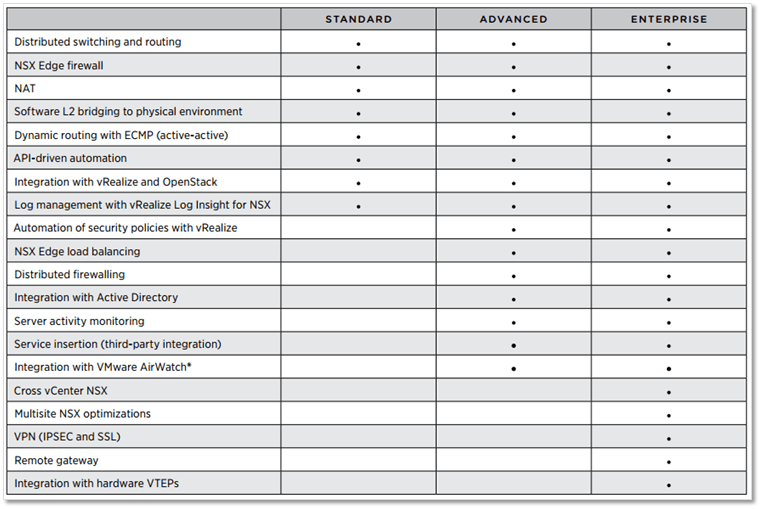
Figure 1 – VMware NSX Editions (Source: VMware.com)
The key benefits to NSX are micro-segmentation and granular security, drastically reduced network provisioning times, workload mobility independent of physical networks, enhanced security and advanced networking services via 3rd party vendor integration.
The basic architecture
There are a number of layers comprising NSX, each with its own set of components and services offered. These are;
Data Plane – the main sub-component found here is the NSX vSwitch. This is basically a modified vSphere Distributed Switch with added functionality. Some of the benefits include, a reduction in the use of VLAN IDs and the ease with which a flexible L2 virtualized architecture can be overlaid on existing physical networks. Moreover, the data plane provides the mechanics for services such as distributed routing, VXLAN capabilities and logical firewalling.
Control Plane – this plane consists of what is known as an NSX Controller Cluster which is in turn comprised of three NSX Controllers. An NSX controller, which is a Linux based virtual machine, acts as a control point for all the logical switching and routing functions provided by NSX and provides hosts with the required network information. A cluster is tasked with several roles including an API provider, Switch manager, Logical manager, Directory server and a Persistence server.
Management Plane – the NSX Manager is the primary component at this level which provides a single point of configuration and entry point for the REST API provided. The NSX Manager is the first thing you’ll install as an appliance on a unique instance of vCenter Server.
Consumption Platform – this is where integration with most cloud management platforms occurs via the provided REST API. Integration is also available through VMware vCloud Automation Center, vCloud Director, and OpenStack with the Neutron plug-in for NSX.
NSX Edge – Deployed either as an Edge Service Gateway (ESG) or a Distributed Logical Router (DLR), NSX Edge provides a ton of services including firewalling, natting, VPN, load balancing and HA if deployed as an ESG and East-West (server to server) routing using DLR.
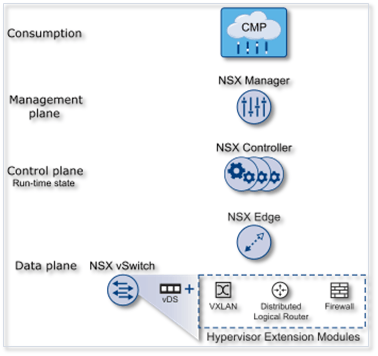
Figure 2 – NSX layers and components (source: VMware.com)
Services offered
The NSX Manager in vSphere Web Client, shown in Figure 3, exposes a number of services. Once again I’ve opted to quote directly from VMware’s documentation instead of paraphrasing the whole lot.
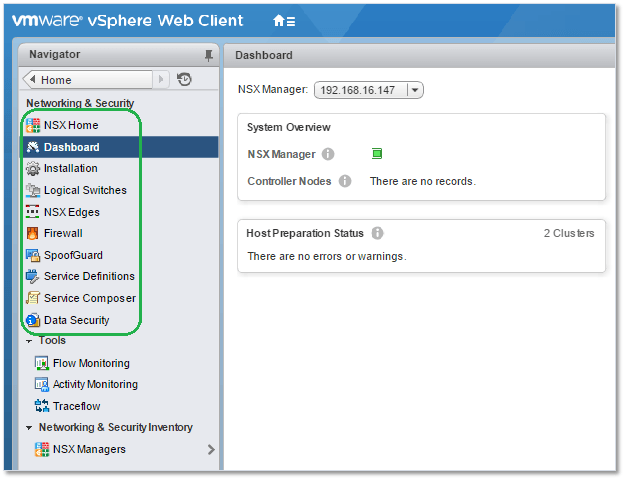
Figure 3 – NSX Manager in vSphere Web Client
- Logical Switches: A cloud deployment or a virtual data center has a variety of applications across multiple tenants. These applications and tenants require isolation from each other for security, fault isolation, and non-overlapping IP addresses. NSX allows the creation of multiple logical switches, each of which is a single logical broadcast domain. An application or tenant virtual machine can be logically wired to a logical switch. This allows for flexibility and speed of deployment while still providing all the characteristics of a physical network’s broadcast domains (VLANs) without physical Layer 2 sprawl or spanning tree issues. A logical switch is distributed and can span across all hosts in vCenter (or across all hosts in a cross-vCenter NSX environment). This allows for virtual machine mobility (vMotion) within the data center without limitations of the physical Layer 2 (VLAN) boundary. The physical infrastructure is not constrained by MAC/FIB table limits, because the logical switch contains the broadcast domain in software.
- Logical Routers: Routing provides the necessary forwarding information between Layer 2 broadcast domains, thereby allowing you to decrease the size of Layer 2 broadcast domains and improve network efficiency and scale. NSX extends this intelligence to where the workloads reside for East-West routing. This allows more direct VM-to-VM communication without the costly or timely need to extend hops. At the same time, NSX logical routers provide North-South connectivity, thereby enabling tenants to access public networks.
- Logical Firewall: Logical Firewall provides security mechanisms for dynamic virtual data centers. The Distributed Firewall component of Logical Firewall allows you to segment virtual datacenter entities like virtual machines based on VM names and attributes, user identity, vCenter objects like datacenters, and hosts, as well as traditional networking attributes like IP addresses, VLANs, and so on. The Edge Firewall component helps you meet key perimeter security requirements, such as building DMZs based on IP/VLAN constructs, and tenant-to-tenant isolation in multi-tenant virtual data centers. The Flow Monitoring feature displays network activity between virtual machines at the application protocol level. You can use this information to audit network traffic, define and refine firewall policies, and identify threats to your network.
- Logical Virtual Private Networks (VPNs): SSL VPN-Plus allows remote users to access private corporate applications. IPsec VPN offers site-to-site connectivity between an NSX Edge instance and remote sites with NSX or with hardware routers/VPN gateways from 3rd-party vendors. L2 VPN allows you to extend your datacenter by allowing virtual machines to retain network connectivity while retaining the same IP address across geographical boundaries.
- Logical Load Balancer: The NSX Edge load balancer distributes client connections directed at a single virtual IP address (VIP) across multiple destinations configured as members of a load balancing pool. It distributes incoming service requests evenly among multiple servers in such a way that the load distribution is transparent to users. Load balancing thus helps in achieving optimal resource utilization, maximizing throughput, minimizing response time, and avoiding overload.
- Service Composer: Service Composer helps you provision and assign network and security services to applications in a virtual infrastructure. You map these services to a security group, and the services are applied to the virtual machines in the security group using a Security Policy. Data Security provides visibility into sensitive data stored within your organization’s virtualized and cloud environments and reports any data security violations.
- NSX Extensibility: 3rd-party solution providers can integrate their solutions with the NSX platform, thus enabling customers to have an integrated experience across VMware products and partner solutions. Data center operators can provision complex, multi-tier virtual networks in seconds, independent of the underlying network topology or components.
Getting acquainted
I must confess that prior to doing the research for this post, I never had the opportunity to work with NSX despite having worked for an IaaS provisioning company whose infrastructure and offerings were heavily VMware centric. So off I went and downloaded the latest NSX version which, at the time of writing, stands at v6.2.4.
You should be aware that the default license supplied, NSX for vShield Endpoint, limits your deployment options to anti-virus offload capabilities only. There’s no full feature trial period as you’d find say with vSphere products. Apparently if you pull the right strings, VMware sales will supply you with a trial license unlocking the full feature set but I honestly did not bother trying. NSX is somewhat resource hungry and my lab is already over-subscribed as it is so, license or not, I’d still be limited in what I can do. Memory-wise you’ll be needing at least 16GB for NSX Manager (it installs nevertheless with less but will keep reminding you to upgrade), 4GB for each NSX Controller and much more once you start rolling out the various components and services.
If you still want to have a go at it – especially if you’re lucky enough to have a valid product key – installing NSX isn’t really that hard but you need to do some reading and be familiar with a few networking concepts prior to diving in. Using the default license key supplied, I only got so far as installing and configuring NSX Manager. For instance, attempting to deploy an ESG, results in the following error message;
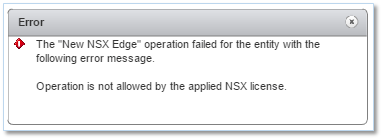
More to come in the Installing It section further down.
There is however a very good alternative if you lack a lab, product key or otherwise. VMware offers a number of free courses and labs which are in my opinion very well paced and worth pursuing. Here’s the link for anyone who’d like to give them a try.
I suggest completing the HOL-SDC-1603 and 1625 courses. These cover the basics and some of the more of advanced concepts. I did both and must say that they’re worth their weight in gold.
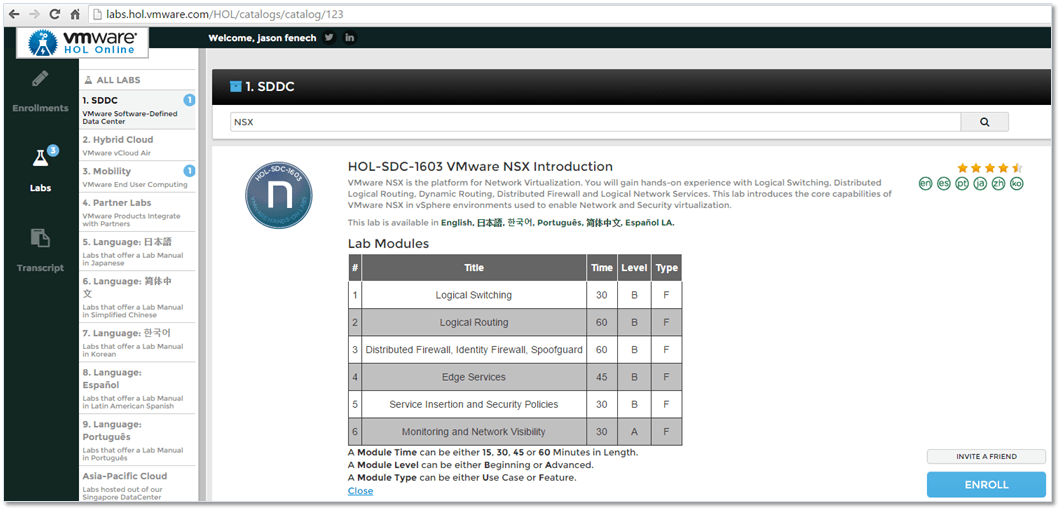
Figure 4 – VMware’s NSX online labs
Installing NSX
NSX is shipped as an OVA so it’s just a simple matter of importing it via vCenter Server as shown in Figure 5.
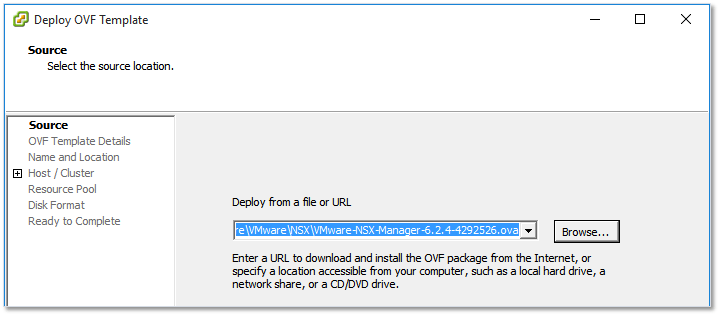
Figure 5 – Deploying the NSX appliance
There are a number of mandatory fields you need to fill in which include passwords for both the admin user and enable mode as well as network properties.
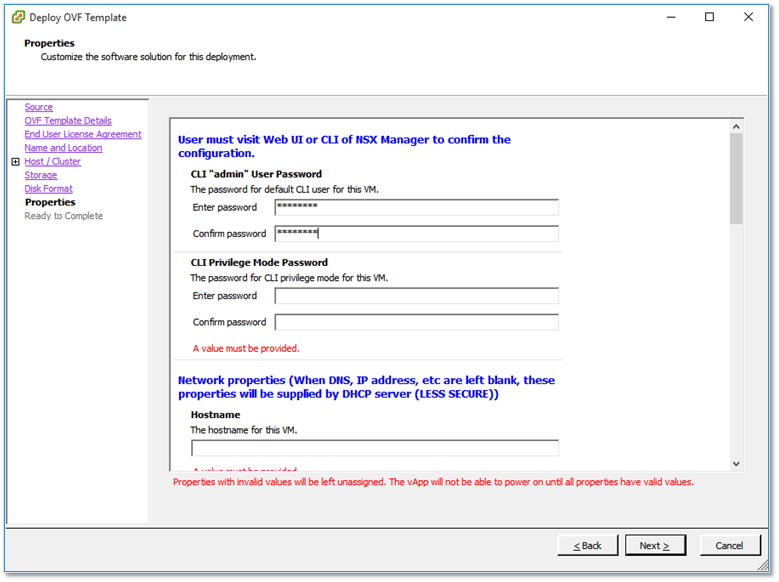
Figure 6 – NSX appliance properties
Once installed, you can log in with the admin account using either SSH (if you chose to enable it) or directly from the vm’s console window. Typing enable at the prompt, gives you access to the privileged mode exposing more commands and options. At this stage, however, you’re not even close to being done.
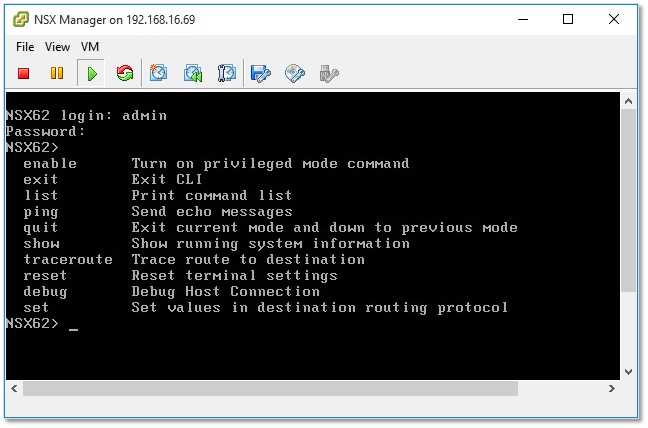
Figure 7 – Accessing NSX Manager from the vm’s console
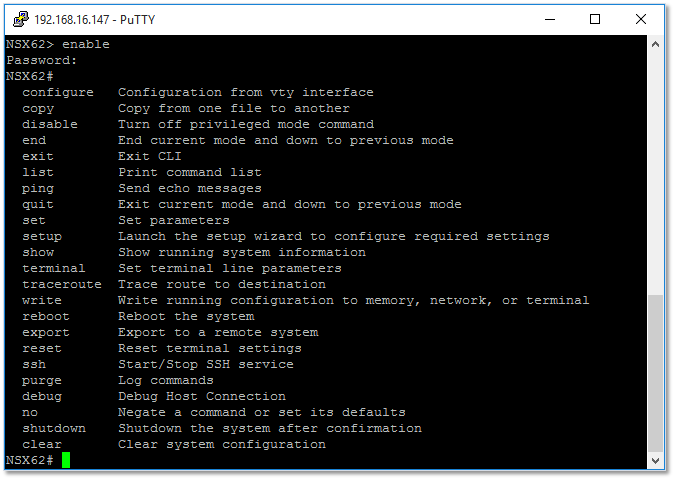
Figure 8 – Enabling privileged mode from an SSH session
Once the NSX appliance has been installed and powered up, it’s time to set it up. You’ll do this using the appliance’s web interface (Figure 9). To log on, use the admin account and the password entered in the OVA’s properties section during the installation process.
The first step is to register vCenter Server with NSX Manager and configuring SSO. You should also make sure that the time on both the NSX Appliance and vCenter Server is in sync otherwise SSO configuration will fail. It’s best to use the same NTP source on both vCenter Server and NSX.
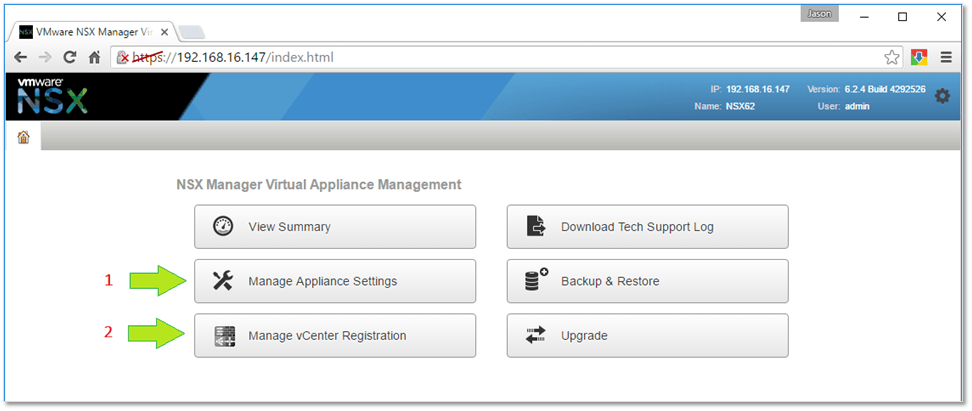
Figure 10 – Managing the appliance’s settings and vCenter Server registration
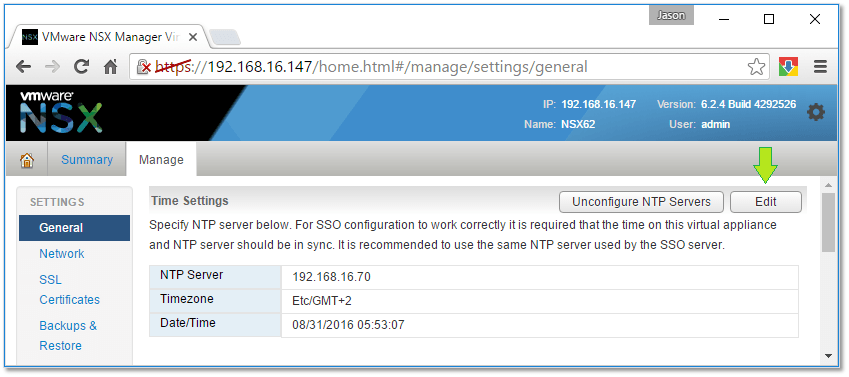
Figure 11 – Configuring the NTP source
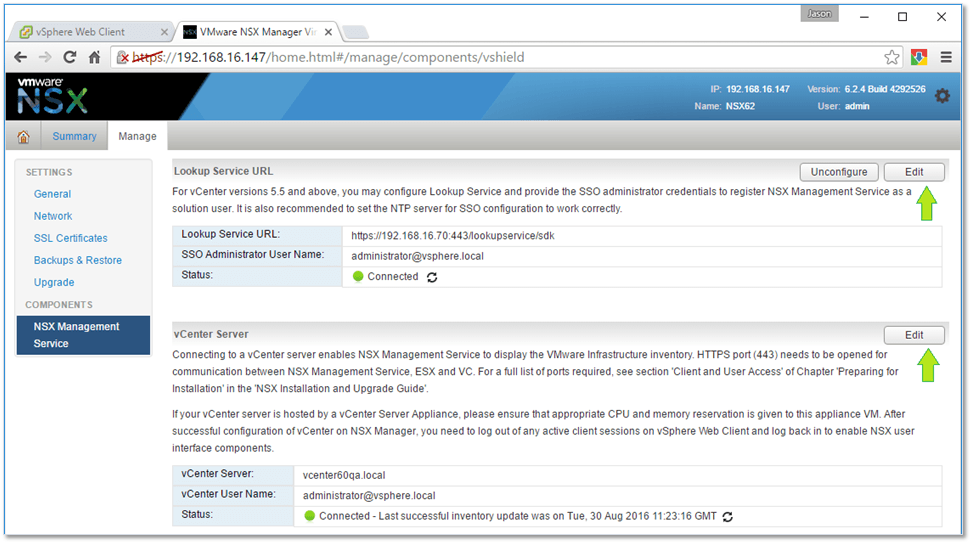
Figure 12 – Configuring SSO and registering vCenter Server

Figure 13 – SSL certs security check when configuring SSO and registering vCenter Server
Once you’ve registered vCenter Server and configured SSO, close any instance of vSphere Web Client you might be using and log in back again. Under Home, you should see a new icon labelled Networking & Security. You’ll also find a similarly labeled menu item under Navigator (Figure 14).
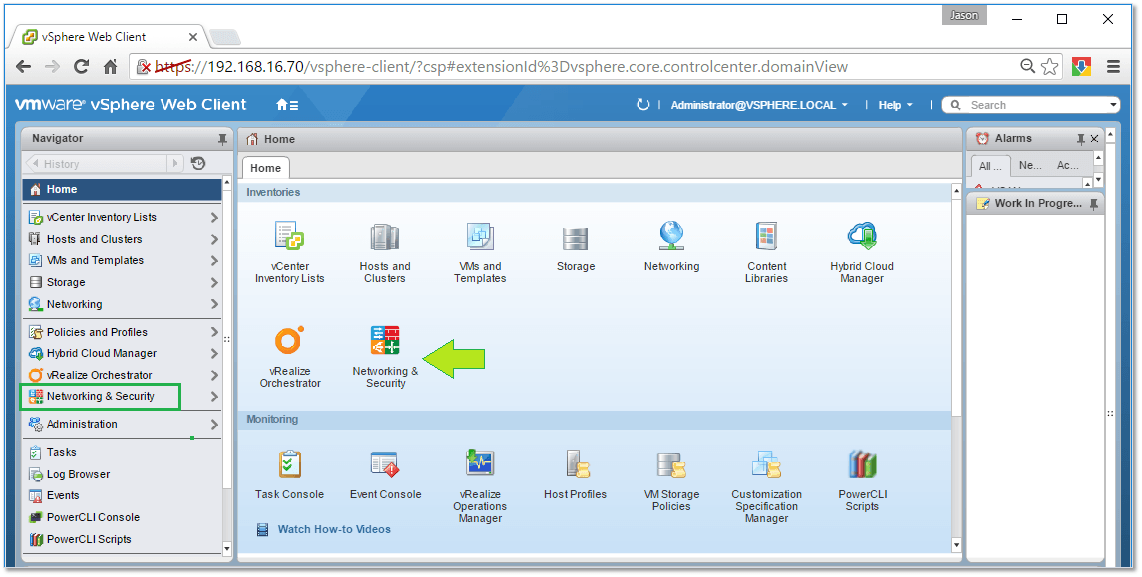
Figure 14 – NSX Manager UI embedded in vSphere Web Client
From here onward it really all depends on what you want to achieve by deploying NSX. In general, you’ll;
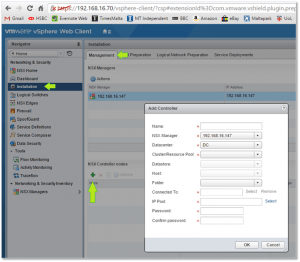
- Deploy an NSX cluster + three controllers (Fig. 15)
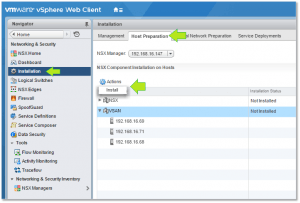
- Prepare host clusters for NSX (Fig. 16)
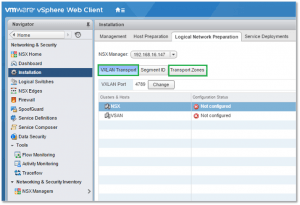
- Configure VXLAN and Transport Zones (Fig. 17)
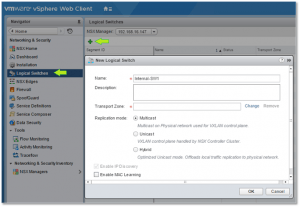
- Deploy one or more logical switches (Fig. 18)
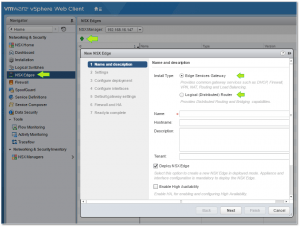
- Deploy one or more Distributed Logical Routers (DLRs) and/or Edge Services Gateways (Fig. 19)
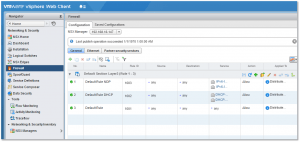
- Configure routing, firewalling, switching, etc. (Fig. 20)
The details and fine print are all covered here.
Conclusion
NSX is definitely an impressive piece of software suited for both converged and hyper-converged infrastructures. With NSX’s release, VMware’s SDDC ambitions come full circle with vSphere catering for compute virtualization, vSAN for SDS and NSX for SDN. That said, NSX is not for everyone and it certainly does not come cheap especially if you want to leverage the full feature set. Suffice is to say that the Enterprise edition nears the $7000 mark per processor.
There’s also a substantial learning curve and learning to use NSX is easier said than done. On top of that, if you’re not a networking guru – count me in – life can get a tad complicated. Then again, this should be taken as an impetus to further learning, standard procedure for anyone pursing this line of work.
[the_ad id=”4738″][the_ad id=”4796″]


Not a DOJO Member yet?
Join thousands of other IT pros and receive a weekly roundup email with the latest content & updates!




5 thoughts on "VMware NSX – Abstracting the network layer"
Really great and such a informative post. you have described it very well to underetand. Keep up the good work.
Great job .. thank you