Save to My DOJO
Table of contents
In January 2020, VMware released App Volumes 4.0, the new major version of their system that delivers applications to desktops through virtual disks. Applications are delivered by attaching a standard VMDK file to a virtual machine and are centrally managed by the App Volumes Managers. This solution gives administrators a great deal of granularity regarding their desktop populations while relying on a small number of golden images to reduce administrative overhead.
App Volumes had been on the 2.x release cycle since the beginning after VMware’s acquisition of Cloud Volumes, its ancestor. The new version brings a slightly slicker user interface and rethinks the way applications are packaged for distribution while remaining compatible with App Stacks created under 2.x.
New in App Volumes 4.0 – Overview
Application packaging
What used to be App Stacks to build applications is now split into 3 parts to improve their lifecycle management.
-
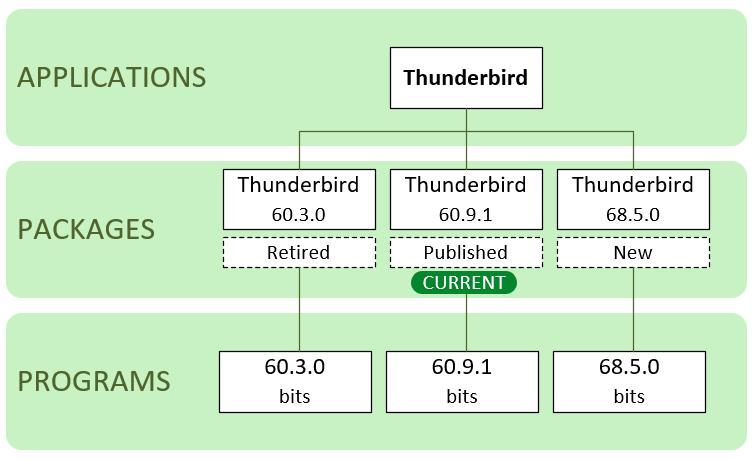
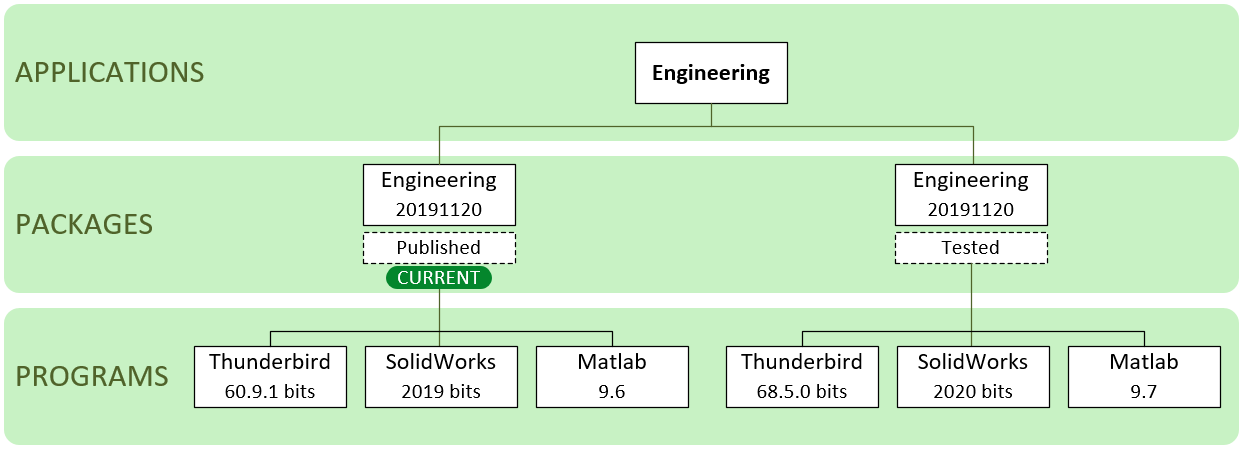
Applications: An application is a collection of packages irrespective of the software version. It could relate to an actual application like notepad++ or to a certain population of users like Marketing that contains everything the marketing desktops need. Assignments are done at the application level.
-
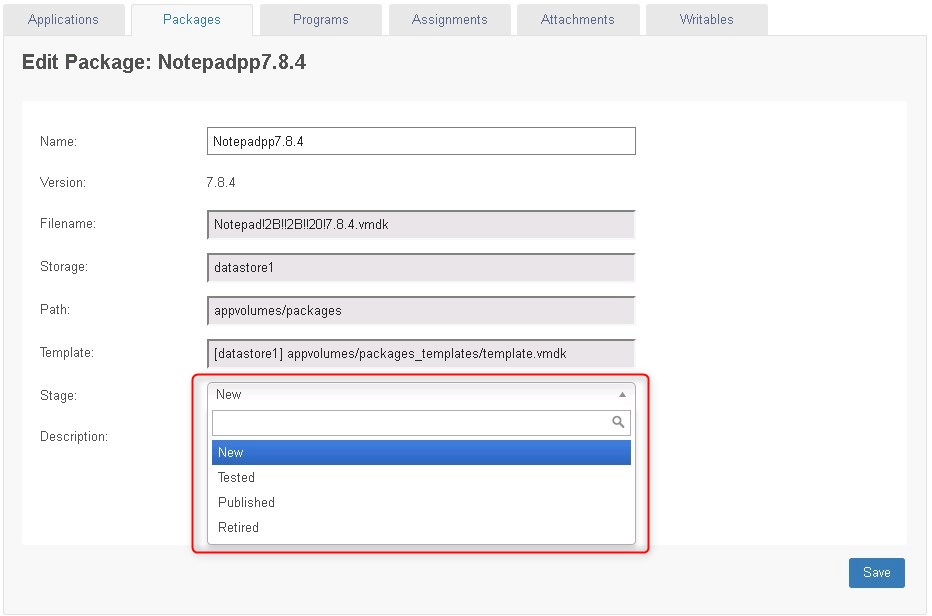
Packages: This is where you run the packaging tool to capture the bits of the software, just like AppStacks. You can assign a stage in its lifecycle to a package (New, Tested, Published, Retired).
-
Programs: Auto-generated during the packaging process. It will appear in the programs pane of App Volumes Manager. A program can contain several applications depending on how you build it.
Applications based on Apps
Applications based on company departments
Lifecycle Management
Lifecycle Stages: Designate the stage of a package in its lifecycle by setting it to New, Tested, Published or Retired. You can also mark a version as current to indicate the intended version for delivery.
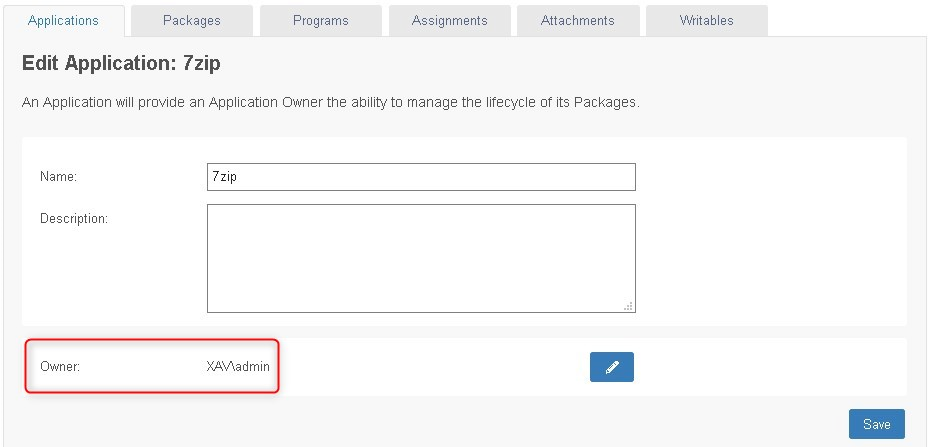
Application Owners: You now can assign an application owner using Active Directory entities.
Application History: View a list of administrative actions that have been performed on an application and who performed them.

Others
-
The App Volumes Agent is supposed to handle more package disks per user session.
-
Add notes or specifics steps of configurations after packaging an application with the package notes.
-
snapvol.cfg has moved out of the template disk to the base image so it’s updated more easily with the Agent.
-
Improved management interface for uploading and maintaining templates.
-
Coexistence of 2.x and 4.0. Granted this one is more a consequence of the new version than a new feature. This will allow administrators to slowly migrate the apps from 2.x to 4.0.

Upgrade from 2.18 to 4.0
Before you start
Remember to always check the VMware product interoperability matrix to ensure that the new version is compatible with the other versions installed in your environment (Horizon, ESXi, vCenter…).
Note that if you are running a version lower than 2.18, you will first have to upgrade to 2.18 before moving to 4.0. You can find the procedure in the VMware documentation.
Backup the App Volumes database
These steps show you how to back up the SQL database. If you already have an up to date backup you can skip this chapter. Note that it is also always a good measure to take a snapshot of the server before upgrading it.
-
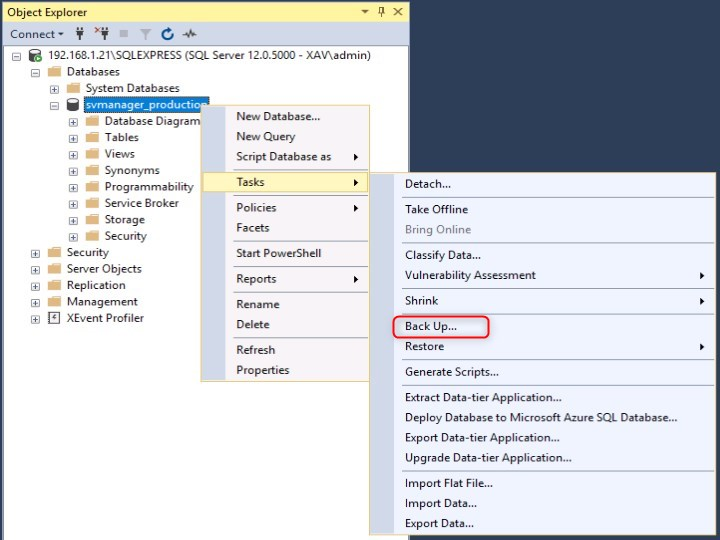
Open SQL Server Management Studio > Expand Databases > Right-click the App Volumes database > Tasks > Back Up…
-
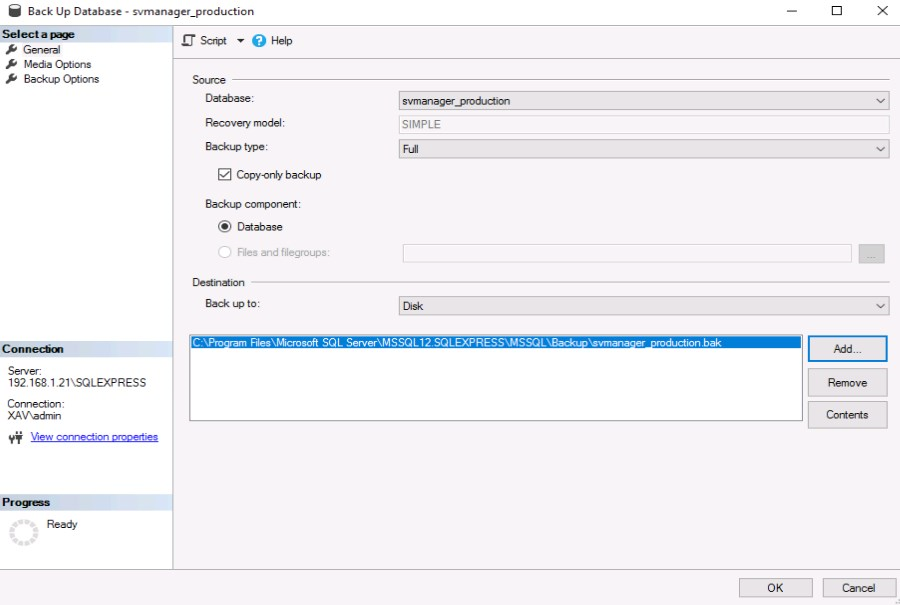
Select Full and check Copy-only backup. Make sure the location is correct and click OK.
-
You will then find the backup file in the location with a *.bak extension.

Upgrade process
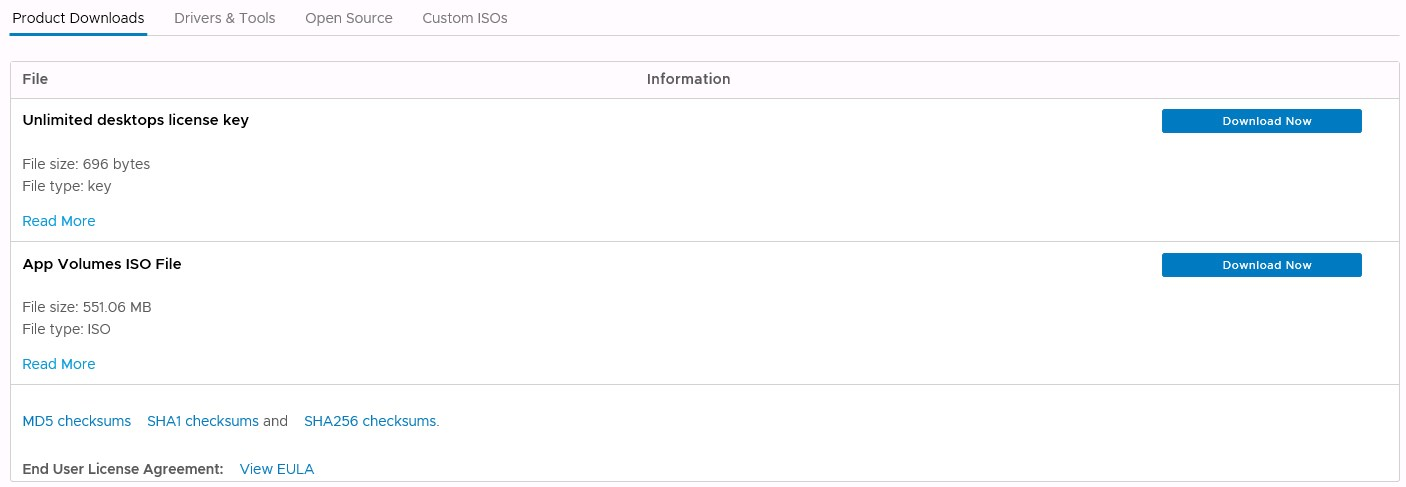
As usual, go to my.vmware.com and download App Volumes 4.0. Don’t forget to also download the license file that you will need after the upgrade is complete.
-
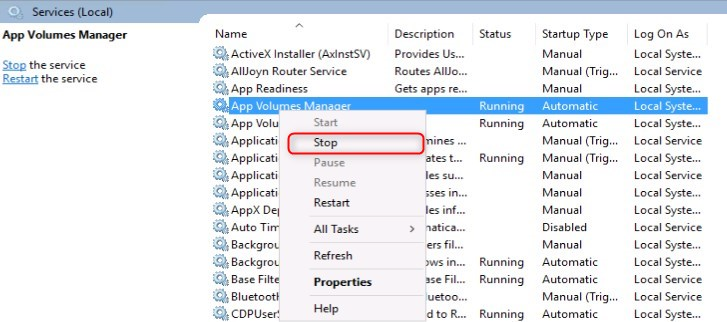
Stop the App Volumes Manager service.
If your environment is made up of several App Volumes Manager servers connecting to a central database, you need to stop the service on all servers before starting the upgrade. You can then upgrade them one at a time.
-
Copy the installer on the App Volumes Manager server and run setup.msi.

-
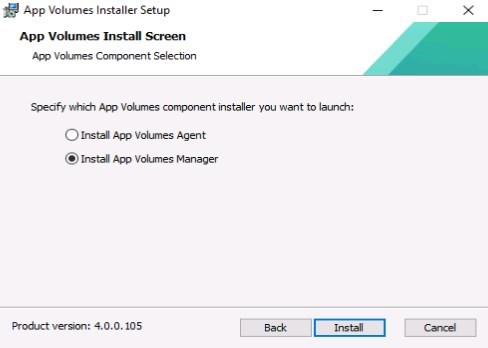
Follow the wizard (accept the eula) and check Install App Volumes Manager then click Install.
-
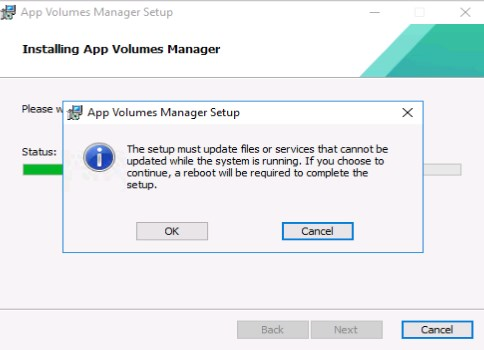
Keep following the wizard and accept the warning about the required reboot.
-
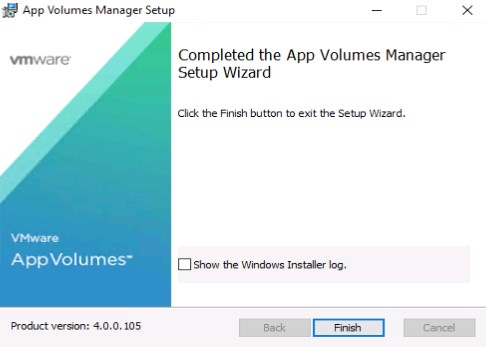
If the install completed successfully, click Finish. The App Volumes Manager and Powershell services will start automatically.
Install the new license
-
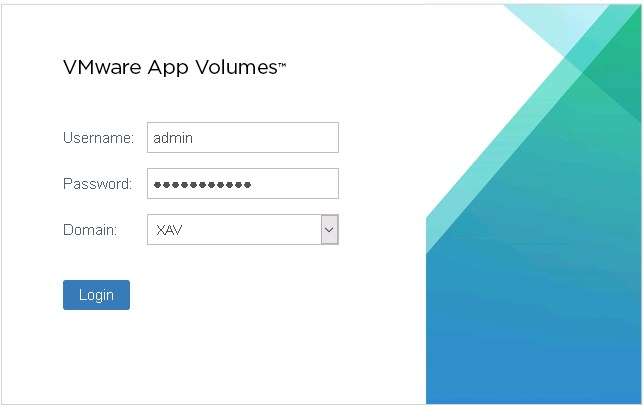
You can now log back in the web UI which gives you a taste of the “new design”.
-
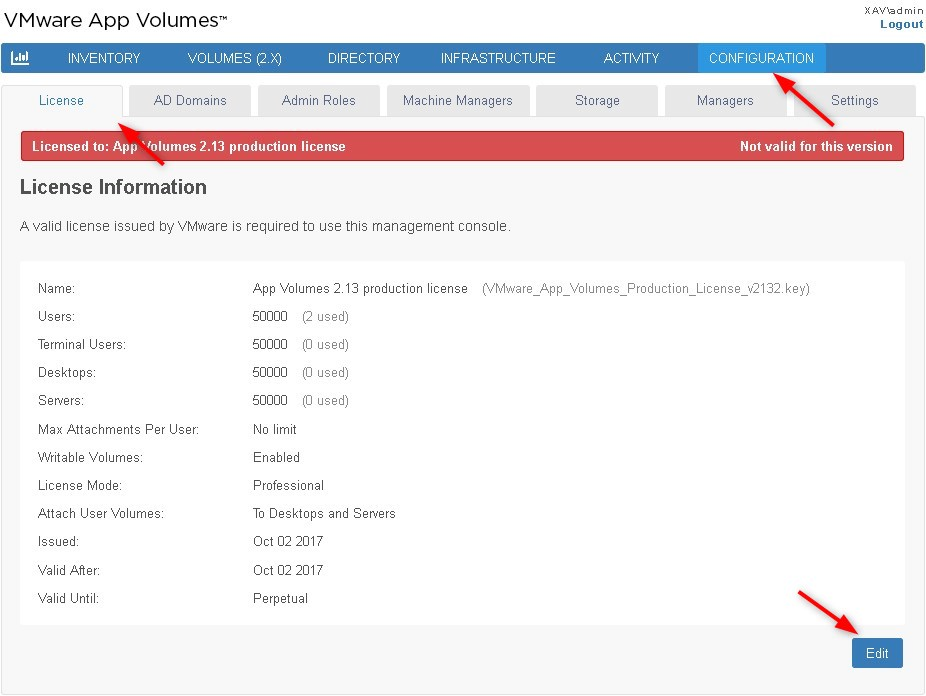
Go to Configuration > License and click Edit.
-
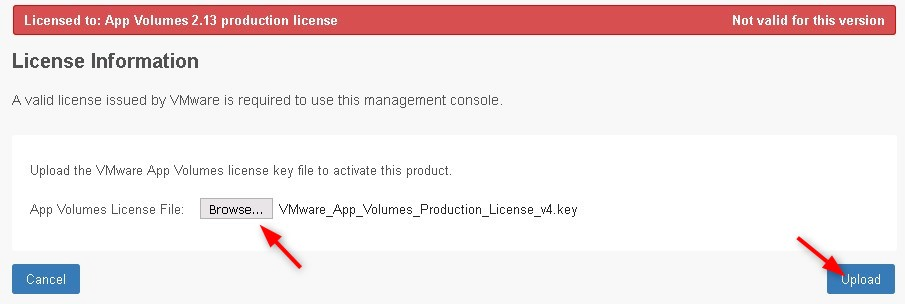
Select the license file you downloaded on the VMware website and click Upload.
-
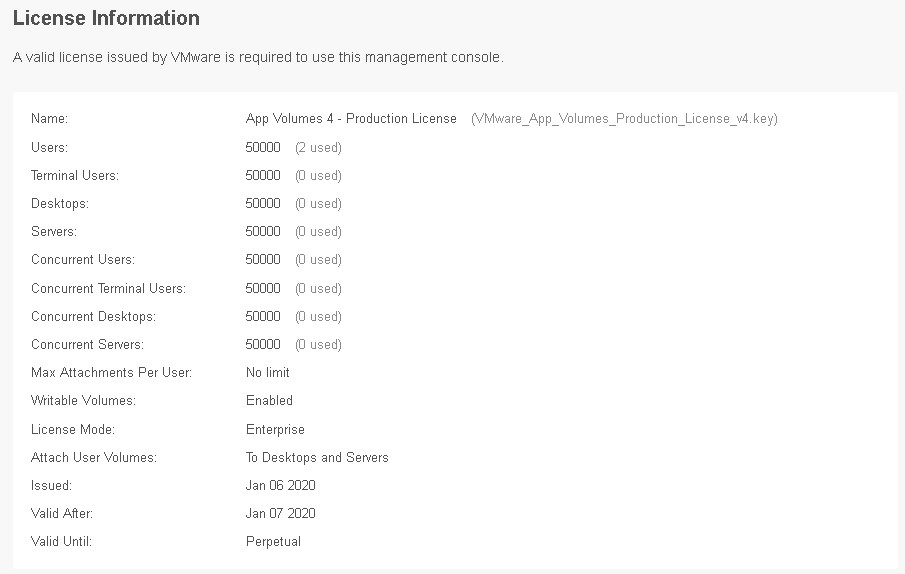
The license should now be valid.
App Volumes templates
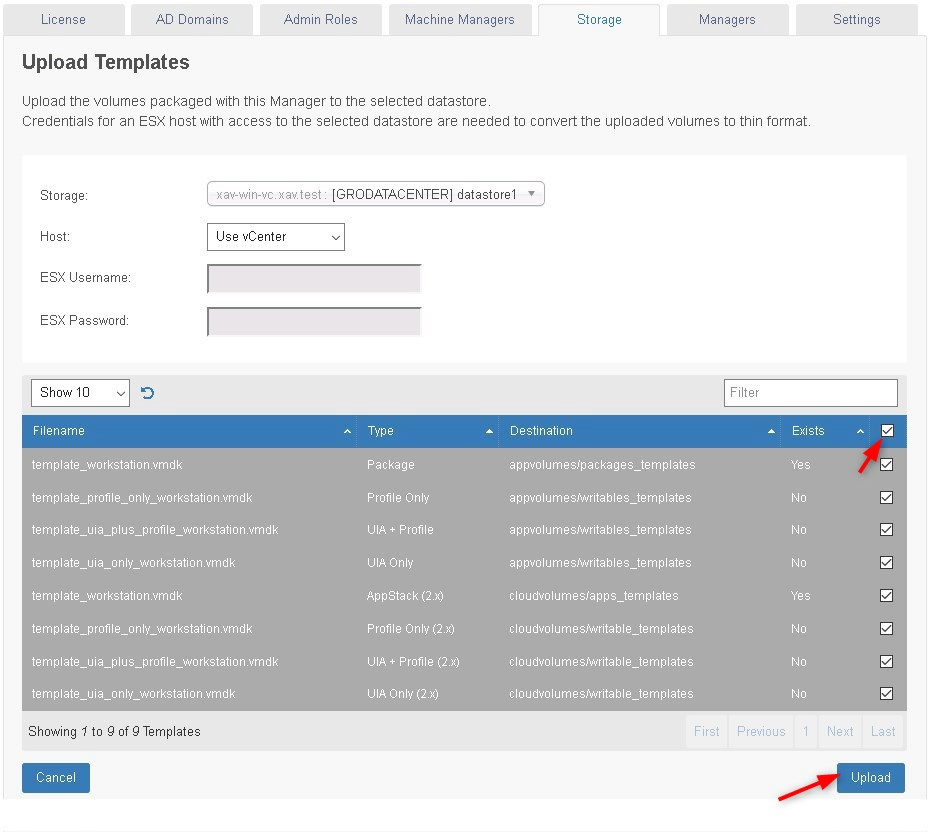
Now you need to upgrade the App Volumes templates and upload the new ones (4.0).
-
Go to Configuration > Storage > Upload Templates.

-
Select all the disks and click upload.
Agent upgrade
I won’t cover the agent upgrade here as the process is the same as usual and not very interesting. However, we will talk about the preparation work you should consider doing before upgrading your desktops.
Note of warning: AppStacks and writable (2.x) only work with Agent 2.x, not 4.0!!
|
App Volumes Agent 2.X |
App Volumes Agent 4.0 |
|
|
AppStack (2.x) |
OK |
X |
|
Application (4.0) |
X |
OK |
Don’t go updating the App Volumes agent to 4.0 on all your desktops before you have upgraded your AppStacks (2.x) to Applications (4.x), or at least the most important ones. All desktops running the agent in version 4.0 won’t get AppStacks made for 2.x and vice versa.
You might want to first migrate your AppStacks to 4.0, install the 4.0 agent in a test pool to test all the migrated AppStacks and upgrade your production when everything is validated.
Note that once the migration to 4.0 is finished, you can disable the 2.X interface in Configuration > Settings > Advanced Settings.

Migrating AppStack to 4.0
After upgrading the managers to 4.0, a tab named “VOLUMES (2.X)” is available for backward compatibility and contains your existing AppStacks created in 2.x. This tab can be disabled once the environment have been fully migrated to 4.0.
Note that only the tool cannot migrate writable volumes.
There is a great Fling available for download that allows you to automatically migrate AppStacks to 4.0. It should be installed on a Windows 7 or 10 VM having access to the datastore having the AppStacks to be migrated and .NET 4.5 installed.
-
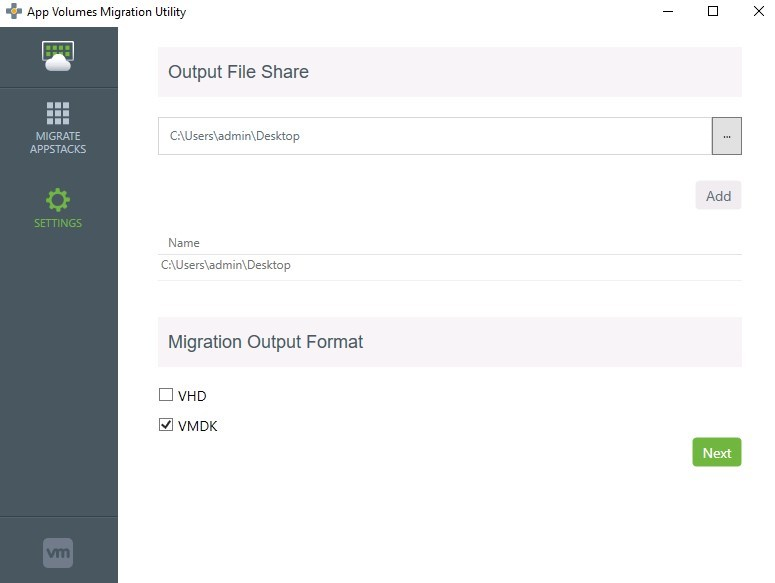
Download the software and install it on the machine (reboot required). On the first launch, you need to specify a location to store the output files, click VMDK and click next.
-
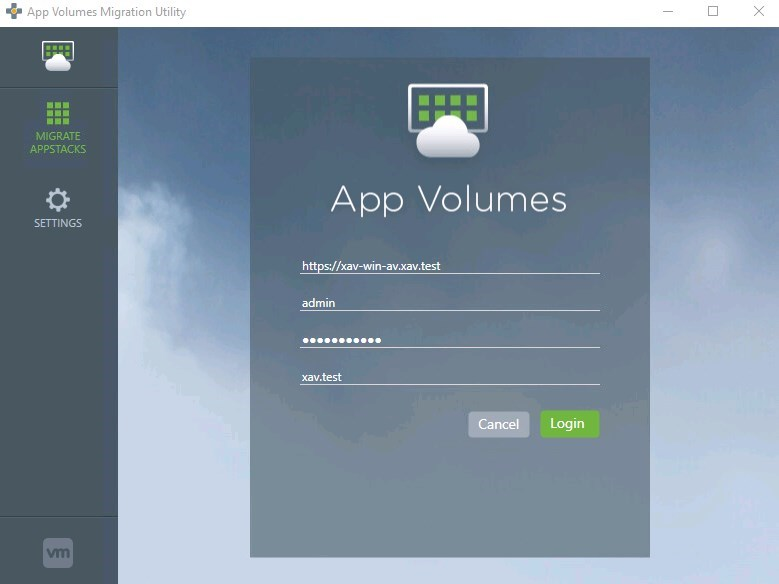
Enter the url to your App Volumes Manager and credentials to login.
-
Select the AppStack to migrate, the status changes from Ready to Scheduled and click Migrate.

-
Once complete the status should be Complete and two files are generated (json and vmdk).

-
Copy the json and vmdk files to the App Volumes Manager server in the \ppv\packages folder where App Volumes is installed.

-
Go to Configuration > Storage > Upload Templates.

-
The App you migrated should appear in the list. Click its checkbox and click Upload.


-
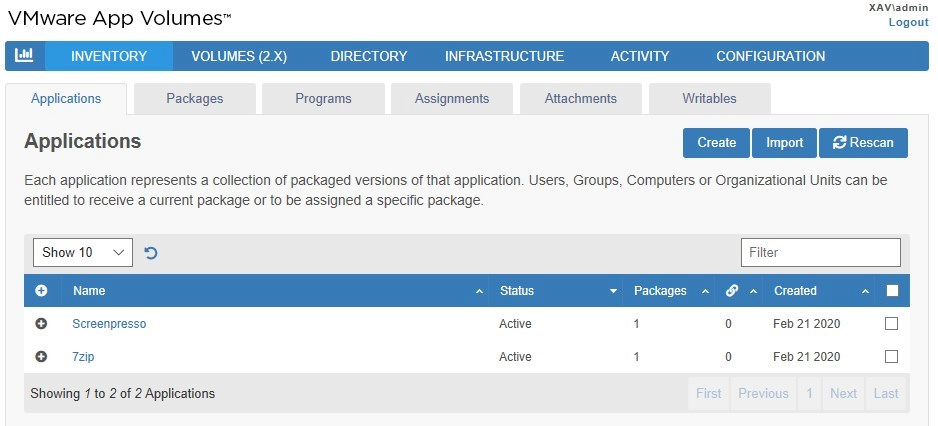
After the task completes, the migrated application (7zip in this example) appears in the Applications tab (4.0). You can add an assignment from here.
-
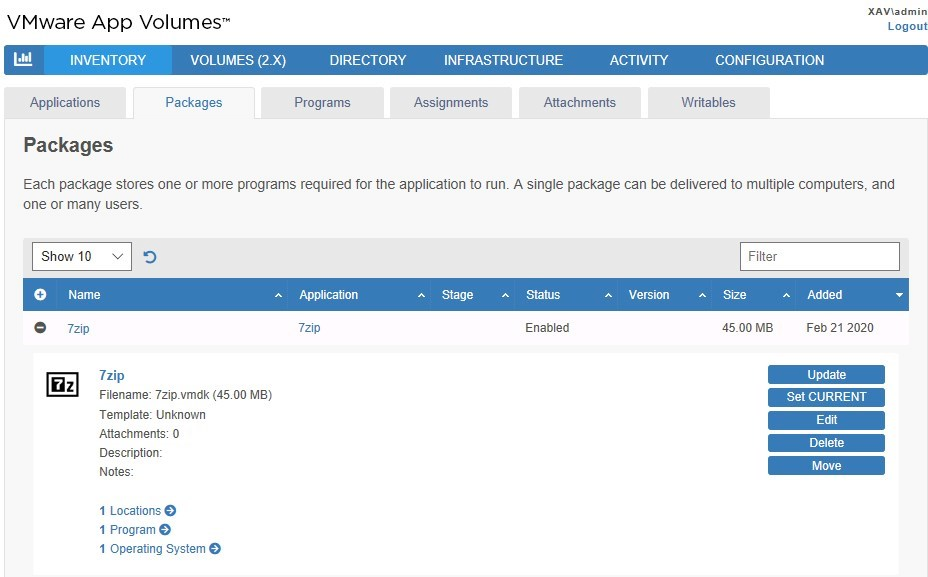
In the Application, a package with the name of the app is here. You can give it a lifecycle and set as current should you wish to do so.
-
Finally, the bits of 7zip appear in the Programs tab.
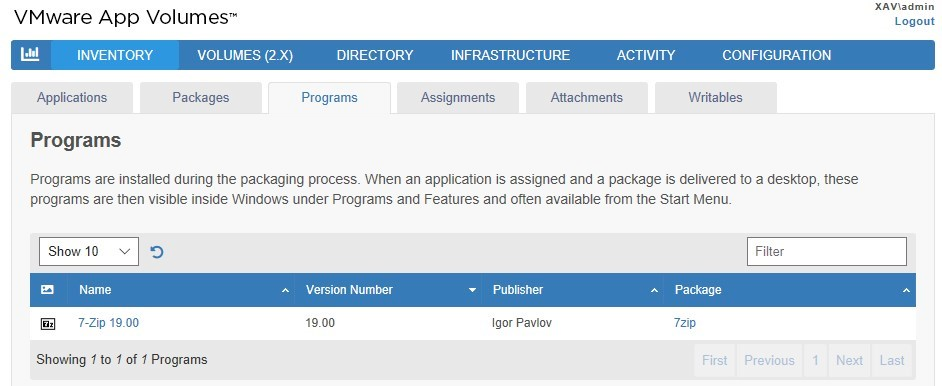
From now on this application will be attached to the users that have an assignment and that get a desktop with App Volumes agent 4.0 delivered.
Wrap up
VMware delivered a lot of changes and improvements to App Volumes for its first major update release. There is no doubt that most environments will have 2.X and 4.0 to coexist for the duration of the migration of the AppStacks and all the associated testing. However, the fact that it is backwards compatible and that everything can be done from the same interface will give them some peace of mind and time to do it right.
I secretly hoped that they would rename the “CloudVolumes” installation folder or make it a virtual appliance, but perhaps in some future release.


Not a DOJO Member yet?
Join thousands of other IT pros and receive a weekly roundup email with the latest content & updates!


