Save to My DOJO

In our previous post Getting Started With Terraform and vSphere, we installed Terraform and went through the process of deploying VMs. Now we will secure our Terraform deployment process with best practices by getting rid of the credentials in plain text as well as storing our state files in a secure location.
Need more generalist overview of protecting credentials in scripts? Check out my article on how to encrypt passwords for PowerShell.
Basic Passwords in Terraform
Since the goal is to keep our configurations in source control, we don’t want to store our passwords right in the .tf file. We can use variables to store our passwords either in a separate variable file or specify the variable when we are initiating the command. There are many ways of assigning variables. First, let’s define our username and password variables. To do this we create a variables.tf file with the following variables defined:
variable "username" {}
variable "password" {}
Since I don’t want to populate the value in these variables, I’m keeping the “{}” brackets empty. Now we must modify our main.tf file and swap out the credentials from our VMware provider with a ${var.username} and ${var.password} to call the variables in our config:
provider "vsphere" {
  user           = "${var.username}"
  password       = "${var.password}"
  vsphere_server = "192.168.0.7"
  version = "~> 1.11"

  # If you have a self-signed cert
  allow_unverified_ssl = true
}

#Data Sources
data "vsphere_datacenter" "dc" {
  name = "LukeLab"
}

data "vsphere_datastore" "datastore" {
  name          = "ESXi1-Internal"
  datacenter_id = "${data.vsphere_datacenter.dc.id}"
}

data "vsphere_compute_cluster" "cluster" {
  name          = "Luke-HA-DRS"
  datacenter_id = "${data.vsphere_datacenter.dc.id}"
}

data "vsphere_network" "network" {
  name          = "VM Network"
  datacenter_id = "${data.vsphere_datacenter.dc.id}"
}

data "vsphere_virtual_machine" "template" {
  name          = "VMTemp"
  datacenter_id = "${data.vsphere_datacenter.dc.id}"
}

#Virtual Machine Resource
resource "vsphere_virtual_machine" "web1" {
  name             = "Web1"
  resource_pool_id = "${data.vsphere_compute_cluster.cluster.resource_pool_id}"
  datastore_id     = "${data.vsphere_datastore.datastore.id}"

  num_cpus = 2
  memory   = 4096
  guest_id = "${data.vsphere_virtual_machine.template.guest_id}"

  scsi_type = "${data.vsphere_virtual_machine.template.scsi_type}"
  firmware = "efi"

  network_interface {
    network_id   = "${data.vsphere_network.network.id}"
    adapter_type = "vmxnet3"
  }

  disk {
    label            = "disk0"
    size             = "${data.vsphere_virtual_machine.template.disks.0.size}"
    eagerly_scrub    = "${data.vsphere_virtual_machine.template.disks.0.eagerly_scrub}"
    thin_provisioned = "${data.vsphere_virtual_machine.template.disks.0.thin_provisioned}"
  }

  clone {
    template_uuid = "${data.vsphere_virtual_machine.template.id}"

    customize {
      windows_options {
        computer_name  = "Web1"
        workgroup      = "home"
        admin_password = "VMw4re"
      }

      network_interface {
        ipv4_address = "192.168.0.46"
        ipv4_netmask = 24
      }

      ipv4_gateway = "192.168.0.1"
    }
  }
}
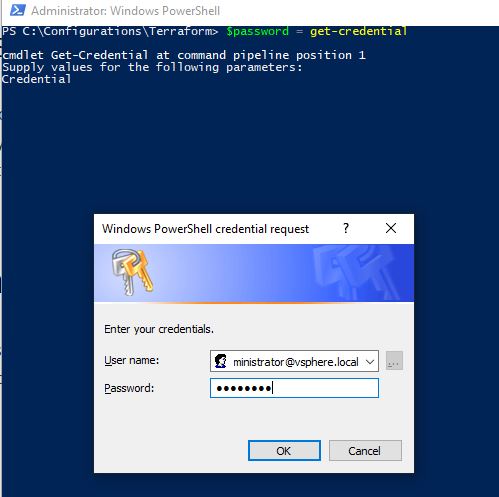
We have a few ways of assigning variables. We could pass them through via command line with PowerShell if we had some sort of Powershell based scripted deployment that utilizes Terraform. It would like the following, first we establish our credentials to a variable:
$Password = Get-credential
Next, we pass our credentials to Terraform using the -var switch for each variable. Also, note that the vSphere provider requires the password in clear text. So we must use the GetNetworkCredential() method to convert our password from a secure string:
terraform apply -var "username=$($password.username)" -var "password=$(($password.GetNetworkCredential()).password)"
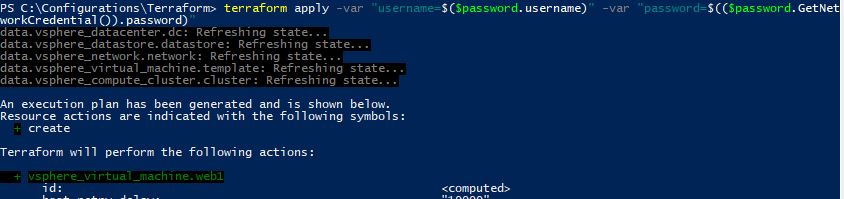
Our credentials are successfully passed through to our Terraform configuration and our VM is built. If we didn’t want to go down this route and want to just use Terraform directly, we could save our variables to a terraform.tfvars file and Terraform will automatically look at that file for the values of each variable. The contents of the terraform.tfvars file looks like the following.
username = "
"
password = "P@ssw0rd"
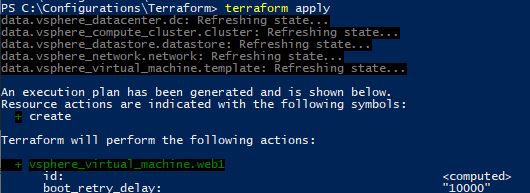
Now we just run our plan like regular and the configuration will automatically find the variables.
Also note, that Terraform follows a standard procedure when looking for variable information and will take variables from the -var switch if present before the terraform.tfvars file. You may want to add the .tfvars file to your gitignore file so you’re not copying that into source control. There are many ways that we can manage passwords with terraform, these are just two basic ways. We could get more advanced and use other 3rd party solutions such as Azure or AWS to store our secrets but to keep the example simple we will stick with these two.
Now that we no longer have our password hardcoded to the configuration file we can upload it to source control. However, there is one more glaring issue how do we protect our state file? In the next section, we’ll go over some of the best practices for handling the config state file.
Remote State Location Using Terraform Cloud Free Tier
Whenever we deploy a template with Terraform, it creates a state file. The state file contains the information of the current “state” of the infrastructure that is being defined in the template. Once the template is applied the state file still sticks around in order to keep track of changes made and applied. After deploying a VM from our previous post we can see that state file is automatically created in the same directory:

Storing the state file on a local file system like this is nice for demonstrations but it’s not a best practice for a production environment. Terraform has a feature called “remote state” which provides the ability to store the state file in a remote location. We want other team members to be able to access the state file so they can deploy their own changes as well to the same infrastructure. This brings up another scenario, if multiple team members are modifying the same state file, there are chances of corrupting the state file. This is where the feature called “state locking” helps as long as the backend location supports it. The term “backend” is used to describe the way the state file is loaded and how the operations are executed when running various Terraform commands like apply. So you can have a local backend like what we’ve been using or a remote backend where the state file is located in AWS, Azure, or a local on-prem solution. In this example, we’ll configure out backend to use remote state with Terraform Cloud Free Tier which is a free service from Hashicorp that provides a remote state cloud storage location as well as collaboration tools for managing state files. We get at rest encryption from HashiCorp Vault as well as state locking.
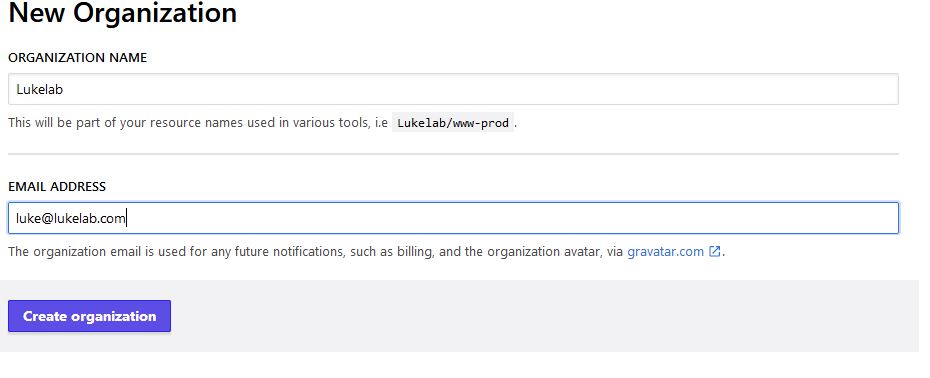
To get started, we first need to sign up and create an account. Once logged in we have the option to join an organization or create one. There is no limit on the number of users you can have in your organization. We will create one since this is our first time setting up Terraform:
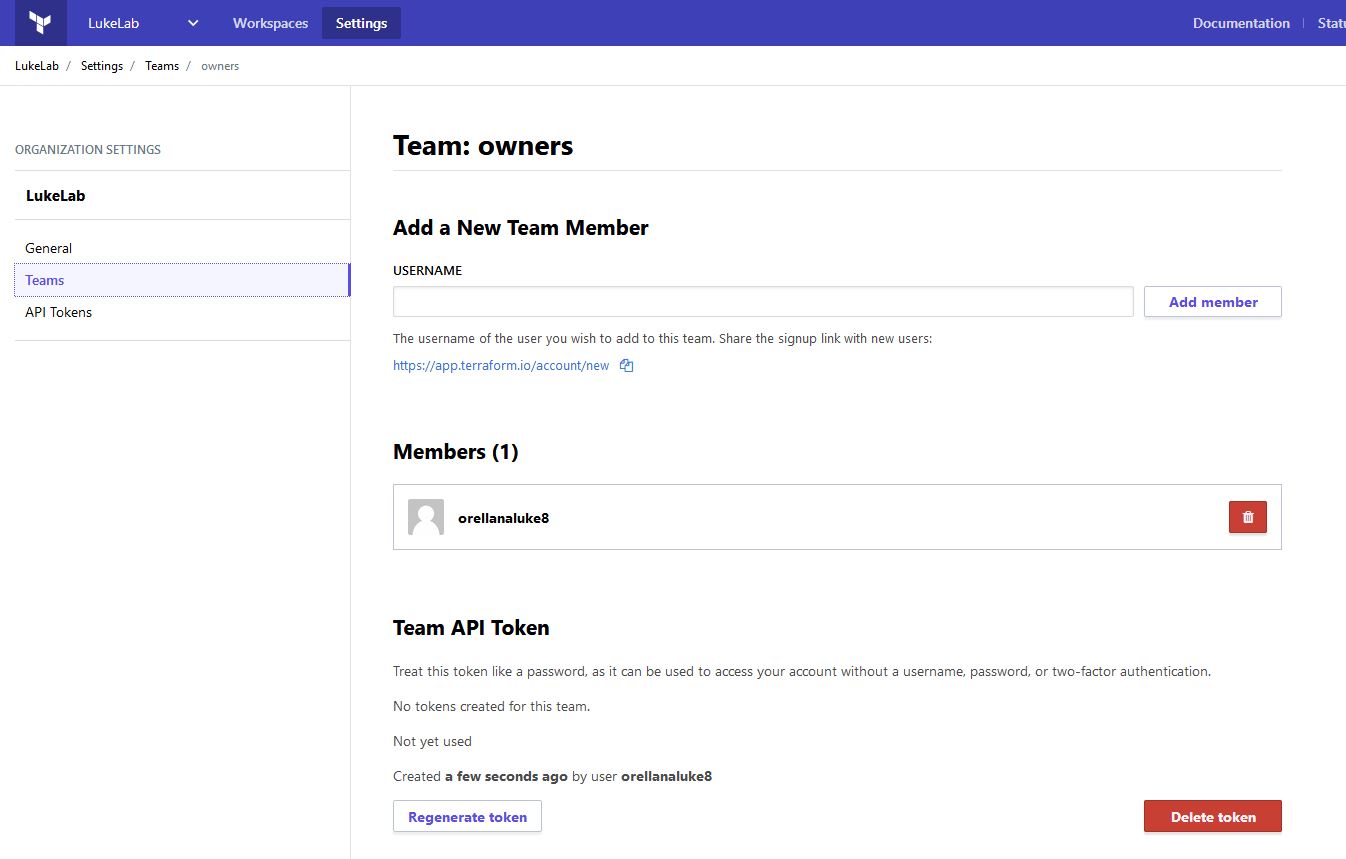
Now let’s move our current state file into the cloud. Terraform Cloud uses an API token to provide secure authentication between Terraform being run on-prem and the cloud. To set this up we need to generate a token. We can generate a token to be used for each user, or we could generate one that could be used like a service account which is called a team token. To set up the team token, go to the Settings tab and select Teams. Then towards the bottom under Team API token, generate your token and copy it:
Now we need to create a Terraform CLI Config file (if you don’t already have one created) to tell the Terraform CLI to report into the cloud. To do this open a text editor or Visual Studio code and paste in the following syntax and replace the REPLACE_ME with your API token you copied in the previous steps:
credentials "app.terraform.io" {
  token = "REPLACE_ME"
}
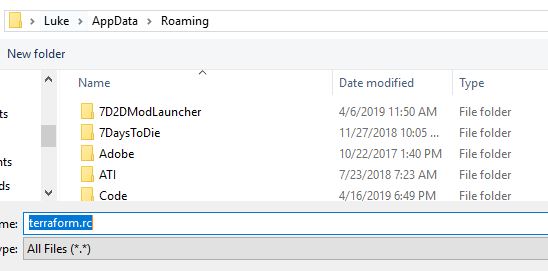
Now save this in your %appdata% folder as terraform.rc. This will cause the Terraform CLI client to automatically pick up the token and use it to authenticate and move all state files into the cloud:
Now we need to add the following to our main.tf in order to tell our configuration to use the Terraform cloud as it’s backend. I specify our “LukeLab” organization and use “VM-Web1” as my workspace to keep the configuration for this VM separate from others. There is no limit to how many workspaces we can have:
terraform {
  backend "remote" {
    organization = "LukeLab"

    workspaces {
      name = "VM-Web1"
    }
  }
}
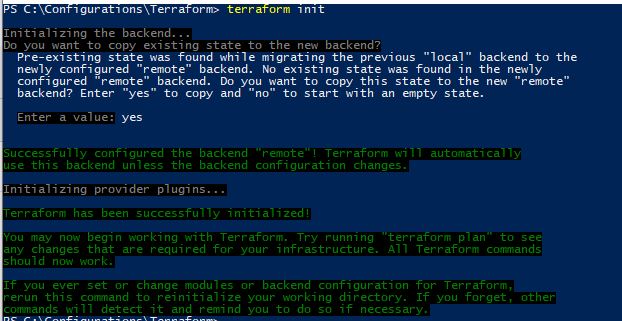
We save our changes to the main.tf file. Now we go back to Terraform and run:
terraform init
Our current state file will be copied over to Terraform Cloud:
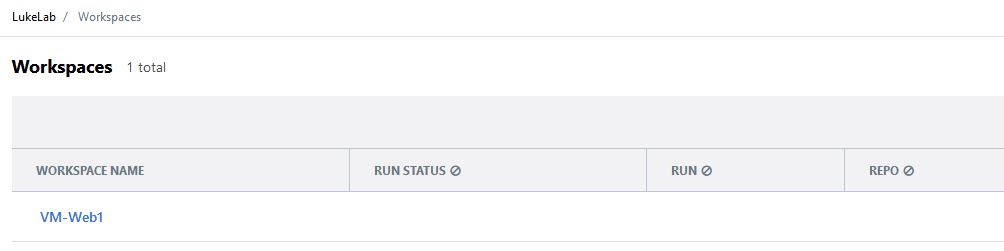
Now our workspace is now visible from within Terraform Cloud:
Now we get the benefit of version tracking for our state files as well:

Rounding out we now have encryption, change tracking, and collaboration with teams for free!
Wrap-Up
As you can see we have lots of options with Terraform. Outside of the basic features, it’s great that they offer more advanced features like this for free as well!
What are your thoughts on Terraform thus far? Are you currently using it today? Do you like it? Why or why not? Let us know in the comments section below!
Thanks for reading!


Not a DOJO Member yet?
Join thousands of other IT pros and receive a weekly roundup email with the latest content & updates!
More in this category


About the Author

Luke Orellana


4 thoughts on "How to Secure the Terraform Deployment Process for vSphere"
[…] our previous articles, we have shown you how to install Terraform, deploy a VM with Terraform and how to implement Azure DSC into our VM builds. Let’s take it a step further into managing […]