Save to My DOJO
Table of contents
This is part 2 of our series on how MSPs can get started with using Source Control with their PowerShell scripts. In part 1, we created a Git repository and committed some changes to it. Then we uploaded our repository to GitHub. Picking up from part 1, we will review how to do branching, merging, and pull requests using Git with GitHub.
Creating A Branch
Let’s say we would like to change our script but keep the original version intact to do more testing to ensure our changes are stable. We can make a “branch,” which will allow us to change the state of the current script but also keep the original version. When we are done with our changes and have verified the script is stable, we can then “merge” our changes back to the master branch. The master branch is the branch name created by default when you initialize the repo.
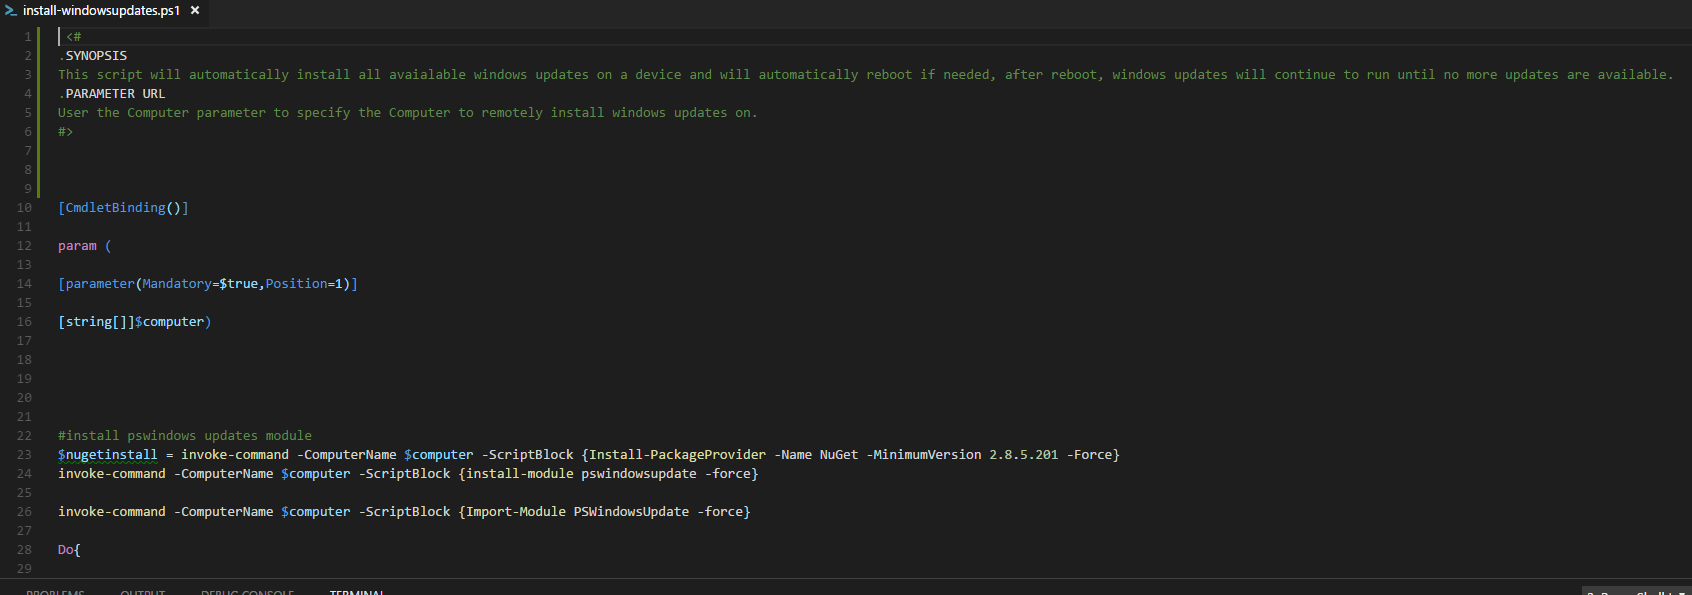
For our demo, we added a new SYNOPSIS section to the script so that users will be able to identify what the script does and how to use it:
Now, let’s create a new branch with our changes. We simply browse the repo and verify what branch we are on by typing the following syntax when in the repo directory:
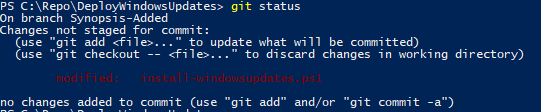
Git status

We can see that we are on the master branch. Now, to make a new branch, we use the checkout command with -b to signify that we want to move to the new branch immediately after it is created. For this example, we will also name the branch “Synopsis-Added.” Also note that you cannot have a space in your branch name:
Git checkout -b Synopsis-Added
![]()
When we run git status again we can see that we are now in our new branch:
We can also run the following syntax to change between branches if desired:
Git checkout master

You can see we were now switched back to the master branch. Any changes we make on either branch will be separate changes until a merge is done.
Let’s commit the changes we made to the new Synopsis-Added branch. First, make sure the new branch is selected, and then we do a “git add” to stage the changes. Then we run git commit to save our changes to the new branch we made:

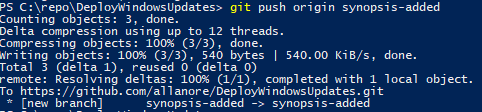
Now that we’ve created our branch and committed the saves to our local Git repo, we next have to push the changes up to our online Github repo. We will do this by using the push command followed by origin and our branch name. The origin syntax is an alias. When we originally pushed this repository up to GitHub (in our part 1 post), we already entered in the remote URL of the repo. Git will automatically save that URL and create an alias for easy use:
git push origin synopsis-added
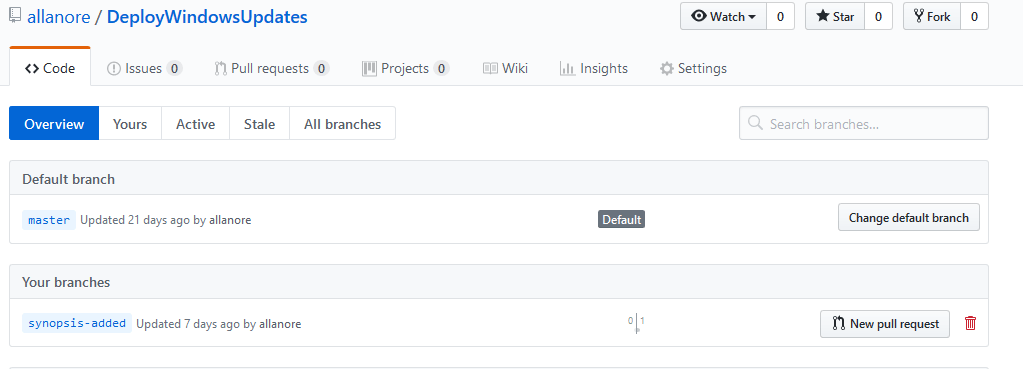
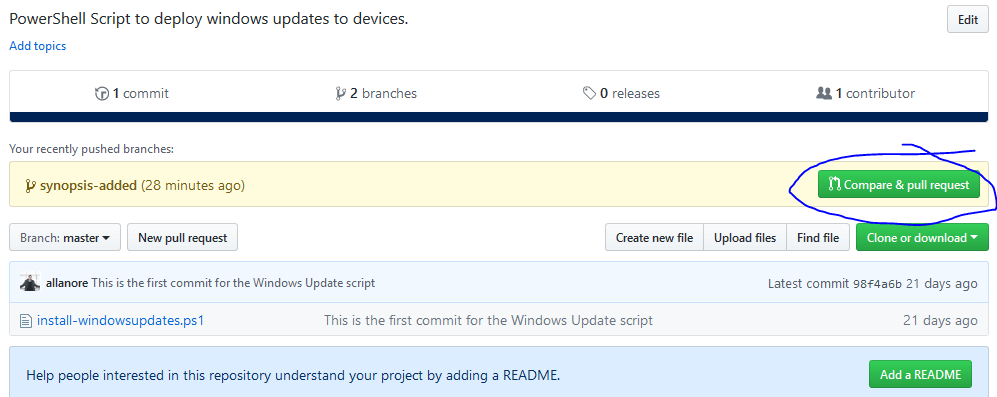
Now when we log into GitHub we can see our new branch is there:
Merging a Branch
Now that we have created a new branch, let’s merge our changes into the master branch. In GitHub, a pull request is a request made to merge two branches. This allows someone to review the code before it is merged into the other branch. To do this, we will log into Github, select the master branch, and select “Compare & Pull Request” on our newly pushed branch
We can now open a pull request. We’ll put in comments about what we did. If you scroll down you can see the code and review the changes made:
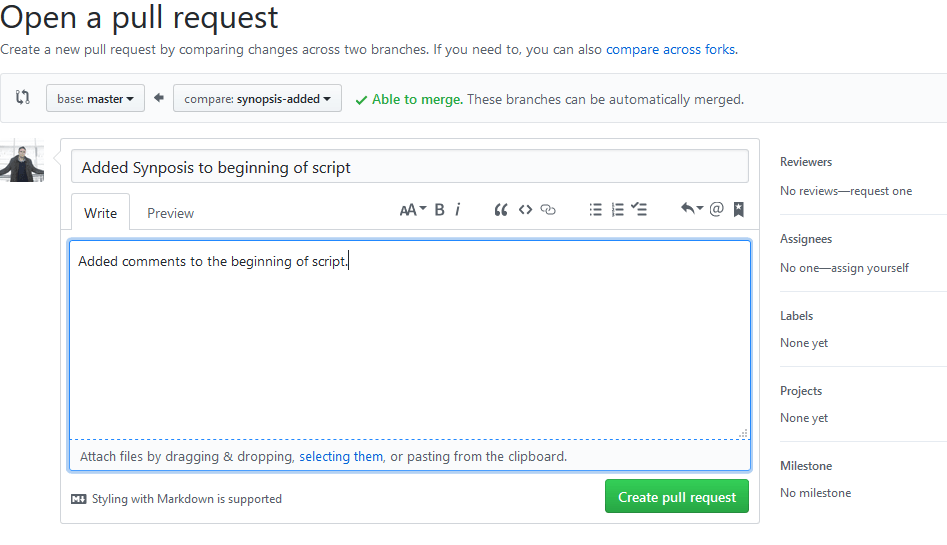
You can even do a split side-by-side comparison of what was changed. Git makes it very easy to track and review the changes made:

Once the changes are verified to be ok, we will select the button for “Create Pull Request.” We are then taken to a page where we can see if there are any conflicts. If there are none, we will select “Merge Pull Request” to merge our newly created branch into the Master branch:
Now we see that our branch was successfully merged. We are also given the option to remove the branch we created if we would like to:

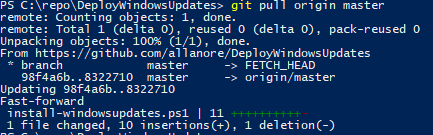
Now that the branches have been merged through GitHub, how do I get the updates to my local git repo? Easy, first, we need to make sure we are on the master branch. So type the following command:
Git checkout master
![]()
Then we will use the pull command to grab all changes from our Github repo:
Git pull origin master
Now we have all the changes from our GitHub repo on our local git repo. The Git commands take a little getting used to, but once you get the hang of it, it’s very useful for documenting your code.
GitLab
If you or your company don’t want to invest in the price tag for a GitHub subscription right away. There is always the option to use GitLab. GitLab can be installed on an Ubuntu server and hosted on-prem. It is similar to GitHub as it is a web-based git repository manager. However, basic features are free to use. Be sure to check out part 3, where I will go over how to install GitLab and configure it to get started with source control for free!
Thanks for reading!


Not a DOJO Member yet?
Join thousands of other IT pros and receive a weekly roundup email with the latest content & updates!
More in this category


About the Author

Luke Orellana

