Save to My DOJO
Following a customer call from a few weeks ago, I thought it would be good to document how to fix a broken NIC configuration of an Azure VM.
The first question that comes to mind is: How it is possible to break a NIC configuration in Azure?
To be honest, it’s actually pretty simple. Let’s say you change the Adapter Properties from inside the Virtual Machine, instead of doing it via the Azure Portal. That will completely disconnect your VM from the Microsoft Global Network Backend. In case this happens, with the next steps, you will find out how you should recover such a VM.
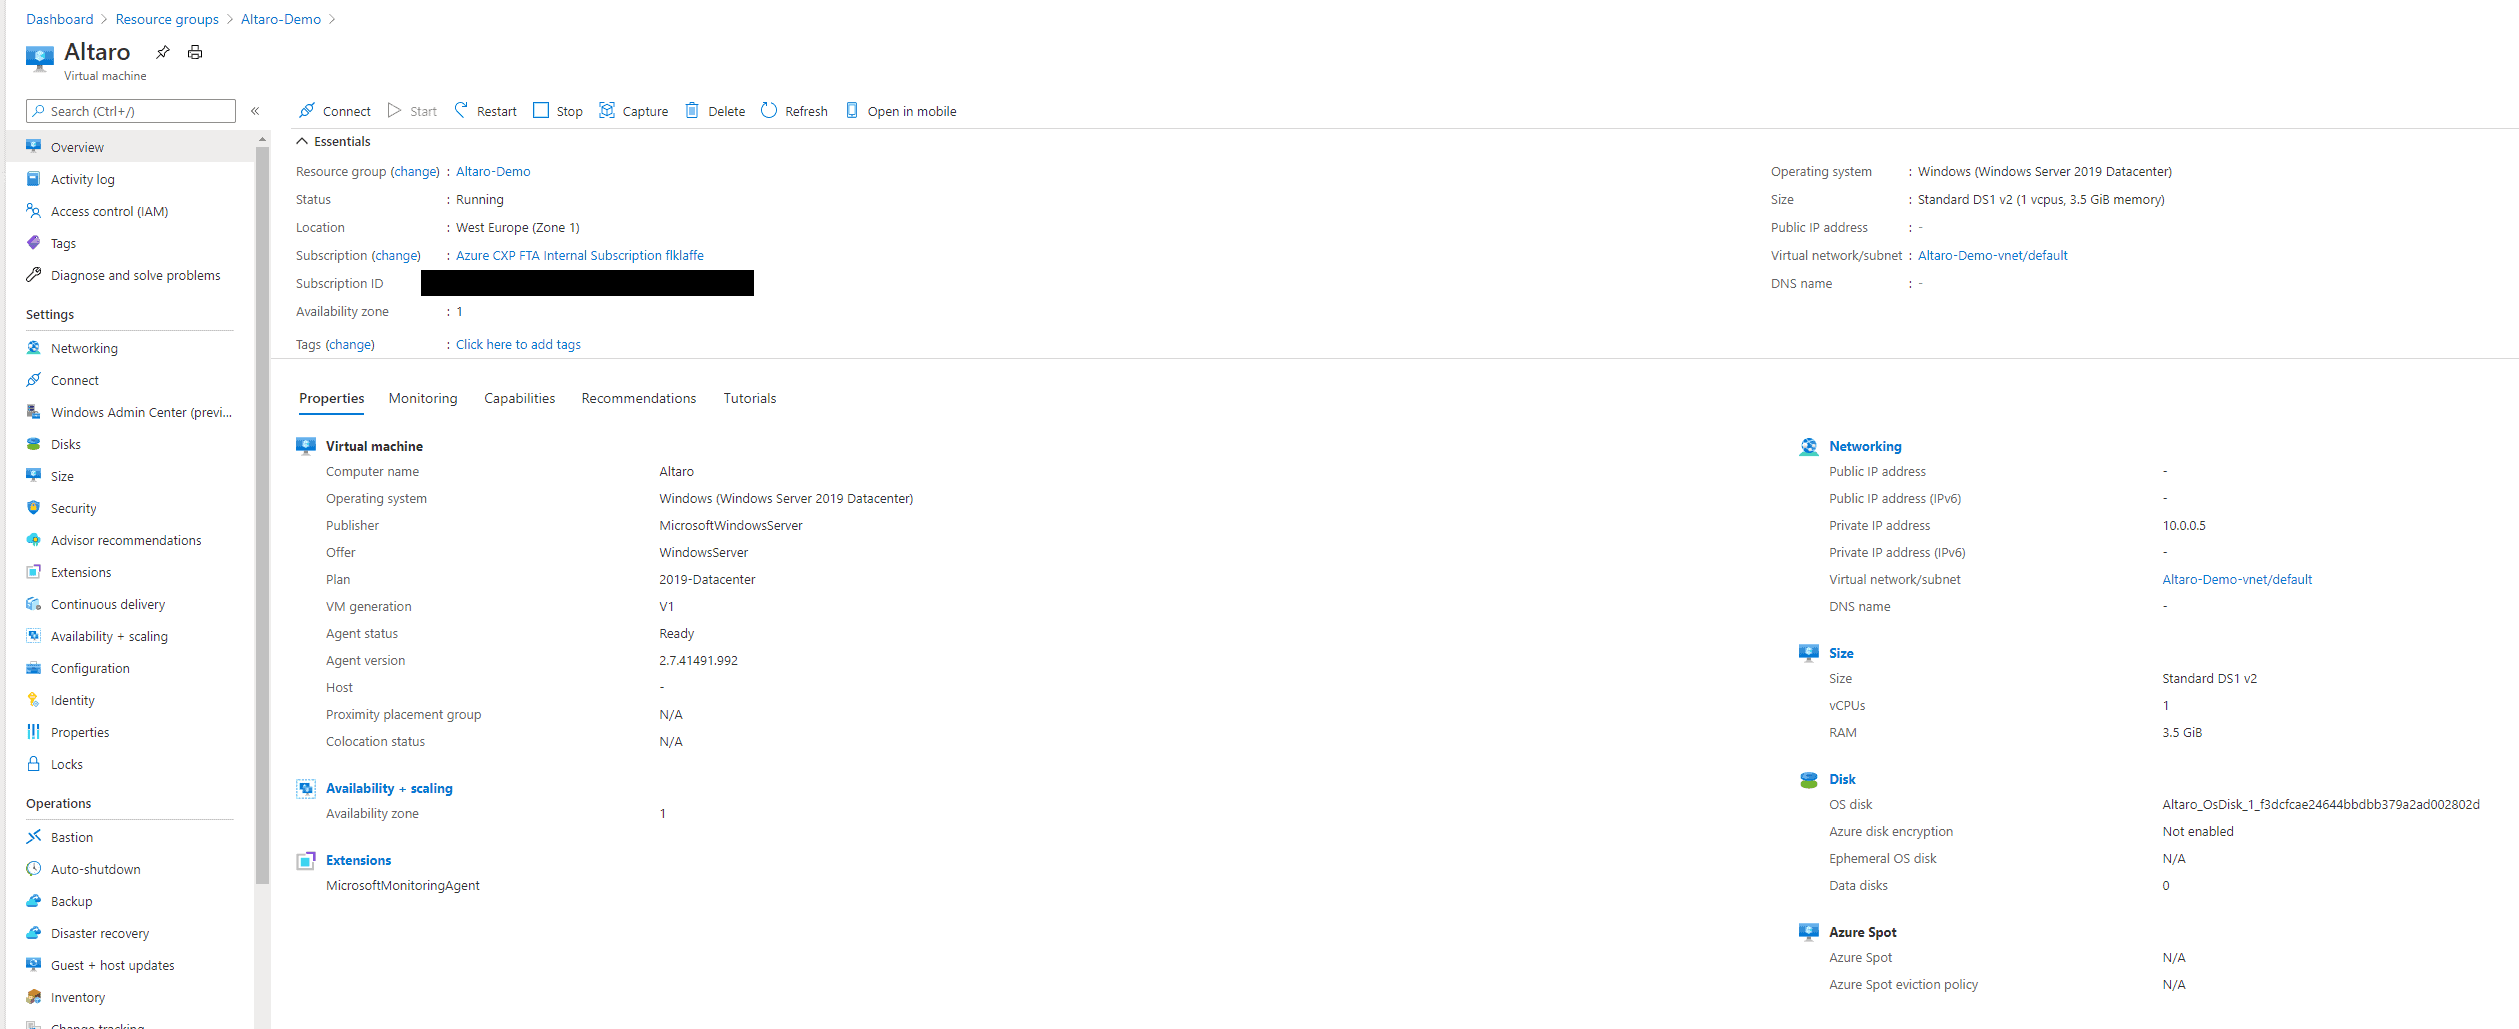
For this guide, I’m using a Windows Server 2019 VM running in a DS1 v2 with private NIC configuration. I connect to the VM using Azure Bastion, which is already pretty robust when it comes to connecting to a VM.
Nothing fancy and no special Microsoft Magic up to here.
Step 1: Break the VM connection to the Microsoft Azure Backend
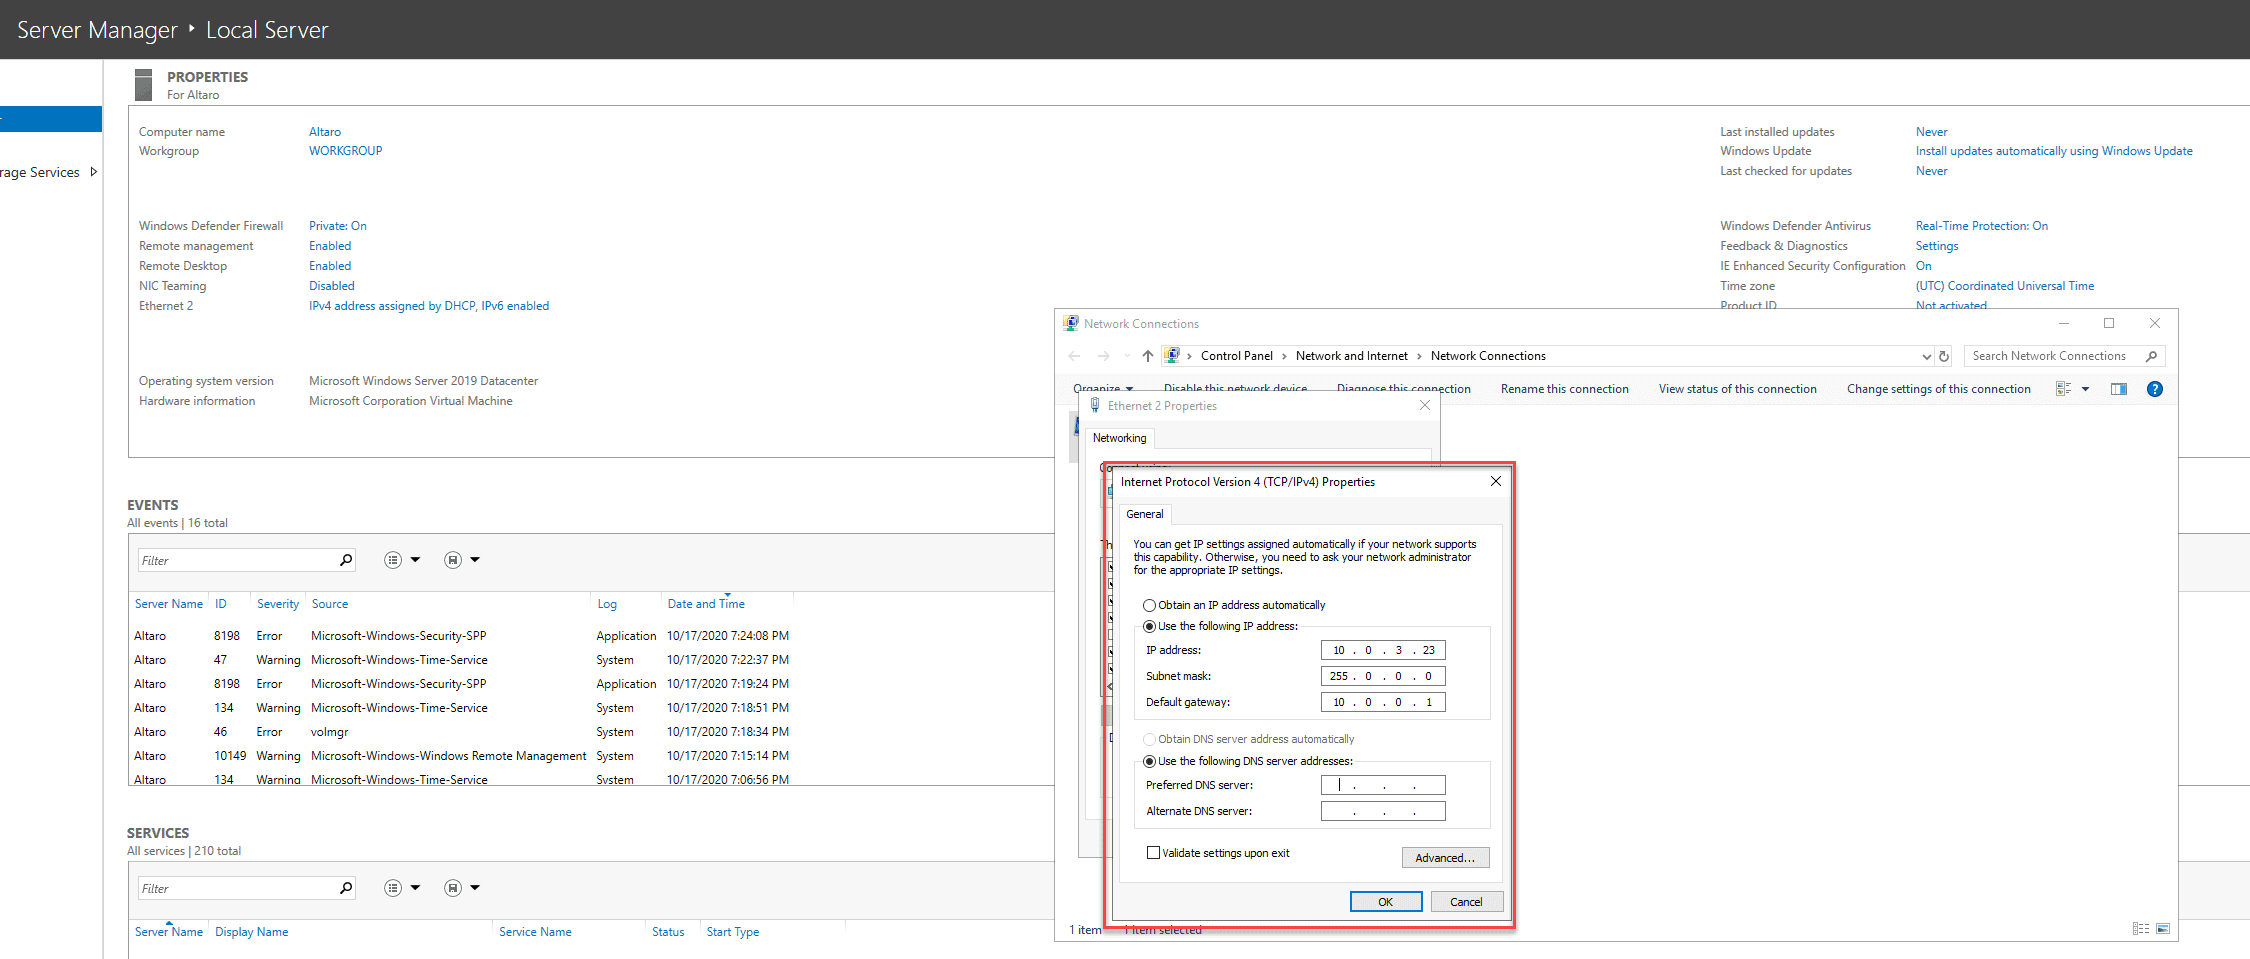
You connect to the VM and change the NIC configuration like shown below. This is a common mistake network admins or Azure Newbies make when trying to set a static IP for a VM. You can read here a guide on how you should set a static IP for an Azure VM.
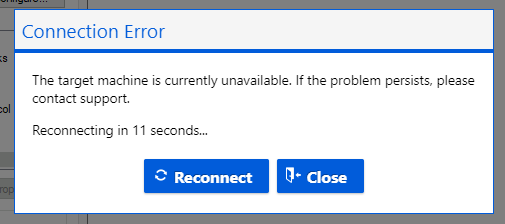
Afterwards, a connection error will appear and you will no longer be able to connect to the VM.
At this point, most people working with Azure would just go and recover their work from a backup taken last night but there is a much easier way to recover the virtual machine.
But before we can recover, we need to do some preparations.
Step 2: The preparation
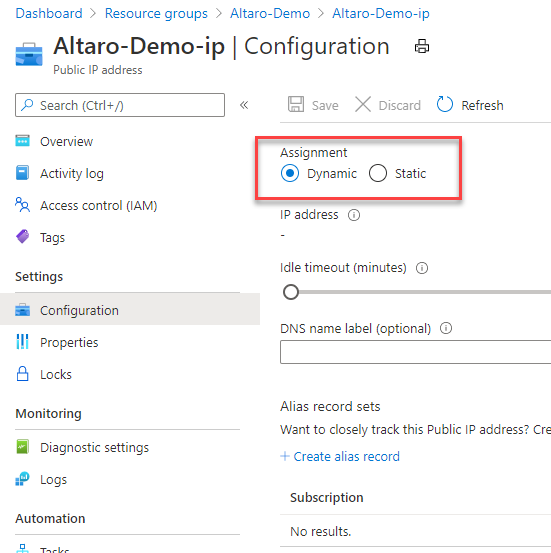
The first step for the prep is very important. If you have public IP assigned to your virtual machine, you need to change the IP from dynamic to static. We will shut down the VM during the recovery process. Without that change, the assigned public IP would be lost and you would have to retrieve a new one.
Please be aware, it is never a good idea and no best practice to assign a public IP directly to an Azure Virtual Machine. Please always use at least the Azure Load Balancer in front of a VM. That would increase your DDoS prevention and security. If you use VMs for production, please always follow the Azure Security Guidelines.
Now disassociate the public IP from the NIC of your VM.
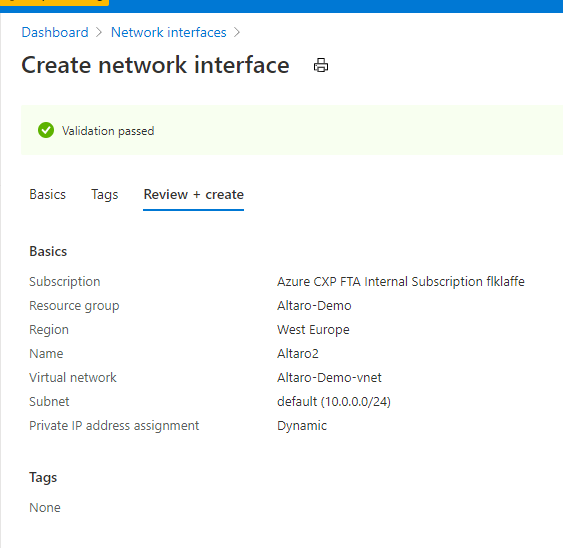
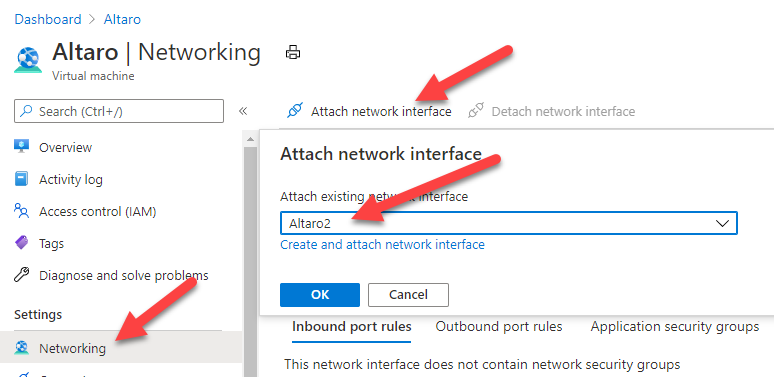
After you change the Public IP configuration, you need to create a new Network Interface from the Azure Marketplace.
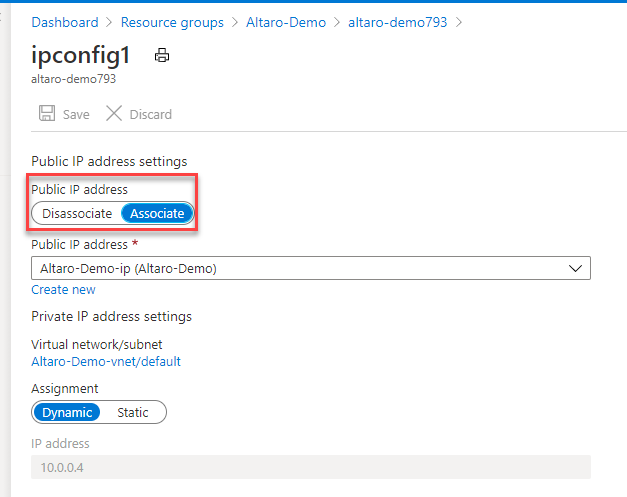
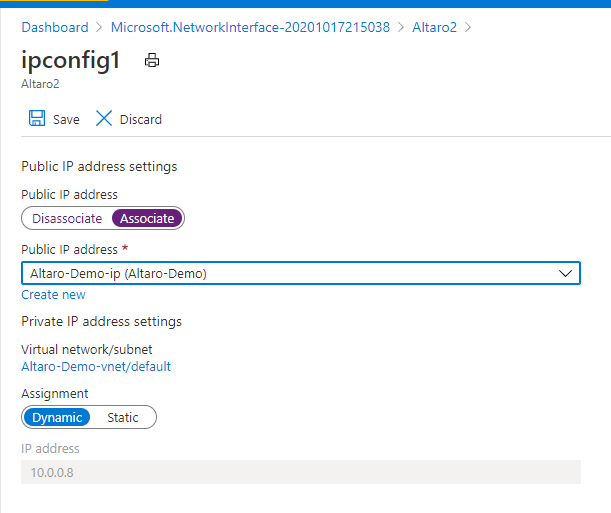
Now associate the public IP to the new Network Interface. In my case, I named it Altaro2 but your Network Interface name should apply to your Azure Naming and Governance Strategy.
Now we are done with the preparation work. Let’s start with recovering the Virtual Machine.
Step 3: Recovering the Virtual Machine
For the next step, we need to stop and deallocate the VM. To do so, you stop the Azure VM via Azure Portal or PowerShell.

For the guys and girls who are now thinking “but I need a downtime to shut down the VM”. Please think, the VM is offline anyway. So every second you lose on such a thought is a second lost for uptime in the future … and yes, I have met such people. 😉
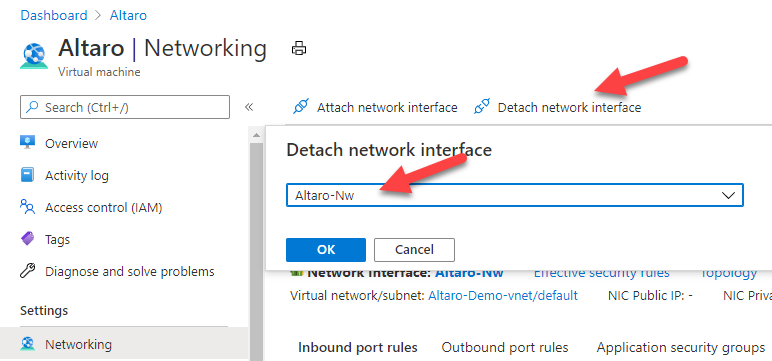
After the VM is shut down, you go to Networking configuration and allocate the newly created Network Interface and deallocate the old one. The exchange of a NIC is only possible when a VM is deallocated and shutdown. You cannot exchange a NIC while running.
Now detach the old Network Interface.
After you did the exchange, you can start your Virtual Machine with the new Network Interface.

After the Virtual Machine has started, you should be able to connect to it using RDP, SSH or Bastion, depends on what you prefer.
Step 4: Validation
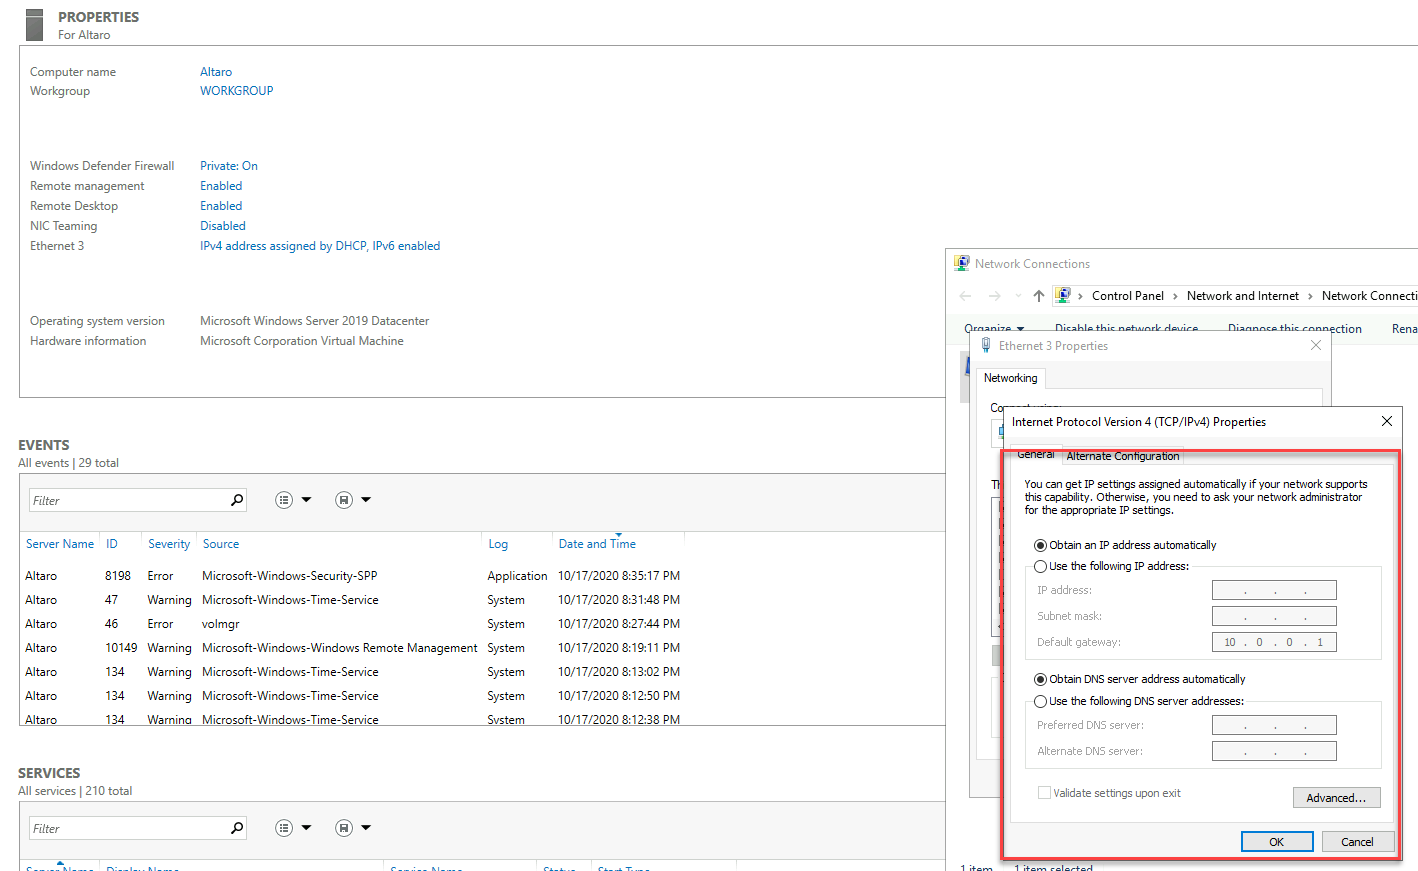
As already explained. I use Azure Bastion to connect to my virtual machines. After I exchanged the NICs, I’m able to connect to the VM, and I also have a very fresh, nice DHCP config for my Azure Virtual Machine.
After you brought your Virtual Machine back to business, you should do a cleanup process, to ensure you don’t waste resources, money, and lose track of the changes.
Step 5: Cleanup
The last step of our recovery is the cleanup. I would suggest the following steps during the cleanup process:
- Delete the old Network Interface
- Set the public IP back to dynamic
- Change the configuration of the new Network Interface according to what you would prefer in case of DNS, IP or Firewalling
- Document the changes in your change management and documentation
- Start a Backup for the Virtual Machine
Why does this solution work?
Now you may ask yourself why is that working or if it’s an “Azure behaviour”. The answer is simple, the recovery method is not related to Azure and can be used for other Hypervisors and Hyperscalers too.
I only used a standard behaviour, which is implemented in every Windows or Linux operating system. Operating Systems normally keep their Network configuration based on MAC and Hardware Identification Number. When you create a new Network Interface, whether it’s virtual or physical, it gets a new MAC Address and Hardware Identification Number.
When the Operating System detects the new MAC and Hardware ID, it has no configuration and switches over to default configuration. In most Operating Systems the default setting is DHCP and that’s the point where the magic happens. Now the Network Interface is back in default mode to connect to the Microsoft Azure Backend Network and gets the IP and Virtual Network specifications assigned, which we destroyed while playing with the NIC inside the Operating System.
Closing notes
It sometimes happens that you waste a NIC config and the reasons for that could be:
- You unknowingly change the NIC configuration or Firewall settings
- You were working with Azure Networks for the first time and you tried to do things as you did aeons ago
- You made a config script, which wasted your settings
- Someone tried a new “security approach”
Those things happen often and I hope this guide can be helpful to get everything back on track. 🙂
As a funny ending note, I wanted to share something that happened to my customer and me during a live configuration session for Azure Virtual WAN. A coworker of my customer changed the IP of the Windows Server NIC of the Terminal Server we were working with. That gave us 30 minutes of extra fun during the session. 😉


Not a DOJO Member yet?
Join thousands of other IT pros and receive a weekly roundup email with the latest content & updates!
More in this category


About the Author

Flo Fox

