Save to My DOJO
If you haven’t done so already, have a look at Eric’s How to run Kali Linux on Client Hyper-V post on Altaro’s Hyper-V sister blog. As it turns out, I have been wanting to try Kali Linux for quite some time, now that I have a rekindled interest in information security. So while I’m at it, I thought, why not write a post to the benefit of our VMware audience as well. So here it goes.
Why Install Kali Linux on VMware?
Kali is free to use and comes with no less than 600 penetration testing tools. I’ll let the following quotation speak for itself!
“Kali Linux is a Debian-based Linux distribution aimed at advanced Penetration Testing and Security Auditing. Kali contains several hundred tools which are geared towards various information security tasks, such as Penetration Testing, Security research, Computer Forensics and Reverse Engineering.”
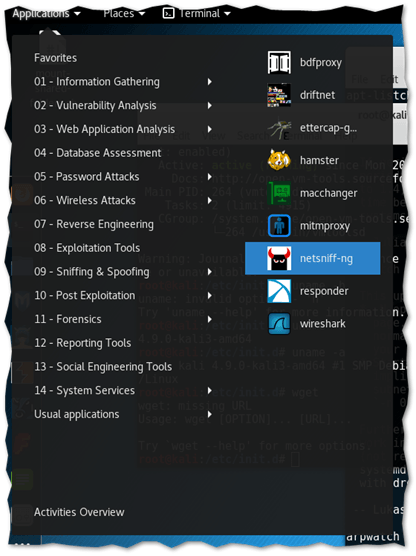
Kali’s suite of security tools
Downloading Kali Linux
Kali can be downloaded from the site’s downloads page in both 32 and 64-bit versions along with a number of desktop environments to choose from including KDE, Mate, Xfce, LXDE and e17. Weekly updates are also available as are VM images for VMware and VirtualBox. There’s also a distro for ARM devices. And should none of this be to your liking, you can opt to build or update your own custom image. All the details are found on the same downloads page.
[thrive_leads id=’18673′]
In my case, I’m only interested in the VMware image, for now at least. I went for the Kali Linux 64-bit VM as shown next.
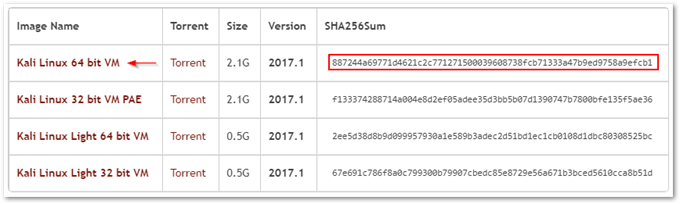
Kali images distributed as virtual machines
After you finish downloading the image, make sure that the downloaded file’s SHA256 checksum matches that listed on the website. This rules out any tampering with the image file. Apart from Eric’s PowerShell technique, you can use the CRC SHA tool which you’ll find in the Windows Explorer’s context menu if you have 7-Zip installed. To use CRC SHA, simply right-click on the downloaded image and select the appropriate CRC type from the menu as shown in the next screenshot.
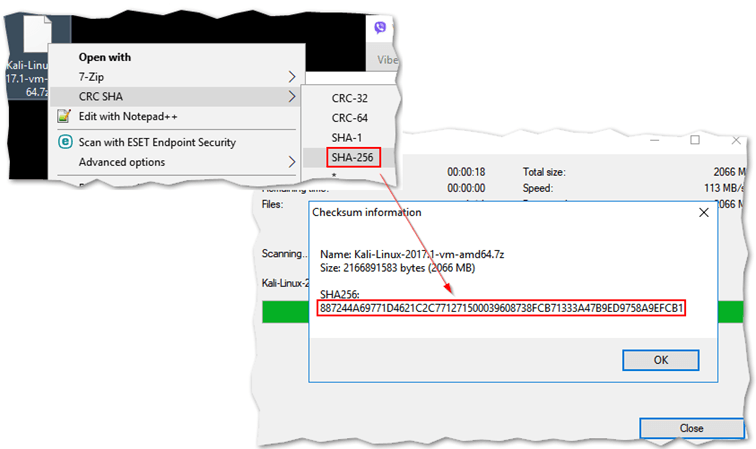
Using 7-Zip’s CRC tool to verify the integrity of downloaded image
As can be seen, the SHA-256 checksum returned for the file matches the one listed on the Kali website, so I’m good to go.
Where to host it?
Unless I missed it, the Kali website does not specify which VMware product to use when deploying from the VM image provided. A quick inspection, quickly reveals that the intended product is VMware Workstation Player as the VMDK is split across several files (sparse), something not supported on ESXi even though you can use vmkfstools to convert them to a supported format. The same information can be obtained by looking at the primary VMDK file which happens to be the disk descriptor file. There are also no VMDK flat files, another indication of this being a non-ESXi VM.
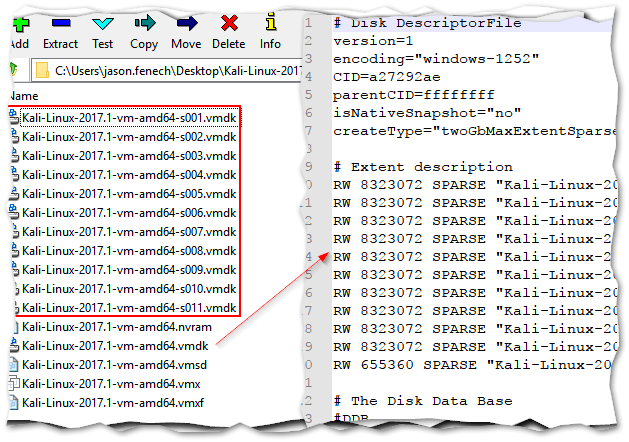
Viewing the image contents and VM’s disk descriptor file
Since I have VMware Workstation installed, I only need to extract the Kali image to a folder and then move it to the default VM folder, C:\Users\jason.fenech\Documents\Virtual Machines in my case. This works with the free version of Workstation Player as well. I’ve used 7-zip to extract the downloaded Kali-Linux-2017.1-vm-amd64.7z archive.
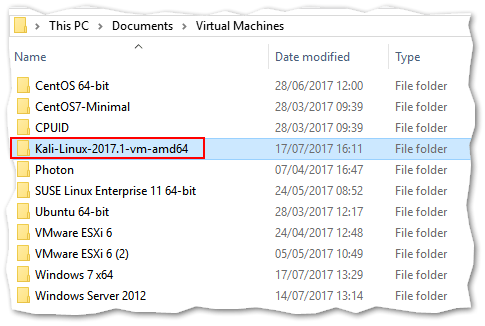
VMware Workstation VM folders on a Windows PC
Adding the VM
To add the VM to Workstation, double click on the VMX file – assuming you have VMware Workstation installed – or use File -> Open from the Workstation Player’s menu. This will add it to the list of VMs currently hosted. The Kali VM comes configured with 2GB of RAM, 4 processors and a 40GB hard disk. The guest OS, of course, is already installed as are VMware Tools. From a networking point of view, the VM is set up to use NAT.

Adding the Kali VM to Workstation
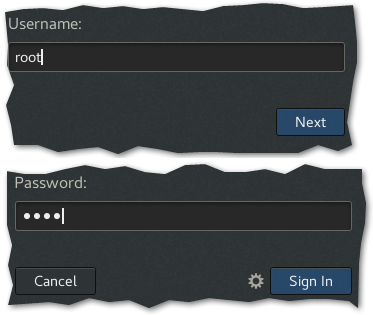
After you power on the VM and Kali boots up, log in as root using password toor.
Signing in as root …
Migrating to ESXi
If you’d rather host Kali on ESXi, perhaps as part of a penetration testing assessment, there are 2 deployment options you can choose from.
Option 1: Download the Kali ISO, create a new VM with the specifications mentioned earlier and install the Kali guest OS as you would normally do. Once the install completes, log in as root and do the following:
- Update Kali to the latest.
apt update && apt -y full-upgrade
- Install VMware Tools and reboot.
apt -y install open-vm-tools-desktop fuse
reboot
Option 2: Use VMware vCenter Converter Standalone to migrate the VM hosted on VMware Workstation to an ESXi host.
Note: If you’re new to using Converter, have a look at How to convert a Hyper-V VM to run on vSphere which gives you a good overview of how to migrate VMs, or physical machines, to ESXi. In our case, make sure to power off the Kali VM before proceeding and to supply the vCenter Server details if the ESXi host is managed.
The next video covers the conversion process where I convert the Kali Linux VM hosted on Workstation to run on a vCenter Server managed ESXi 6.5 host.
I’m using Workstation’s VMRC as can be seen at the end of the video. The ps -ef | grep ‘tools’ command is an easy way to verify that VMware Tools are running. Similarly, you can determine if the tools are installed and running by looking at the VMware Tools details under the Summary tab in vSphere Web client.
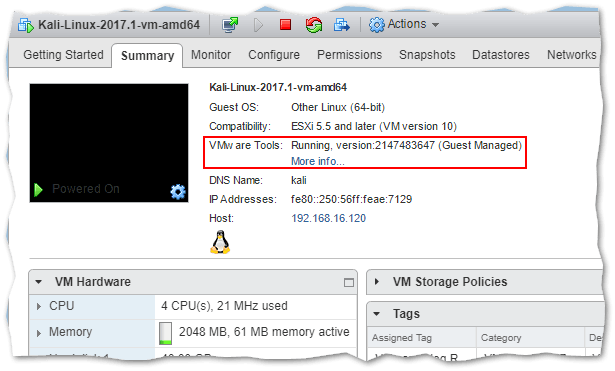
VMware Tools details in vSphere Web Client (Open-vm-tools running on Kali)
Conclusion
If you’re into penetration testing, forensics or simply curious to learn more about security tools, it’s definitely worth the time learning now you know how to install Kali Linux on VMware hypervisors . If you don’t want to go bare-metal, Kali is distributed as ready-to-use image for VMware Workstation Player. Alternatively, you can easily convert the VM to run on ESXi using VMware vCenter Converter.
Make sure to visit Kali’s documentation page for the latest info.
[the_ad id=”4738″]


Not a DOJO Member yet?
Join thousands of other IT pros and receive a weekly roundup email with the latest content & updates!
More in this category


About the Author
Jason Fenech


8 thoughts on "How to Install Kali Linux on VMware"
Can I give 1gb ram instead of 2gb ram is it ok?
Hi,
Yes, you can and you can always add RAM if performance is sluggish. The min. is 512MB.
regards
Jason
Hello my name is tom, i am currently working on an esxi 6.7 server and find it difficult to install kali linux on it. there are many options of the linux family but no kali please help. thanks.
Not all the distros are in the guest lists, only the main ones.
Kali is based on Debian so you can pick this one.
Also picking the wrong family won’t prevent you to install the OS. It is used to pick the VMware tools and offer an adequate default hardware configuration.
And since Linux distros now use openvmtools available in the public repos, it is not that relevant.
https://www.kali.org/docs/virtualization/install-vmware-guest-vm/