Save to My DOJO

In our last post, we set up an Azure Repo with some source code, built an Azure Pipelines agent server, and created an Azure Key Vault. Now we are ready to create our build and release pipelines. Our Build pipeline is going to be a continuous integration component. It’s there to help us run our tests and catch issues or bugs early in the beginning. In our example, the build is just going to consists of copying down the .tf file from our Git repo and placing it into an artifact. The artifact will contain our deployable code that will be used by our release pipeline, which is the continuous delivery component of our process. The release pipeline will retrieve our secret’s from the Azure Key vault and integrate them into our Terraform config, then it will run the Terraform commands on our agent server on-prem to build our VMware infrastructure by deploying our VM.
This article features MANY DevOps concepts. Need a refresher on the question or What is DevOps?
Creating the Build Pipeline
We will start by creating the build. In Azure DevOps select Pipelines on the left-hand side and chose Builds. Select the button to create a new pipeline.
We have two ways to create our build pipeline, we can do it from pure YAML or we can use the GUI. I highly recommend that the first time you set up a build pipeline to use the GUI because it helps with visualizing what each step is. Using the YAML file is definitely easier once you’re more experienced with Azure DevOps Pipelines, but for the sake of learning it, we will create our pipelines with the GUI. So select the option at the bottom User the classic editor.
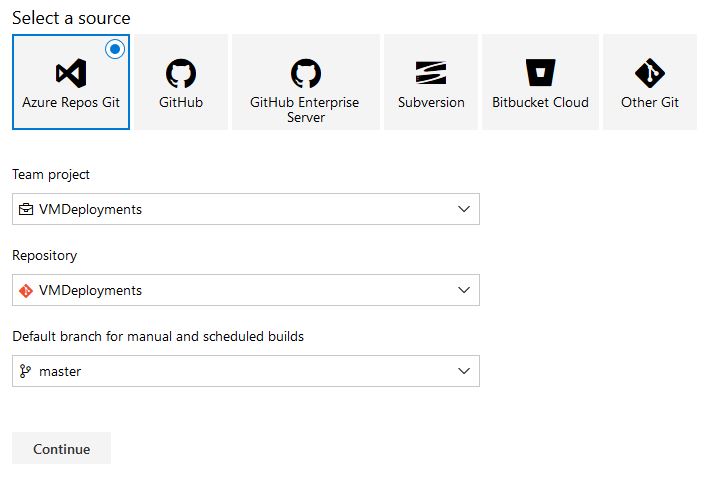
Now we need to select outsource control which in this example is Azure Repos Git. Make sure you have the correct project and repository selected, as well as the branch. We are using the master branch. Select Continue:
We are presented with the option to select a template. Select Empty Job:

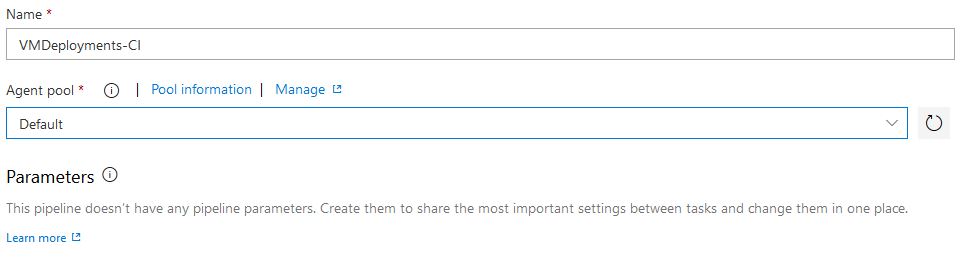
Now we can name our build pipeline, I named mine VMDeployments-CI, the important part is to change the Agent Pool to default since our on-prem agent server is in that pool:
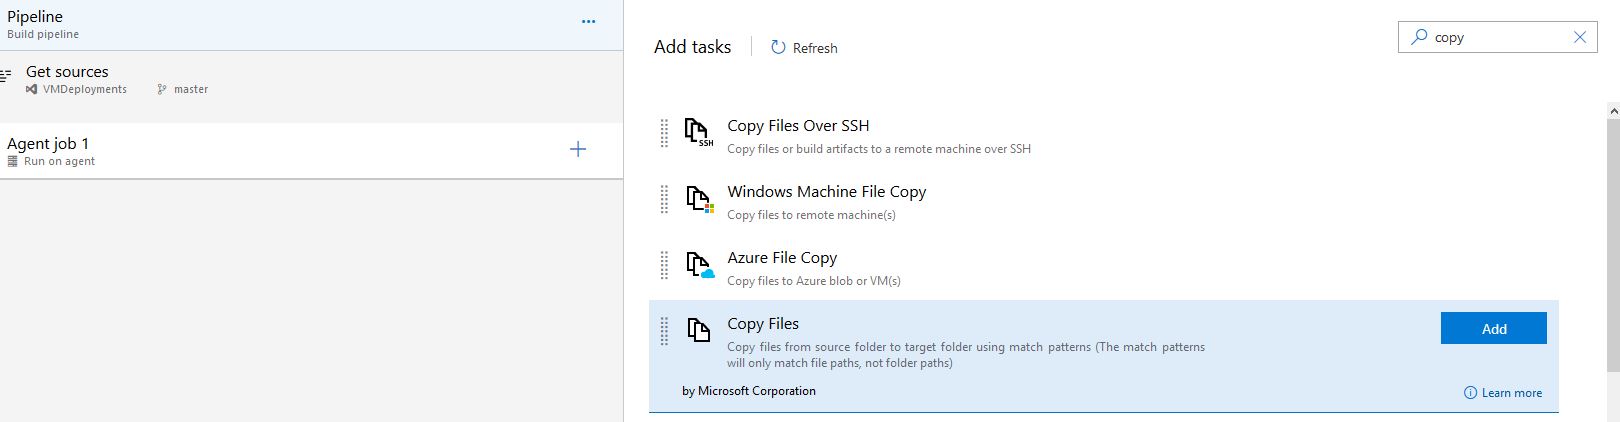
Now we need to add some tasks in for our job. Select the + symbol and search for Copy Files. Select Add:
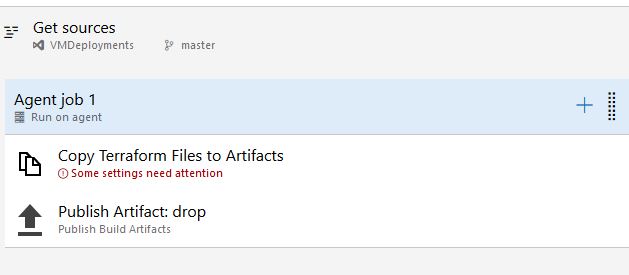
We will need to add 2 tasks which will copy our Terraform configuration file from source code to our artifacts and then publish our artifacts to the Azure pipeline so we can retrieve it in our release. So add the following task and we will configure each one:
Copy Files
Publish Build Artifacts
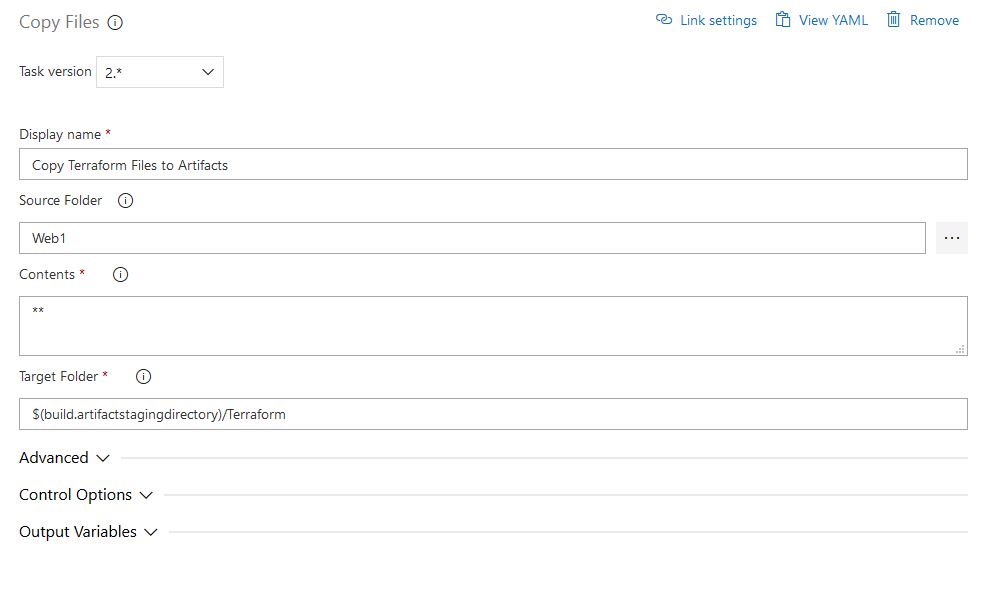
For the Copy Files task, we will choose the source folder in our source control where our web1.tf file is. Our target folder is going to be the variable for our Artifacts folder, which is $(build.artifactstagingdirectory)/Terraform:
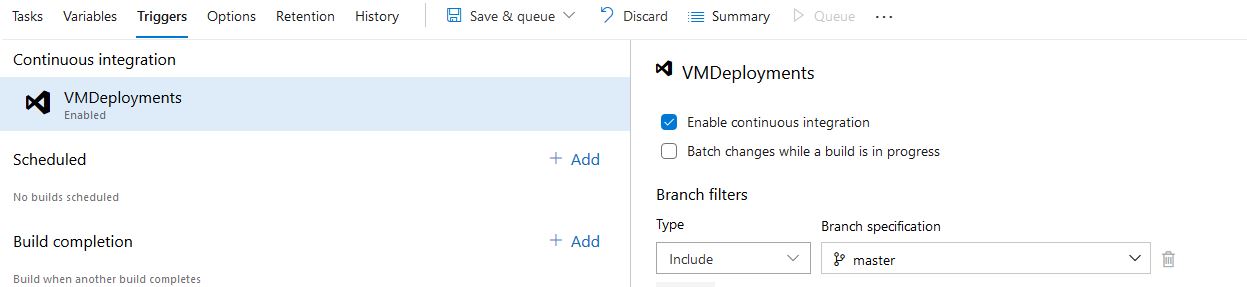
Leave the defaults for the Publish Artifacts task. You can also rename the agent job to make it more meaningful. If we want to be able to trigger this build from Git Pull Requests we can check the box under the Triggers tab to Enable Continuous Integration:
Now we are done with our build, click Save. Then click Queue to run our build. This will test our build to ensure it is working properly, also it will create our Artifact directory that we can use to create our release pipeline.
Creating The Release Pipeline
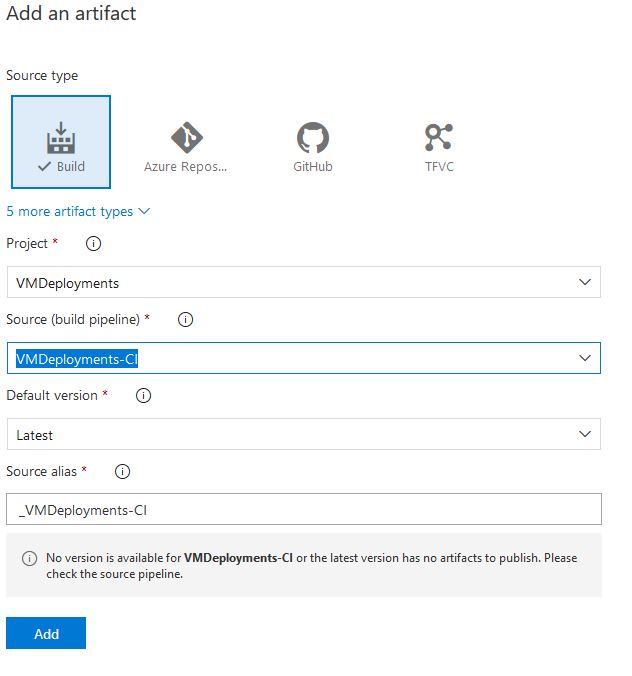
Now we can create the release pipeline. Select Pipelines again on the left-hand side and chose Releases. Click New Pipeline and select Empty Job again when selecting a template. Now we need to add an artifact, Select Build Type and make sure you have the correct project and source which will be our build pipeline we just created:
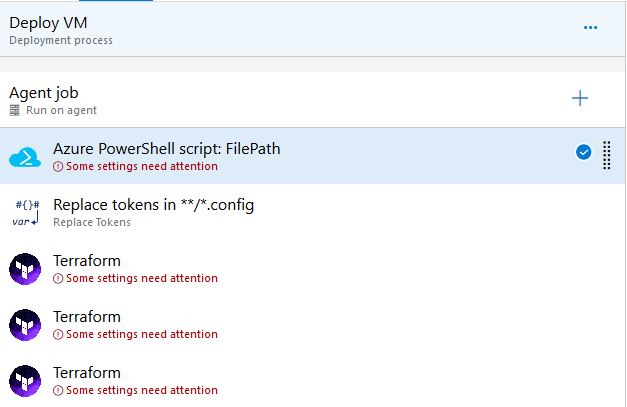
Now we need to add 5 tasks to our stage. Do this by selecting the word task:
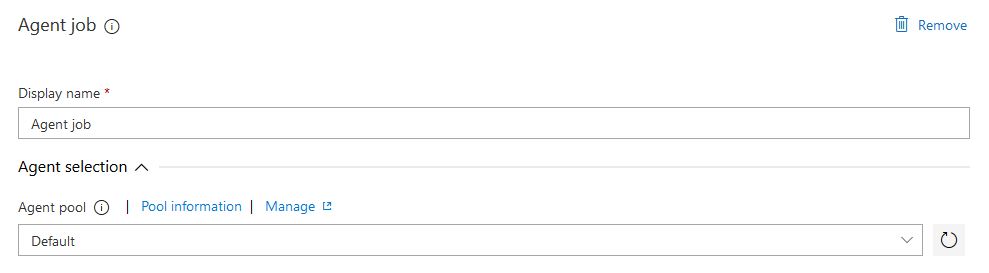
Rename the Stage to something meaningful, I named mine “Deploy VM”. Make sure the Agent Job is configured to the Default Agent Pool so we are using our self-hosted agent server to run the tasks:
Now just like our build pipeline, we need to add in some tasks for our job. We will need to add in the following tasks in this order. Also note, that replace tokens and the run Terraform tasks are 3rd party tasks that need to be installed, it just takes a few clicks so it’s not a big deal and you can do it right from the same window:
Azure PowerShell
Replace Tokens
Run Terraform
Run Terraform
Run Terraform
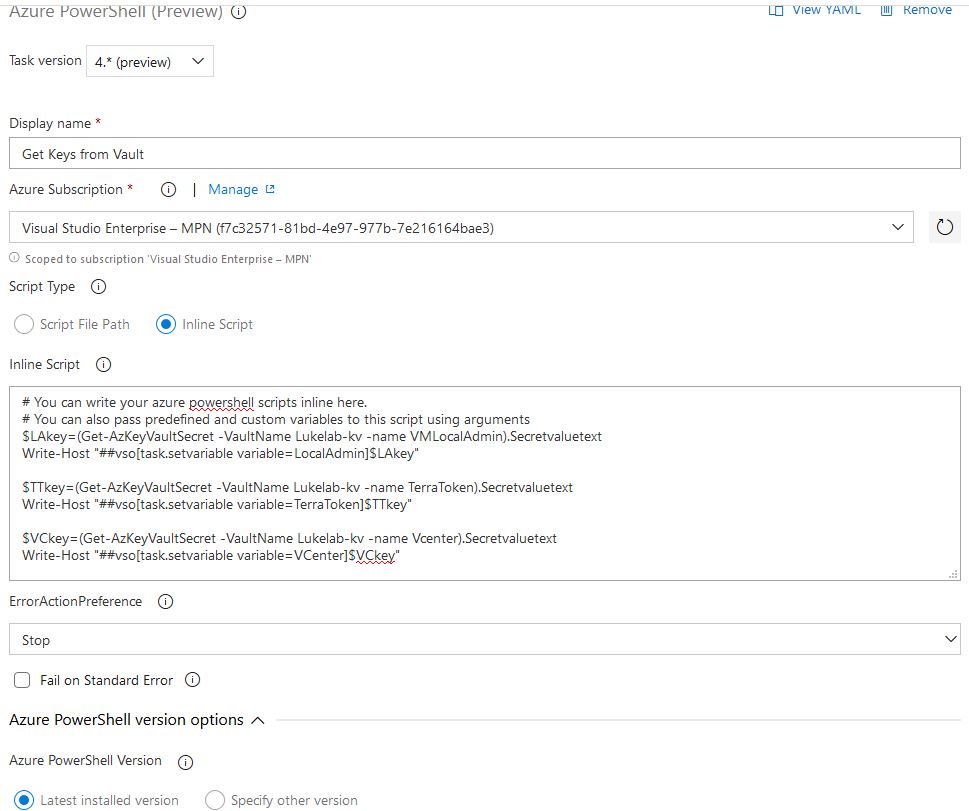
The first task is going to be running a PowerShell script to grab the key’s from our Azure Vault and create them as variables. Replace the vault name with the Vault Key you set up previously, in my example my key vault name is “LukeLab-KV”. Copy the code below:
$LAkey=(Get-AzKeyVaultSecret -VaultName Lukelab-kv -name VMLocalAdmin).Secretvaluetext
Write-Host "##vso[task.setvariable variable=LocalAdmin]$LAkey"

$TTkey=(Get-AzKeyVaultSecret -VaultName Lukelab-kv -name TerraToken).Secretvaluetext
Write-Host "##vso[task.setvariable variable=TerraToken]$TTkey"

$VCkey=(Get-AzKeyVaultSecret -VaultName Lukelab-kv -name Vcenter).Secretvaluetext
Write-Host "##vso[task.setvariable variable=VCenter]$VCkey"
Configure the task with the following settings below, make sure your change the Task Version to 4 as that one contains the AZ modules. Paste in the PowerShell code we copied above in the Inline Script section:
The 2nd task, Replace Tokens, is going to replace the variables in our web1.tf file with the actual variable values that we created from the Powershell script in the previous task. Set up the top half like below:
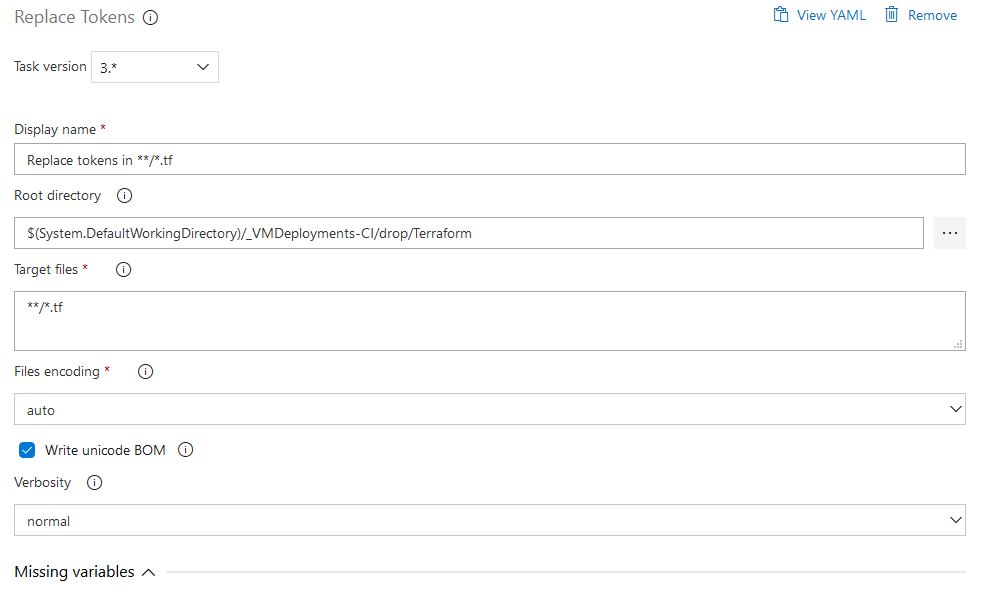
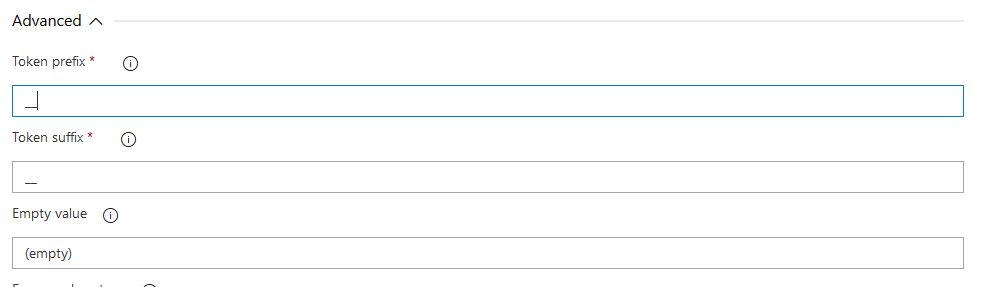
On the bottom half, set the Advanced settings like below. Note that the Token prefix and suffix are double underscores (__). This basically tells the task to swap out the variables in our .tf file that had those underscores in them:
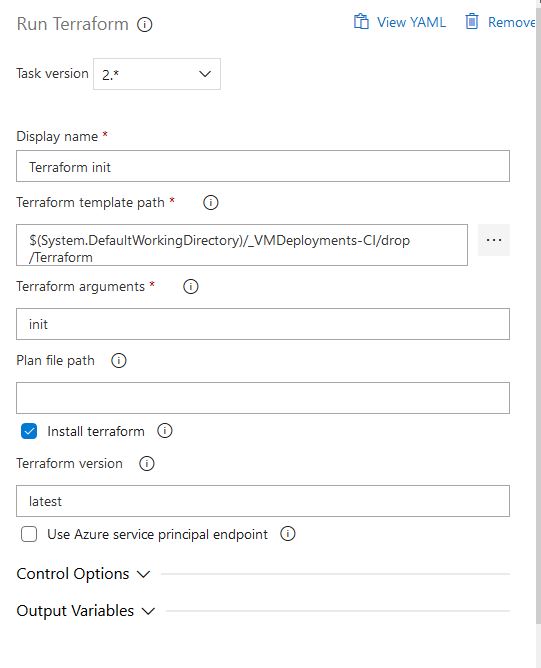
Now we can start creating the tasks for running some Terraform commands. First, we need to initialize Terraform to make sure everything on the backend is in working order so we will do a Terraform init. We will configure the 3rd task with the following settings. Make sure to check the install Terraform option, this will install Terraform on the agent server:
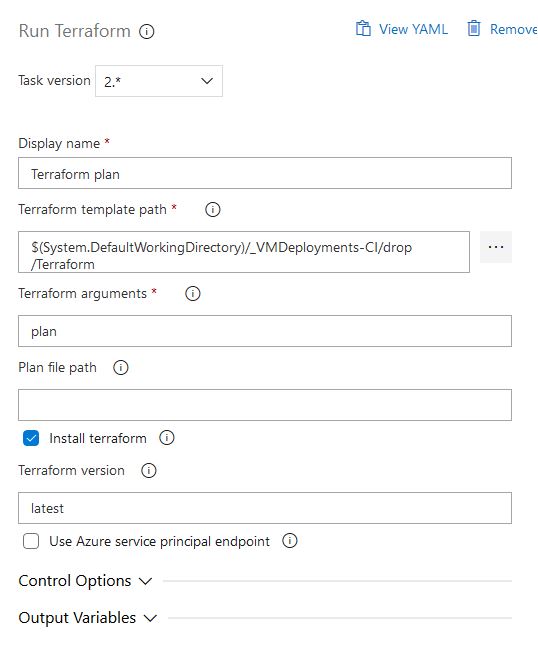
For our 4th task, we will run a Terraform plan, this will ensure our configuration file is valid. Use the following settings:
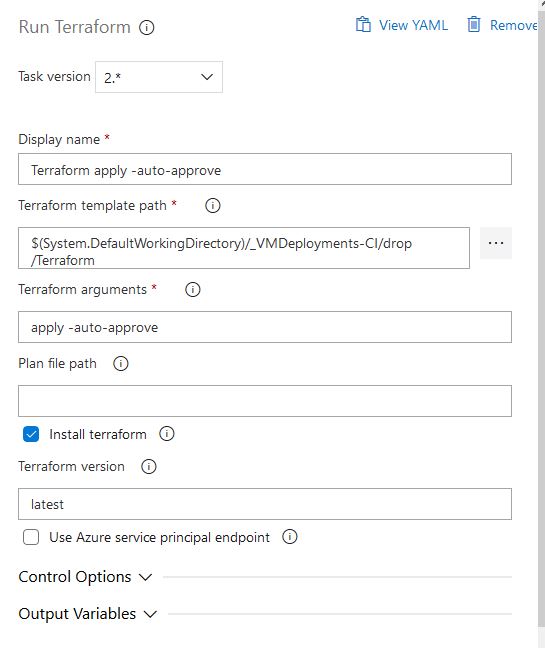
For our 5th and final task, we will finally perform our Terraform apply. Since this is going to be an automated step we will need to use the auto approve option:
To enable continuous deployment so that our release pipeline will start as soon as a new build pipeline is run successfully, select the lightning bolt symbol when on the pipelines tab. There will be an option called continuous deployment trigger that you can turn on or off. We will turn it on in our example:
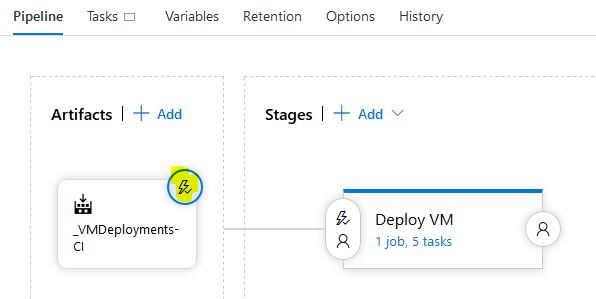
Don’t forget to click Save to save our release.
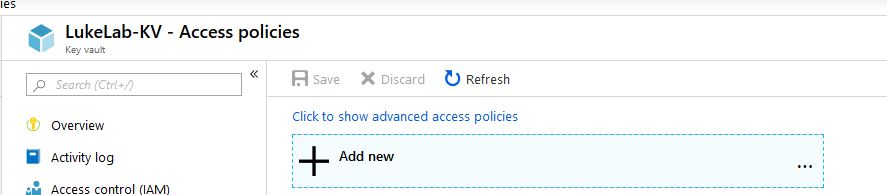
Set Key Vault Permissions
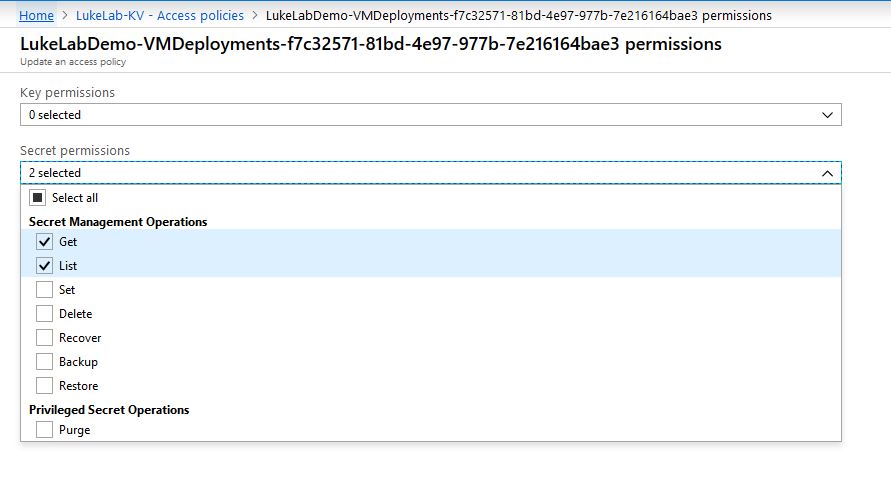
The last step is to set up our Azure DevOps Service Principal with access to our Key Vault. This allows us to obtain the passwords and token from our Azure Key vault with our pipeline. Navigate to your key vault in Azure and select Access Policies. then choose Add new:
We want to configure our service principal with Get and List permissions for our secrets:
Deploying the VM With The Pipeline
Now it’s time for the magic to happen. Select Queue on the Build Pipeline to create a new build:

Once our build goes through the steps of copying the Terraform Config file from source control, we will see our release pipeline start:
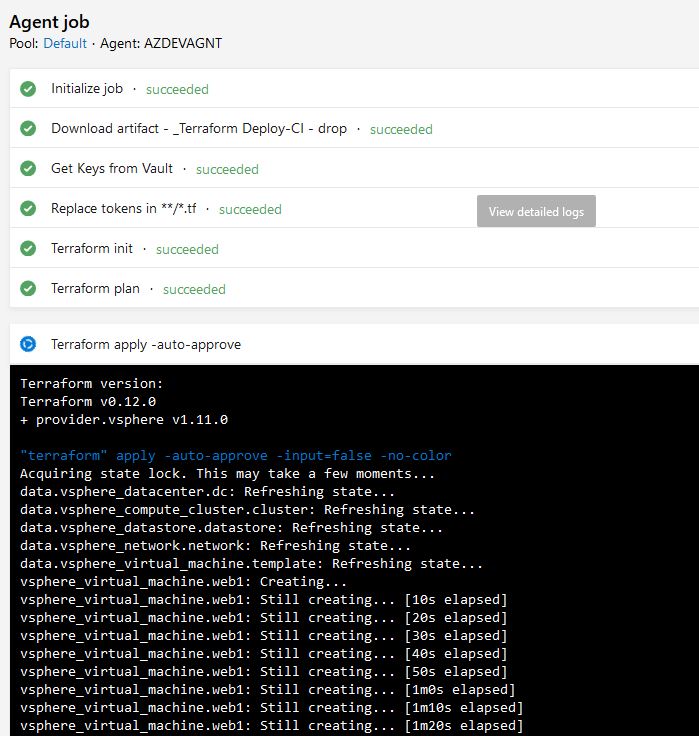
After a successful deployment, we will see that our Web1 VM has been created. Azure DevOps pipelines are extremely powerful for building and testing infrastructure. In this example, we just deployed a single VM for demonstration purposes, in a normal use case a pipeline this would be just one step to get the infrastructure going for an entire application build. Microsoft is focusing heavily upon the improvement of their Azure Devops product and the upgrade frequency of it really shows. It will be interesting to see how the application evolves in the future as well as the audience that uses it.
What are your thoughts on these Infrastructure as Code deployments? Useful? Difficult? Let me know in the comments below!


Not a DOJO Member yet?
Join thousands of other IT pros and receive a weekly roundup email with the latest content & updates!
More in this category


About the Author

Luke Orellana

