Save to My DOJO
I, and a lot of other authors, have been cheerleading for PowerShell for quite some time. I think that a major problem with the most common approach is that it highlights all the wonderful things about PowerShell as a technology. I have my doubt that very many IT professionals decide to adopt new things based on that sort of presentation, especially when it comes to something that requires as much time and effort investment as PowerShell might. What needs to be done for those pros is to show them that the investment pays off for them. That’s what this open-ended post series aims to do.
We Understand Why You Didn’t Jump On It
I’ve seen a lot of writings attempting to shame or scare admins into dropping everything and devoting their lives to becoming PowerShell experts. They’ll tell you that you’re stupid or that your boss is on his way right now to fire you for being too shortsighted to continue in your chosen career path. Of course, none of these things are true. Bosses just want you to be effective. They don’t care how you get the job done. For a great many people in IT, their bosses probably aren’t even aware of the ways to get things done. If they did, there wouldn’t be so many still-employed “admins” out there whose entire “troubleshooting” toolkit is re-imaging machines.
No, you’re busy. You’re really busy. You do enough work to cover three separate admin roles and you’re always on-call. You can barely get through one surprise special project before another one lands on your desk. Just taking time to catch up on some blogs is a luxury. I’ve certainly been there. That’s where I was when my PowerShell journey began. For me, it was Exchange Server. I had recently upgraded from 2003 to 2010. I needed to do some things that I thought were fairly minor tasks. Turns out that a lot of the functionality that I needed had been removed from the Exchange Management Console in a recent update. For the rest of it, the recommended solution was to use PowerShell.
As for Hyper-V, I had just started working with James O’Neill’s PSHyperV module. I had printed out the documentation and run through a few things. It wasn’t really until I started working on the automated export script for Altaro that I really began to dive into its real, um, “power”. When Windows/Hyper-V Server 2012 came out with its official PowerShell module, it started to look more like Exchange in that the PowerShell functionality exceeded what could be done with the GUI. Since then, I’ve tried to use what I’ve learned to convince others that PowerShell is well worth the effort.
The problem with my approach has been that I tend to show large, grandiose uses of PowerShell. I publish these 1,000+ line scripts that do things I’m really happy with, but probably don’t do much to convince anyone to start learning PowerShell. Obviously, such a script requires a great deal of both time and effort. If I had never used PowerShell and thought that this was the sort of thing that was necessary to use PowerShell effectively, there’s no way I would ever leap to embrace it. The thing is, this is not normative for the way the average admin should be using PowerShell on a daily basis.
The Purpose of this Series
What I intend to do with this series is dial down the intensity. We’ll explore some much shorter scripts that seek to solve more immediate problems and improve existing processes. What I’m not going to do is just show you how to do things in PowerShell that could be done simply enough in the GUI. I’m going to show you how to do things that the GUI isn’t well-suited for. I’m going to show you how to automate things. I’m going to help you find easier ways to do your job so that PowerShell becomes worth your time.
The Primer
There are a lot of good tutorials and primers out there and I couldn’t possibly do as well, and certainly not better. At the same time, I understand that spending more time and resources on this probably isn’t a proposition that excites you. So, I’ll start with a list of a number of those materials and then show you some things of my own.
- Learn Windows PowerShell in a Month of Lunches, 2nd Edition by Don Jones and Jeff Hicks. I haven’t read this particular work myself just because I figured I was already past the point it wants to teach by the time it was published. I’ve read other works by Mr. Jones, and regular readers of this blog have already been introduced to Jeff Hicks. This one comes with good reviews, so I feel confident that it’s good work.
- PowerShell in Depth and the forthcoming PowerShell in Depth, 2nd Edition by Don Jones, Jeff Hicks, and Richard Siddaway. I have this one, and it’s very good and, as the title says, in-depth. This one isn’t quite as simple, but it’s one that you will be using for a long time.
- MSDN has published an online tutorial.
- Use your favorite RSS client and add the Scripting Guy’s blog. There are a combination of long articles and really quick solutions.
Getting Started
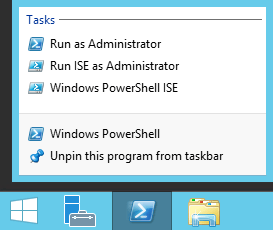
If you’ve never run PowerShell before, the first thing to do is learn how to kick it off. Starting with Server 2008 R2, there’s been an icon included on the taskbar. Clicking it will open it as the current user. If you want to run it with elevated privileges, you have to right-click on it and choose Run as Administrator.
 If you’re running Server Core or Hyper-V Server, then you just have to type PowerShell at the command prompt and press Enter. Of course, this works just as well from a standard command prompt in GUI editions as well.
If you haven’t got the PowerShell module for Hyper-V loaded (2012+), then the first thing you’ll want to enter is the following:
Add-WindowsFeature -Name RSAT-Hyper-V-Tools
Doing Things Quickly
One of the biggest impediments to jumping into PowerShell is all that typing. Fortunately, you don’t have to do nearly as much as you might think just from reading others’ scripts.
Aliases
The first thing to talk about is aliases. These are shorter ways to run common functions and enter common parameters. You won’t see these as often in published scripts because they impair readability. Their purpose is to reduce typing. If you want to see a list of these, just run:
Get-Alias
One that you’ll see very commonly is “foreach”. This is an alias for “ForEach-Object”. It’s what you’ll use when you want to step through multiple objects using a single function. These are usually not simple functions, so we won’t show an example right now. If you haven’t seen one already, you will.
Other aliases you’ll see and use a lot are “fl” and “ft”. They stand for “Format-List” and “Format-Table”, respectively. These are used for controlling output. So, if you run Get-VM, you get something like this:
Name  State   CPUUsage(%) MemoryAssigned(M) Uptime      Status
----  -----   ----------- ----------------- ------      ------
svdc1 Running 19          1156              15.23:02:33 Operating normally
This is a pre-defined format. Using the format commands, you can see other properties. Normally, we want to see all properties, so you might use this:
Get-VM | Format-List -Property *
This will show everything. You’ll use this often enough that you can shorten it to just fl:
Get-VM | fl -Property *
The asterisk means “all”, but you don’t have to pull all, if you don’t want to.
Get-VM | fl -Property Name, Uptime
Positional Parameters
Some parameters are used so often that it would be more convenient if you didn’t have to type them at all. Let’s start with the last example from the previous section. Most of the time when you’re formatting something, you want to look at specific properties. So, you don’t have to type -Property. If you don’t specify a parameter name, then Format-List assumes that the first thing you give it is a list of properties that you want to retrieve. The following does exactly the same thing as the previous:
Get-VM | fl Name, Uptime
A great many functions have positional parameters. We’ll show you later how to determine which parameters for a function are positional.
Tab Completion
The quickest way to save typing is by using tab completion. This wonderful gem is always active. Enter as many characters for a function, cmdlet, parameter, option, path, or filename, and press TAB to let PowerShell figure out what you want. If it doesn’t get it the first time, keep pressing TAB. To try it out, type in “Get-V” and press TAB a few times.
My favorite part of tab completion is for parameters. It’s hard to remember all of them, especially for functions you just discovered. After a function, enter a hyphen and press Tab to cycle through all available parameters. If you know part of the name, type as much as you know and press Tab.
Seeing What’s Available
The other issue with PowerShell is getting your head around everything that’s is available to you. There’s a lot out there and the content is expanding constantly. If you really want to see, just run:
Get-Command
Long before it stops scrolling, you’ll have an idea for just how much there is. Let’s trim the list a bit:
Get-Command -Module Hyper-V
Want to see cmdlets that are just for Hyper-V Replica?
Get-Command -Module Hyper-V -Name *replica*
This won’t always work. Sometimes cmdlets don’t include a name component that’s so easy to filter against. What you can always do is see what modules are there so you can figure out how to control certain technologies:
Get-Module -ListAvailable
Learning More About a Cmdlet
All of the built-in cmdlets have their own help that’s easily retrieved.
Get-Help Get-VM
This shows a short listing of help, usually good to give you a quick idea of what the function does and its usage. If you want more information, you can use:
Get-Help Get-VM -Full
If you don’t get much out of it, you might need to download updates. This is easily done:
Update-Help
If the system you’re using can’t access the Internet, perform a search for offline help updates. There is a solution, but it’s beyond what I want to talk about in this article.
Let’s look at the syntax output for Get-VM:
SYNTAX
    Get-VM [[-Name] <String[]>] [-ComputerName <String[]>] [<CommonParameters>]

    Get-VM [-ClusterObject] <PSObject> [<CommonParameters>]

    Get-VM [[-Id] <Guid>] [-ComputerName <String[]>] [<CommonParameters>]
What you see here are three different parameter sets for the Get-VM cmdlet. What that means is that there are three mutually exclusive ways you can use this cmdlet.
Brackets around an object mean that it is optional. In the first parameter set, everything is optional. That means if you run the cmdlet all by itself, it will attempt to do something. The parameters modify how it takes that action. When the brackets are around the parameter name itself, that means that it is positional. So, for Get-VM, if any string is passed in as the first parameter, it will assume that it is the name of a virtual machine and it will attempt to locate it.
Learning About PowerShell Features
PowerShell help has a number of entries that can help you learn about PowerShell’s innate capabilities. Enter the following:
Get-Help about_
Press Tab after the underscore, and you’ll cycle through all the available entries. Read about anything that interests you.
The Pipeline
One of the major strengths of PowerShell is its “pipeline”. It’s not exactly easy to explain or understand, especially if you don’t have a programming background. The simplest explanation is that many functions generate objects. For instance, Get-VM returns one or more virtual machine objects. The pipeline allows you to transfer that object directly into another function or cmdlet. If there aren’t any more, then the object is delivered to whatever output item there is. Since we’re talking about executing PowerShell inside a visible screen, then that’s where the output will go. Let’s look at a practical example:
Get-VM | Start-VM
The | has been called the “pipe” character for as long as I can remember, so it makes perfect sense that it’s how you invoke the pipeline. What happened here is that Get-VM emits one or more virtual machine objects. These are passed to Start-VM. If you look at Start-VM’s help, you’ll notice that one of its syntax lines is:
Start-VM [-VM] <VirtualMachine[]> [-AsJob] [-Passthru] [<CommonParameters>]
The first item here is a “VirtualMachine” object, which is exactly what Get-VM is emitting. If you check further down in Start-VM’s help (use -Full), you’ll find the expanded description for the VM parameter, it has the entry:
Accept pipeline input? true (ByValue)
This means that it accepts piped objects. The “ByValue” portion means that it will automatically match on a piped “VirtualMachine” object. There are also ways to match piped parameters based on their name, but that’s more advanced and not necessary for the sorts of things I intend to do with this series.
Next Steps
The next thing I want you to do is review Jeff Hick’s “10 Awesome Hyper-V Cmdlets” article. It shows a number of very common, practical cmdlets you can use in day-to-day operations. Play around with your newfound knowledge. For instance, Jeff shows you how to use Get-VMNetworkAdapter using parameters. Try piping in virtual machine objects instead.
Where I’m going to lead you from here is in short demonstrations of practical Hyper-V PowerShell applications. You may not see right now how Get-VM or any of these other cmdlets are meaningfully better than just using Hyper-V Manager. It will be my mission to change that and open your eyes to the world of possibilities presented by PowerShell. Along the way, we’ll build a toolkit that you may just find you can’t live without.


Not a DOJO Member yet?
Join thousands of other IT pros and receive a weekly roundup email with the latest content & updates!
More in this category


About the Author

Eric Siron


6 thoughts on "Hyper-V and PowerShell: Part 1 of However Many It Takes"
Want to be modern and successfull MS admin – study PowerShell. No doubt – it will help you in any situation.