Save to My DOJO
Managing your infrastructure remotely, and on the go, is now so ubiquitous that being unable to do so puts you, or your organization, at a competitive disadvantage. From meeting SLA response times to providing after-hours support, being able to work from anywhere is now a pressing necessity. There were times when I used to carry along a laptop equipped with an Internet dongle. When the dreaded call came, I would VPN to the office and work on whatever pressing issue was at hand.
However, technology has advanced and now most common mobile devices such as smartphones and tablets, are well-suited to do this task. Of course, there are still limitations, most notably screen real estate, that could otherwise be easily accomplished using a laptop or devices with larger screens. Think about having to use a vSphere client on a 5″ screen. Nah, I don’t think so.
Still, someone must have thought about designing a well-thought-out mobile app, something you could use to manage vSphere resources without driving you nuts. With that in mind, I did some research, ahem, typed in VMware on my Android phone, (sorry, not an iPhone or Windows fan) and this is what I got.
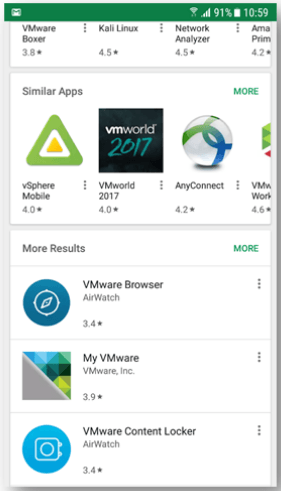
VMware apps on play store
It turns out there’s quite a number of VMware mobile apps available for download. So, for today’s post, I’ve chosen this one app called vSphere Mobile Watchlist. My goal is to assess its functionality and determine whether it’s worth adding to your bag of tools.
To test it out, I used an Android emulator running on Windows as well as my phone. The emulator allows me to take screenshots quicker but I’m still using a smartphone to make sure I don’t miss any gesture-driven functionality.
Other Available VMware Mobile Apps
There are third party tools worth looking into such as those from Infradog. Depending on the platform you’re running on, here are the links to the various apps stores listed in no order of preference.
I’ve also listed some of the VMware mobile apps and supported platforms as follows. For a complete description, refer to the app store download location.

VMware Mobile Apps
The vSphere Mobile Watchlist App
Let me first quote the app’s description.
vSphere Mobile Watchlist enables secure vSphere infrastructure monitoring and remediation directly from your smartphone. With Watchlist, VMware administrators will be able to log in to a vCenter Server or ESXi host directly and choose virtual machines and hosts from inventory to create targeted views of objects and their properties. Remediate directly from the device with power and management operations, and delegation of tasks to onsite colleagues with linked relevant Knowledge Base (KB) articles.
The one thing that immediately caught my eye is the “Remediate directly from the device with power and management operations“. Fantastic, if it really works as advertised.
Installing the app
As mentioned already, besides my Android phone, I’m also using an Android emulator. I picked one at random from the list suggested by Google. It’s called MEmu and that’s as far as my review of that goes. Though I must admit that from first impressions, it seems to do a great job at emulating the popular OS on Windows. Here it is running on Windows 10.
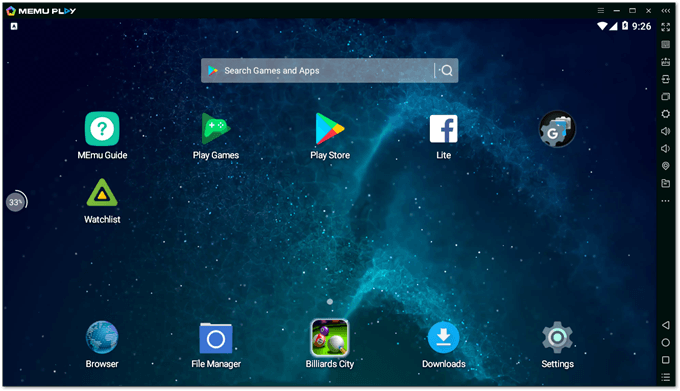
An Android emulator running on Windows 10
As with all Android apps, installing Watchlist is a simple matter of heading to Play Store, typing in vSphere Mobile Watchlist and clicking on Install.
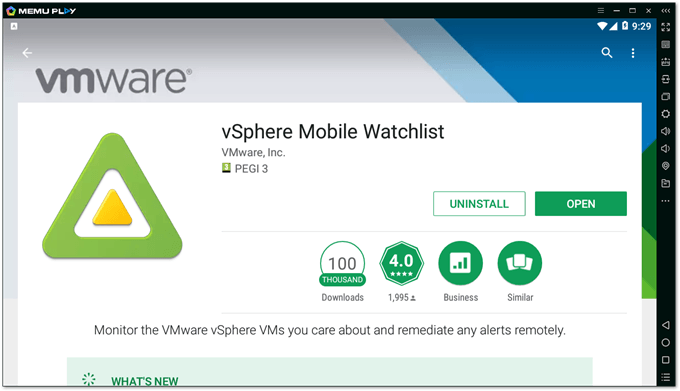
Installing vSphere Mobile Watchlist from Play Store
After you install the software, press either Open or the icon that’s created on the Home screen. Accept the EULA as is customary with all software installations.

Type in the IP address or FQDN of an ESXi host or vCenter Server you want to connect to, along with the credentials.
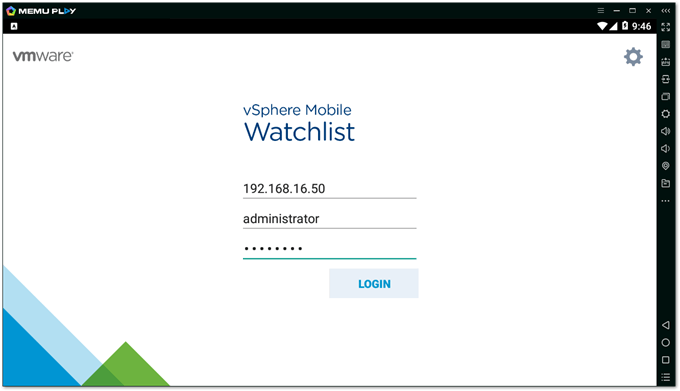
Select the ESXi host or vCenter Server you want to connect to
When logging in for the first time, it is highly likely that you are presented with an SSL warning. If that’s the case, press Settings, and enable the Trust on First Use option and press Done. This takes you back to the start where you can press Login to continue.
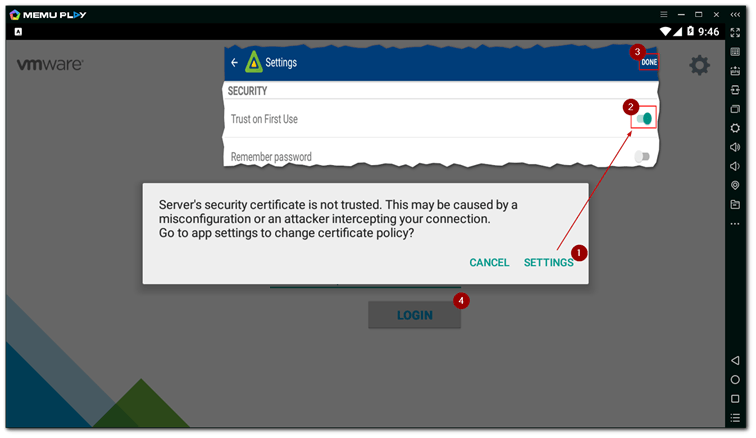
SSL certificate warning first time you log in. Enabling the Trust on First Use option fixes the issue.
A second SSL warning may also be given if the IP address, or FQDN, used does not match the one specified in the host’s or vCenter Server’s certificate. You can safely press OK to connect.
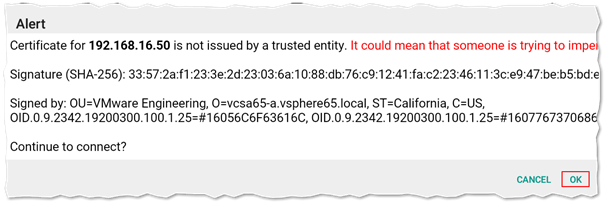
Certificate name mismatch warning
And we’re in, finally.
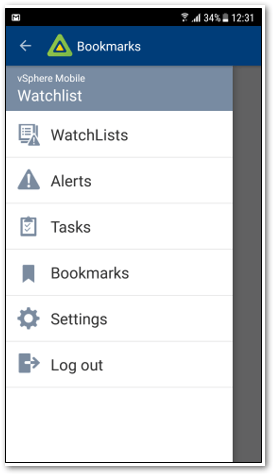
The vSphere Mobile WatchList application’s main screen
You’ll find a number of menu items on the main screen. WatchLists is the one item you’ll be using the most, the use of which is explained in the following section. Alerts and Tasks bring together all the event data pertaining to the ESXi host or vCenter Server, the app is currently connected to. Under Settings, you’ll only find a few Security and Data related items. As for Bookmarks, I couldn’t find how to use it but I suspect it’s akin to a favorites tab.
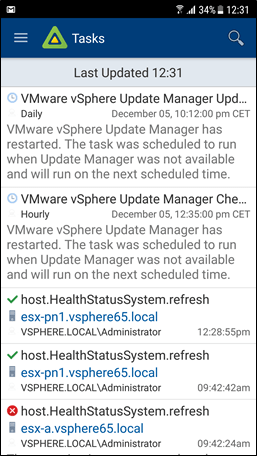
The tasks history of a vCenter Server the app is connected to
Watchlists. What about them?
On the main screen, you will see two options called Virtual Machines and Hosts. Pressing on either one, allows you to add VMs, or ESXi hosts, to the default watchlist which is initially empty. As an example, I connected to vCenter Server and proceeded to populate the default watchlist with a few VMs I wish to monitor and manage remotely.
To do this, simply press on Virtual Machines and select the VMs you want to be included on the watchlist. Pressing Select All adds all the VMs listed on the watchlist. Pressing Back takes you to the main screen.
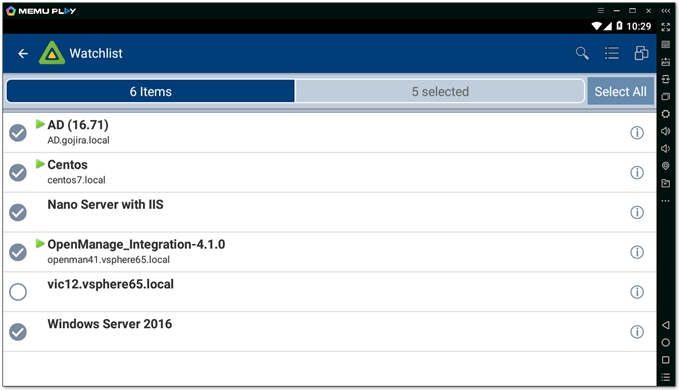
Adding VMs to the default watchlist
The process of creating new watchlists is not exactly intuitive. From a UI perspective, the process could be better laid out. Regardless, the procedure to add a new watchlist is as follows. Press the Watchlist drop-down box (1) followed by Edit (2). Then, press the + icon (3), type in a name for the new watchlist (4) – I’ve named mine ESXi Hosts – and press Save (5). When done, go back and select Virtual Machines or Hosts. Select the items you want to be included on the new watchlist.
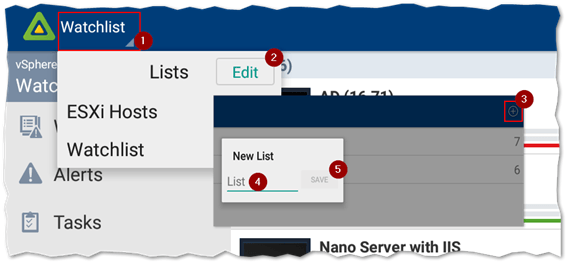
Creating a new watchlist
Here’s a VM populated watchlist as displayed on my phone.
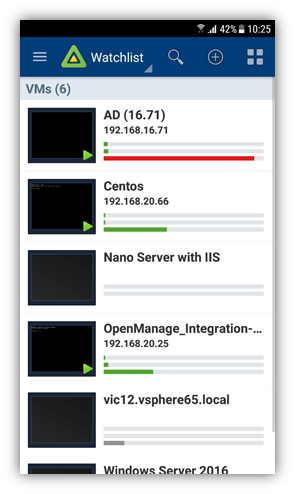
A watchlist containing VM objects
The next video, documents the whole shebang, from installing the app to creating and populating a watchlist.
Monitoring and Managing hosts and VMs
Once your watchlists are up and running, there are a few things you could do. Straight off the bat, you can visualize resource utilization for both VMs and ESXi hosts. The three bars under every watchlist item, from top to bottom, correspond to the CPU, memory, and storage currently in use by the resource. Pressing on the selected item reveals more details as per the next screenshot.
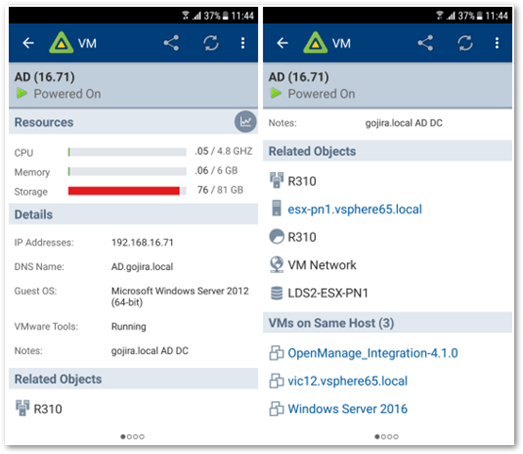
Detailed information about a VM included in a watchlist
Resource utilization values and other information such as guest OS type and assigned IP addresses are displayed first. Scrolling down brings up a list of objects related to the VM or host. These might include the parent host, cluster and network information, the datastore name and a list of other VMs hosted on the same ESXi host.
Swiping to the left reveals the remote console screen with a screenshot of the VM’s console displayed in the middle. Better still, you can remote connect to a VM via the Launch Console icon.
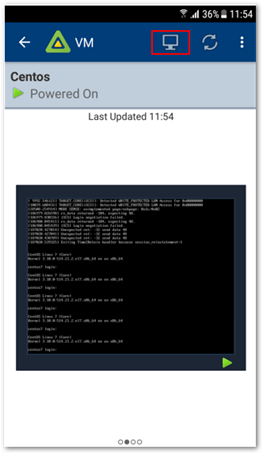
Remote console screen
Another left swipe takes you the management tasks screen. Here, you can power up a VM or manage snapshots not to mention other functionality. The same functionality, minus the snapshots, is available when you right-swipe a watchlist item as shown in the second screenshot below. In both cases, you are prompted to confirm the selected action.
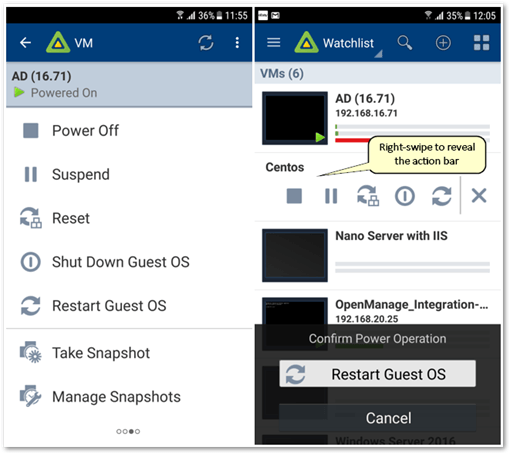
VM management actions
If the selected VM is powered down, you have the option to change the allocated CPU and Memory values.
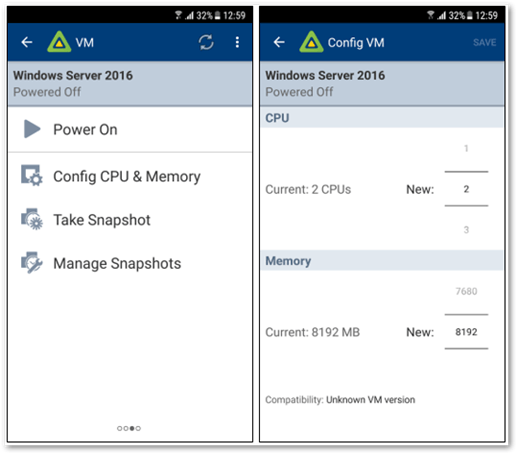
Change the CPU and Memory values for a powered down virtual machine
Left-swiping to the last screen gives you access to the Tasks and Events associated with the selected resource, a great help when troubleshooting. Filters can be set on both Tasks and Events by pressing the respective icon at the top of the screen.
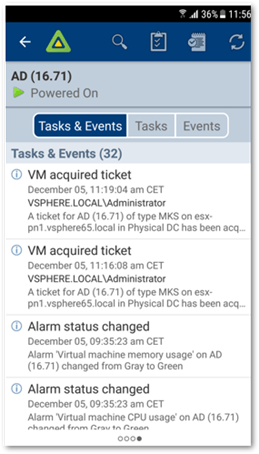
Task and Events for a given resource. Filters for both can be applied via icons at the top of the screen.
Give or take, you’ll find the same screen layout and functionality when selecting ESXi hosts. The minor differences are a lack of a remote console screen and the addition of Sensor Data. The is shown in the last screenshot below. You can also put a host in maintenance mode, disconnect it from vCenter Server, reboot it, and also shut it down if required.
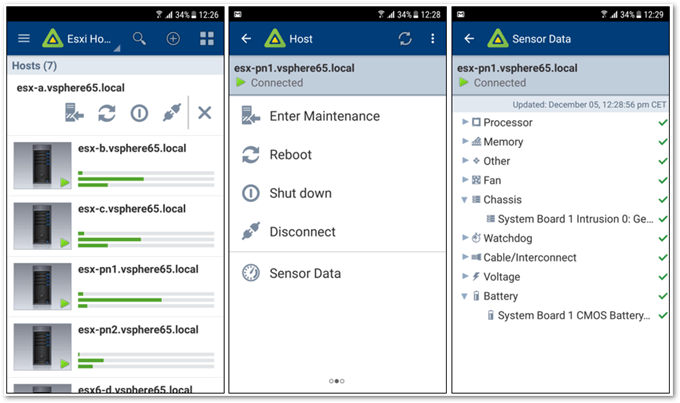
Monitoring and functionality screens for ESXi resources
Resource utilization graphs for CPU and Memory, Disk, and Network are accessible for both VMs and ESXi hosts via the Resources icon.
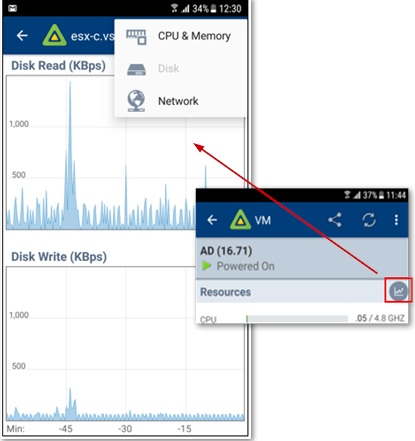
Resource utilization graphs are available for both VM and ESXi resources
Conclusion
In my opinion, this is a great app to have especially if your job description includes outside of office hours support. VPN is probably the most secure option when connecting to your vSphere environment over the Internet. An alternative is to use port forwarding to redirect traffic to your vCenter Server and/or ESXi hosts without the need to set up a VPN or make your servers Internet facing.
Note I haven’t tested how the app performs when connected to the Internet, so I’m leaving this as an exercise to you, the reader, to test it out. Feel free to leave comments on your finding if you do. In the meantime, do have a look around on this blog for more interesting VMware related posts.
[the_ad id=”4738″][the_ad id=”4796″]


Not a DOJO Member yet?
Join thousands of other IT pros and receive a weekly roundup email with the latest content & updates!
More in this category


About the Author
Jason Fenech


13 thoughts on "How To Monitor Your vSphere VMs On The Go"
I’m using tags to organize VMs, I can’t find them within the app…
Hi. Mostly it’s because they are not supported. Have you tried checking the app’s documentation?
Watchlist is no longer available in the Google Play store.
Why tis great application isn’t available anymore?
Hi Jovan,
Looks like it was updated: https://play.google.com/store/apps/details?id=com.vmware.vsphere.cloudsmith&hl=en. Our wishes have been granted!