Save to My DOJO
Table of contents
The Compare-VM cmdlet is a useful tool that creates a “VM compatibility report”. This report can be used to fix incompatibility issues between a VM and a host. It can come in handy either when trying to migrate a VM to another host, import a VM copy, or when trying to view the VM configuration file for Server 2016 and Windows 10. This nifty tool can even be used to live migrate VMs between hosts with different vSwitches!
Compare a VM with Another Host
Let’s say we have a VM on a Hyper-V host and want to migrate that VM to another host. If there are issues with the migration process, we can create a compatibility report using Compare-VM to verify that the VM is compatible to run on the destination host. In the example below we have a VM, Luke-DC02, that we want to create a compatibility report for if it migrated to Luke-HV04. The steps are simple, we just need to specify the name of the VM using the –Name parameter and the host that we are planning to migrate to using the –DestinationHost parameter:
$VM = Compare-VM –Name "luke-dc02" -DestinationHost "luke-hv04"
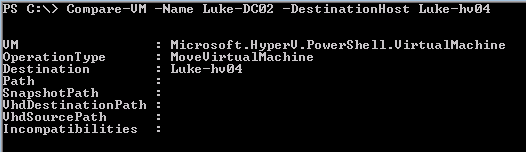
In the compatibility report, we can see that the INCOMPATIBILITIES object contains no data. If there was an incompatibility it would display the message IDs. This shows us that that the VM is compatible with the destination host.
Compare a VM Export with a Host
You can also run a compatibility report for troubleshooting VMs that you would like to import. In the example below we have a VM that I exported from my production Hyper-V environment. I would like to import it into my test environment. The import process failed due to configuration errors and the PowerShell error message actually states to use Compare-VM to troubleshoot:

The nice thing about this cmdlet is that it uses the same parameters as Import-VM. So, to create a compatibility report for us to view and manipulate, we will switch Import-VM with Compare-VM and store the information as the variable $VM so that we can easily display the different properties contained within the report. The syntax looks like this:
$vm = Compare-vm -path "C:ClusterStorageVolume1Test ExportTGLAB-WSUS01Virtual Machines200AF1BE-E1E6-40AE-B48F-E25504670724.XML" -virtualmachinepath "C:ClusterStorageVolume1Test ExportTGLAB-WSUS01" -copy
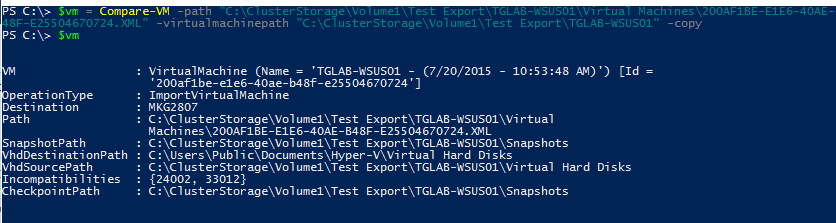
Now when we display the contents of $VM we can see that the INCOMPATIBILITIES property contains some message IDs. To see more information about the incompatibilities we can reference our $VM variable and specify the INCOMPATIBILITIES property:
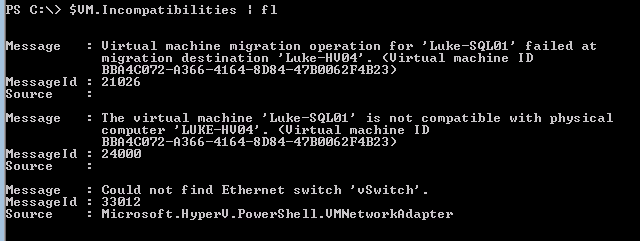
$VM.Incompatibilities

Now we can see that the 2 message IDs were because the processor isn’t compatible and because a networking component is missing on our test environment.
Viewing the VM Configuration in Server 2016
In Server 2016 and Windows 10, the VM configuration file has been changed from an XML format to a binary format. It now uses the .VMCX extension and if we open up this file in notepad, we just get a bunch of gibberish:
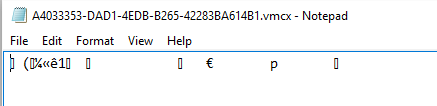
Some Hyper-V administrators find it very useful to view the VM config file for troubleshooting issues such as orphaned checkpoints. The VM config file can actually be used as a referenced point to piece the AVHDX files back together. However, now that the format has been changed we can no longer open the config file in notepad and view the information. Thanks to the Compare-VM cmdlet, we can use PowerShell to translate the information from the VMCX file into a human readable format.
First, we browse to the directory where our virtual machines are stored at:
CD "C:ProgramDataMicrosoftWindowsHyper-VVirtual Machines”

Now, we use Compare-VM and the –Path parameter to specify the path of the VMCX file that we want to view. We also need to use the –GenerateNewID parameter since the VM we are looking at is already registered on the host. Also, since we only want to look at the VM property of the compatibility report, we will wrap our command in parenthesis and specify the VM property with a “.” symbol. We will want to store the information in a variable ($VM) so we can easily expand some of the properties. The entire syntax looks like the following:
$VM = (Compare-VM -Copy -Path.A4033353-DAD1-4EDB-B265-42283BA614B1.vmcx –GenerateNewID).VM

The information of the VM configuration is stored in the $VM variable. Since this object is using the Microsoft.HyperV.Powershell.VirtualMachine TypeName, the default display properties are only set to display a few properties. So, to view all the information gathered from the VM config file, we just have to specify the variable and pipe it to Select-Object with the asterisk (*) symbol to specify that we want all properties displayed:
$vm| Select-object *
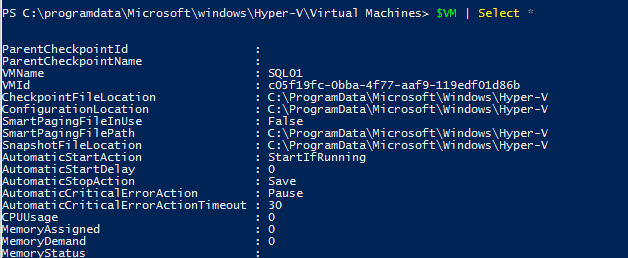
We can now view the information for all the properties of our VM. For some of the properties that are multi-valued such as NETWORKADAPTER or HARDRIVES you can see that they are enclosed in curly brackets:
![]()
We can view all the contents of these types of properties by simply specifying the property when we input our variable:
$vm.harddrives

This provides more information of the VM hard drive configuration.
Using Compare-VM to Modify a VM During Live Migration
This is probably one of the coolest tricks with Compare-VM. Lets say we want to live migrate our VMs to another host that has different vSwitches. We can use PowerShell to change the vSwitch of the VM during the migration process without dropping a connection!
In the example below we want to live migrate our VM (Luke-SQL01)to another host (Luke-HV04) that has a vSwitch that’s named differently than our current host. First, we want to generate a VM compatibility report of our VM by running the following command:
$VM = Compare-VM -Name "Luke-SQL01" -DestinationHost "Luke-HV04"
![]()
When we view the incompatibilities of the VM, we can see that the only issue with this VM is the vSwitch labeled “vSwitch” is missing from the destination host:
Now that we have our VM compatibiliy report saved to a variable ($VM), we can work some PowerShell magic and modify the vSwitch information in the compatibility report to change the vSwitch of the VM to “Virtual Switch”. The syntax is the following:
$VM.Incompatibilities | Where-Object {$_.MessageID –eq 33012} | ForEach-Object {Connect-VMNetworkAdapter $_.Source –Switchname “VirtualSwitch”}
![]()
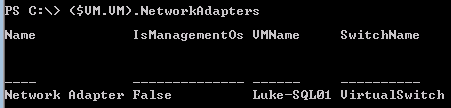
When we check the NETWORKADAPTERS property of our VM configuration, we can see proof that the vSwitch has been modified to match the one on the destination host:
Now, since we have our modified VM compatibility report stored in a variable ($VM), we can pass it through the –CompatibilityReport parameter with the Move-VM cmdlet:
Move-VM –CompatibilityReport $VM
![]()
The live migration process starts with the VM now using the destination host’s vSwitch:
![]()
This technique can also be implemented into a script for those looking to automate migrating multiple VMs in this way.


Not a DOJO Member yet?
Join thousands of other IT pros and receive a weekly roundup email with the latest content & updates!
More in this category


About the Author

Luke Orellana


7 thoughts on "Using Compare-VM"
wow, great to know this about migrating to another host with a different switch name. What about the case where I also need to add a vlan tag after the VM moves to the new switch? Must I do that after the “Move-VM” and use another CMDlt, or can I incorporate this into the Move-VM somehow? Thanks!
I’m trying to use Compare-VM when migrating a VM to a host with a different virtual switch as you describe, but not having much luck. I get an error ‘Connect-VMNetworkAdapter: Hyper-V was unable to find a virtual switch with the name “Hyper-V Network”‘. I’m running the commands on the source hyper-v host. This is the line where it runs into the error:
$VMReport.Incompatibilities | ?{$_.messageid -eq 33012}| %{connect-vmnetworkadapter $_.Source -switchname “Hyper-V Network”}
If anyone else has run into this or sees where I’m going wrong, I’d appreciate any feedback you might have…
I’m having the same problem here as Neighborgeek reported some time back but it doesn’t seem like he solved it. I’m receiving an error that the switch does not exist when running:
$VM.Incompatibilities | Where-Object {$_.MessageID –eq 33012} | ForEach-Object {Connect-VMNetworkAdapter $_.Source –Switchname “testing”}
It appears it is looking for the switch name on the local server (which doesn’t exist).
To verify I created a switch of the same name on the local host, which then allows the command to run but it updates the switch in use on the running VM on the local host which interrupts network connectivity.
Hoping someone has this worked out and may be able to assist.
Excellent thx!
how can i set vlan id on destination switch
Hi Kirill,
Are you wanting to set the VLAN on the VM Network adapter or the destination vSwitch on the Hyper-v host? Check out this guide we have on Hyper-V networking its super in depth and shows you how to set those with PowerShell: https://www.altaro.com/hyper-v/virtual-networking-configuration-best-practices/.
-Thanks!