Save to My DOJO
One of the first things to check for whenever using a snapshot or checkpoint in Hyper-V is the available storage in the location where checkpoints are being stored. If enough space is available, the next thing to verify is how long the checkpoint is going to be left in place. Verifying the proper storage for using checkpoints is an important step and following these two steps can save you from shame later if the environment you are working on has very little wiggle room as far as storage.
What Happens When a Checkpoint is Created?
When a checkpoint is created on a VM this is the process that occurs:
- The VM that the checkpoint is created for is quickly paused. This pause happens so fast that it is not noticeable to the end user.
- While the VM is paused, an AVHDX file is created (by default, in the same location as the original Virtual Disk) and the virtual machine is reconfigured to use that file as storage.
- The VM is then resumed.
Also, if you inspect the AVHDX file that is created, you will find that it is a differencing disk:
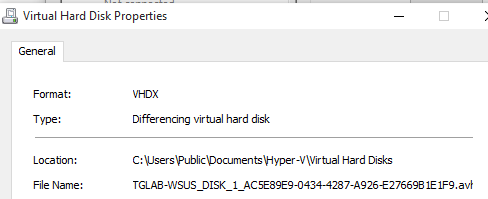
A differencing disk is a virtual disk that is used to store changes made to its parent virtual disk. Meaning, all ongoing changes are now written to the AVHDX file. This causes the file to grow in size and depending on how much change data is being created on the VM it can grow either fast or slow. The maximum size that an AVHDX file can grow follows the same limitations of a differencing disk, which is limited to the size of its parent VHD. So, if we have a VM using an 80GB VHD and we create a checkpoint, the largest that checkpoint can grow is 80GB.
How does a checkpoint work when a VM is using multiple VHDXs? Let’s say we have an SQL server with a C drive for the OS and a D drive for data. We take a Checkpoint of the VM. Since there are two VHDX files being used by this VM what happens? When a checkpoint is taken of the VM, an AVHDX file is created for each VHDX file configured:

So if our C drive is 80GB and the D drive is 400GB, both AVHDX files combined can potentially consume 480GB of storage. This is how checkpoints can start to really consume a lot of storage if left out for a long time.
What Happens if a Checkpoint Consumes All Storage?
If the location where the checkpoints are being stored runs out of available free space, Hyper-V will pause the VM. This not only affects the VM that has the growing checkpoint, but also has the potential to affect other VMs that are using differencing or dynamic disks that are stored in the same location. This process occurs so that the VMs don’t start failing disk writes within the OS of the VM and possibly cause file corruption.
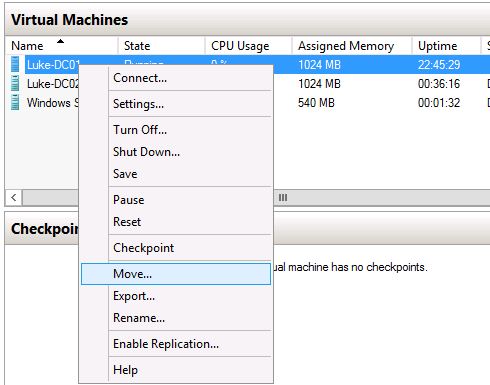
In the demonstration below, I have 3 VMs (LUKE-DC01, LUKE-DC02, and WINDOWS SERVER) all stored in the same location. I created a snapshot of the VM WINDOWS SERVER and copied a large amount of files to the VM causing the changes to be saved to the AVHDX file. This resulted in the file growing in size to the point where the VM storage of the Hyper-V host was filled. LUKE-DC02 has a dynamic disk while LUKE-DC01 is using a fixed disk. So because available space for VHD storage ran out, Hyper-V paused the VMs LUKE-DC02 and WINDOWS SERVER:

Another “gotcha” that occurs in this scenario is that the option to delete the checkpoint is no longer available, this is because the process of merging checkpoints requires some storage to be available.
How to Free Up Space and Get the VMs Running Again
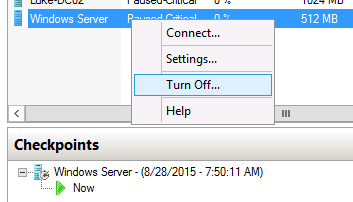
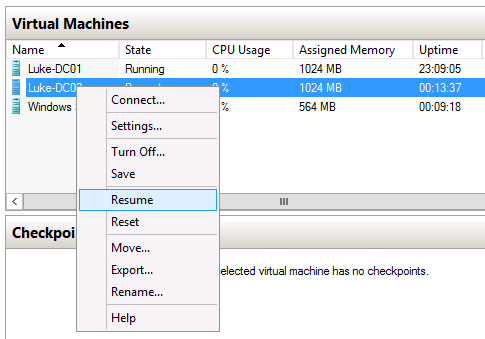
When the VMs are paused, the only way to resume them is to free up disk space. An easy way to free up space is to delete the checkpoint. However, the option is not available since there isn’t enough space to perform the merge process. A way around this, is to turn the VM off by right clicking on the VM and selecting Turn Off:
This creates additional space since turning off the VM removes the VM saved state files that are created on VM start up. Usually they will be about the same size as the memory allocated to the VM:

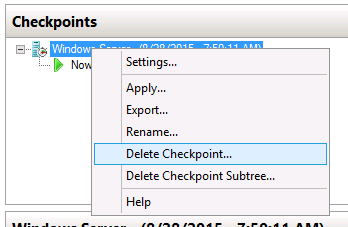
Now that there is space freed up, we can now right click on the VM and select Delete Checkpoint to merge the checkpoint and free up space:
Another way to free up space if you do not want to delete the checkpoint is by performing a live storage migration to another location. Just right click on the VM you want to move and select Move:
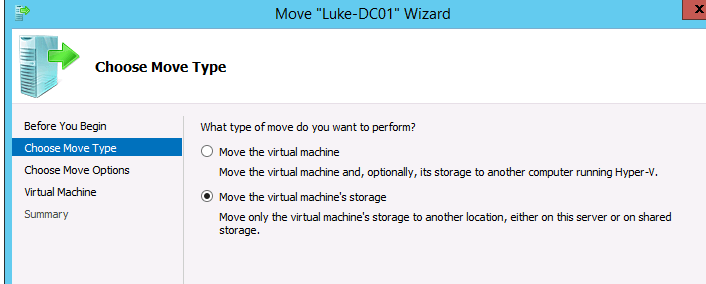
The move wizard will appear, since we just want to move the storage of the VM select the option to move the virtual machine’s storage and click Next:
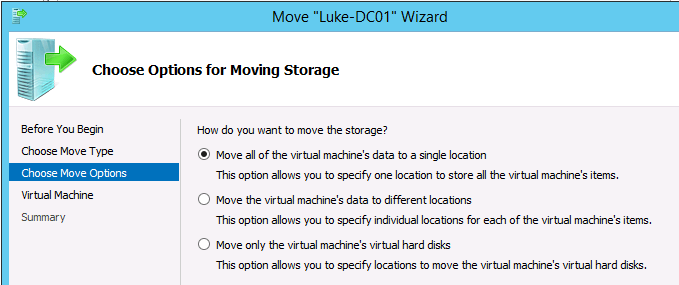
Select the option depending on what component of the VM you would like to move, in this example we will move the entire VM to another location, so we will select move all of the virtual machine’s data to a single location and click Next:
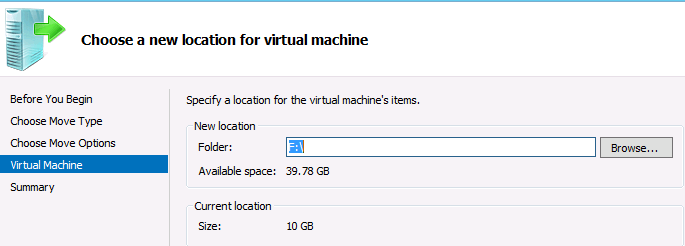
Then we will select the new location for the VM and click Finish:
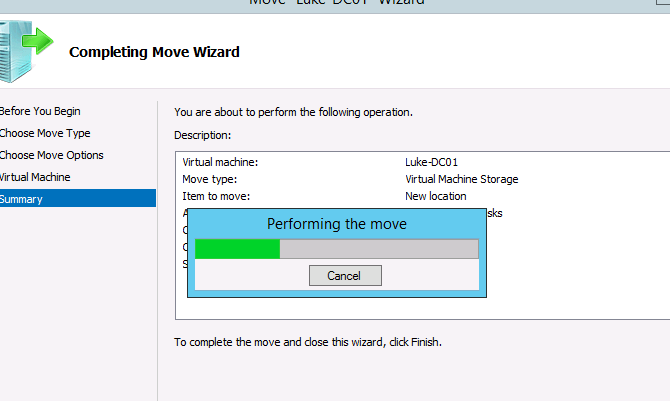
The storage migration will proceed:
Once the migration process is done, right click on each paused VM and select Resume:
The VMs should resume to the state they were previously in before the VM storage was filled up.


Not a DOJO Member yet?
Join thousands of other IT pros and receive a weekly roundup email with the latest content & updates!
More in this category


About the Author

Luke Orellana


4 thoughts on "How to Verify Storage Before Using Checkpoints in Hyper-V"
im creating a small network for vitualization project in college. i have sever with 1 TB and a NAS attached where my group has 150 GB we need to put 3 servers on it and we are giving each one of them 30 GB which mean that we will only have 60 GB left for back up or any additional tasks we need to complete. we have to come up with a back up solution and well i have read about checkpoint a lot but it seems that with such small storage it does not seem good to use checkpoint.
we have to use the NAS for vhd storage (Project requirement)
so what im asking is checkpoint a valid solution for us or would it cause more problems than solutions due to small amount of storage space?
Hello Johann,
You can save space on your VMs by using Dynamic Expanding VHD’s. This will cause each VM to only use space as it is written to it. Read here for more information: https://www.altaro.com/hyper-v/proper-use-of-hyper-v-dynamic-disks/. I wouldn’t recommend using Checkpoints as a backup, they aren’t a backup solution. Altaro has a free backup solution you may be able to use for this https://go.altaro.com/altaro-hyper-v-backup-gppc/?LP=Gppc-h0v1-Hyper-V-Backup-SEARCH-Free-US-CA&adpos=&n=g&geo=9017528&i=&d=c&gclid=Cj0KCQjwmdzzBRC7ARIsANdqRRkT9SpSjPQheAGyDepqiWXp7udgWKORe27fUIBCaYnpe7t7w1TVJIAaApnAEALw_wcB. Also you can use Windows Server backup to backup to an NFS share on the NAS. Let me know if you have any other questions, good luck!