Save to My DOJO

In our previous article, we successfully provisioned a VM in vSphere using Terraform while saving our state files to Terraform Enterprise. Now, we will take it a step further and use Desired State Configuration to customize our VM even further. Terraform can easily be confused as another form of Configuration Management, however, its not the same as products like Ansible, Chef, DSC, or Puppet. Terraform is classified as an “orchestration tool” which is used to define, deploy, and organize infrastructure, while Configuration Management software is used to deploy and manage the OS and hosted software. We will add an additional element to our VM deployment process that includes adding our VM into Azure Automation‘s Configuration Management and applying a configuration to the node.
Creating an Azure Automation Account
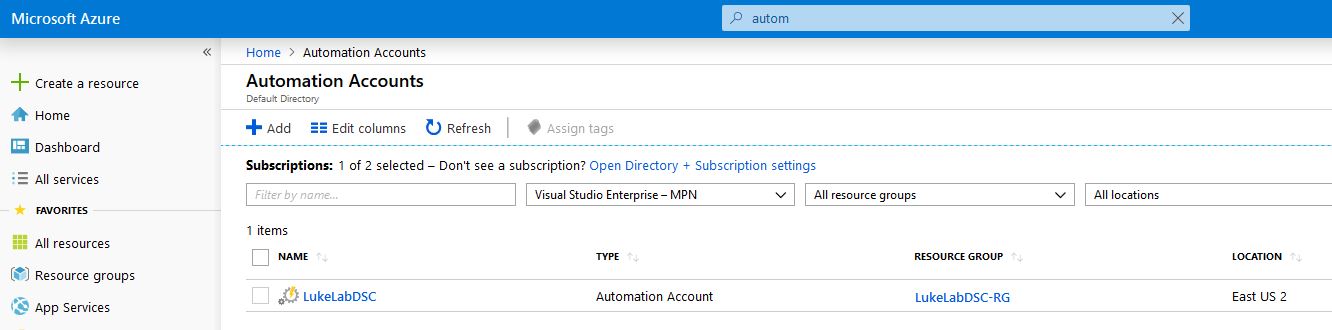
To get started, we need to create an Azure Automation Account in order to use Azure DSC with our on-prem VMs. If you do not already have an Azure account, sign up for the free trial. Azure DSC gives us some great management tools for managing our DSC nodes. This service is free for all VMs that reside in Azure, however for on-prem nodes, your first 5 nodes are free, otherwise, it’s $6 USD a month which in the grand scheme of things isn’t a bad deal. Also, you can adjust the pull intervals to reduce that cost even further. To create the Automation Account search for the service in the search bar at the top of the screen, then select Add to create your account:
Now that our Automation Account has been created, we can upload a DSC configuration and compile it in order to apply a “desired state” to our VM deployment. For our example, I’m going to upload a simple DSC configuration to install the web server role. To do this, we’ll save the below configuration to a .ps1. I named mine “webserver.ps1”:
Configuration WebserverConfig {

    # Import the module for dsc
    Import-DscResource -ModuleName PsDesiredStateConfiguration

    Node 'localhost' {

        #ensures that the Web-Server (IIS) feature is enabled.
        WindowsFeature WebServer {
            Ensure = "Present"
            Name   = "Web-Server"
        }


    }
}
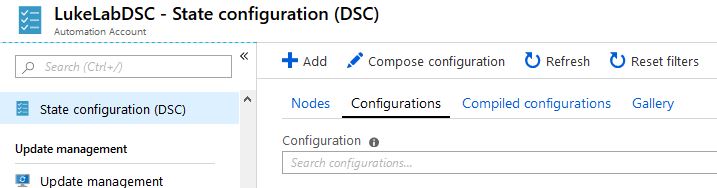
To upload the configuration, navigate to the Automation Account we created and select State Configuration (DSC) on the left-hand side. Then select the Configurations tab and choose Add:
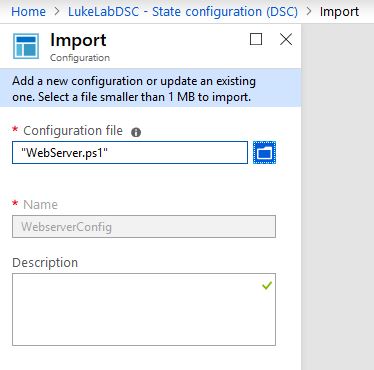
Select the .ps1 file we just created, in my example it was saved as “Webserver.ps1”. Click OK to import it:
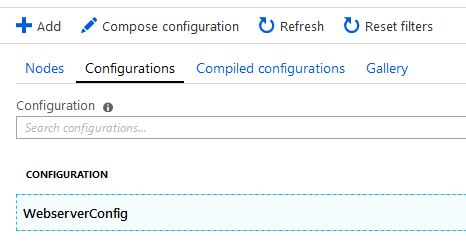
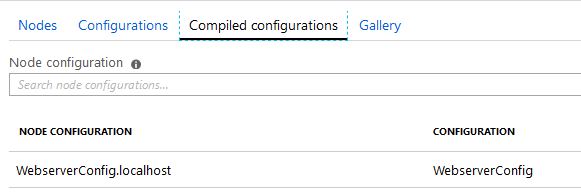
Now our configuration is showing in the list, select the WebServerConfig configuration:
Now we are presented with a menu for compiling our configuration. This is the process where a mof file is generated from our configuration we just uploaded. So click on Compile. The Completed status will show once it has finished, it can take a few minutes:

Note the name of our newly compiled configuration, we will use that in our Terraform configuration to specify the name of the config to assign to the VM after deployment:
Integration with vSphere VM Templates
In order to add Windows on-premise servers into Azure Configuration Management, we need to generate a meta mof file that tells the Local Configuration Manager to report into our Azure Automation Account. After we generate this meta mof file, we will store it on our VMware Template and use Terraform’s customize os options to run a PowerShell script that configures the LCM when the VM gets built.
To generate our meta mof, we will need the AZ cmdlets. If you don’t have them you can install them on an administrative PowerShell console with the following command:
install-module AZ -Force
Next, we’ll use the Connect-AZAccount command to connect to our Azure tenant:
Connect-AzAccount
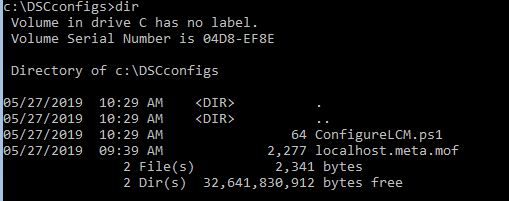
Once connected, we will generate our meta mof file to the “C:\DSCConfigs” directory. We will use the Get-AZAutomationDSCOnboardingMetaConfig cmdlet and specify our Automation Account Name and Resource Group. Also, we will want to use the computername localhost. This is because we are going to be moving this metamof file to the VM Template and configuring the LCM directly from the VM Template on deployment:
Get-AzAutomationDscOnboardingMetaconfig -ResourceGroupName 'LukelabDSC-RG' -AutomationAccountName 'LukeLabDSC' -ComputerName localhost -OutputFolder "C:\DSCConfigs"
My “localhost.meta.mof file” has been created:

Now we will need to create a script that will apply the meta configuration from the file. So copy the command below and save it as a .ps1. I saved mine as “ConfigureLCM.ps1”:
Set-DSCLocalConfigurationManager -path 'C:\DSCConfigs' -force
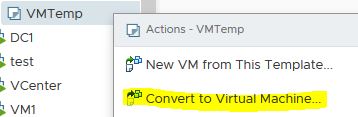
Now, we can transfer our meta mof file and ConfigureLCM.ps1 script to our VM template. VCenter, right click on the VM Template and choose Convert to Virtual Machine:
We’ll power up the template VM and transfer our two files to the C:\DSCConfigs folder. Note that the .ps1 calls the meta mof file from that folder so if you want to place them elsewhere you will need to change the directory on the .ps1:
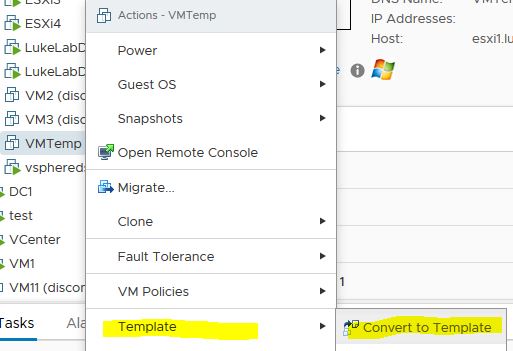
Next, power off the VM and convert it back to a template:
One last .PS1 file to create. We must make a script for Terraform to execute for assigning the VM to the specified DSC Compiled Configuration. I’ve created a service principal account and assigned the appropriate permissions to assign configurations to DSC nodes. The script will use that account to connect to Azure and perform our node assignments. Note that for the purpose of making the example simple, I’ve hardcoded the password for the Service Principal Account into the script. I highly recommend taking another approach like encrypting a text file with the password and retrieving the password with a designated service account. I saved this script as “C:\Scripts\AddNodeToDSCConfig.ps1” in my example. We’ll use the parameters to pass through the VM name and the compiled configuration to apply:
param(

[String]$servername,
[string]$dscconfig


)


#Automation Account Info
$resourceGroup = "LukeLabDSC-RG"
$AutomationAccountName = "LukeLabDSC"


#Service Principal Credentials
$password = ConvertTo-SecureString 'P@ssw0rd' -AsPlainText -Force
$credential = New-Object System.Management.Automation.PSCredential ('a38b9074-e00e-41d8-b0e1-dbd59250e120', $password)

#connect to Azure Account
Connect-AzAccount -Credential $Credential -Tenant "24e2975c-af72-454e-8dc0-579d886a1532" -ServicePrincipal

#Wait for VM to appear in State Configuration as a node, then assign node the Compiled DSC Configuration
Do{

$CheckNode = Get-AzAutomationDscNode -Name $servername -ResourceGroupName $resourceGroup -AutomationAccountName $AutomationAccountName

sleep -Seconds 10

}until ($CheckNode.name -eq $servername)


Set-AzAutomationDscNode -NodeConfigurationName $DSCConfig -ResourceGroupName $resourceGroup -Id $CheckNode.Id -AutomationAccountName $AutomationAccountName -Force
The hard part is over, now we just need to edit our Terraform configuration file.
Deploying a VM with Terraform
We only need to add a few lines to our configuration from the previous article. First, we will modify the VM customization to include the step for running the script to configure our VM to report into Azure Automation:
customize {
      windows_options {
        computer_name  = "Web1"
        workgroup      = "home"
        admin_password = "${var.admin_password}"

        auto_logon = "true"
        auto_logon_count = "1"
        run_once_command_list = ["powershell C:/DSCconfigs/ConfigureLCM.ps1"]
      }
Next we will add in a section at the end of the VM resource to run our script to assign our webserverconfig.localhost configuration to the node:
provisioner "local-exec" {
    command = "C:\\Scripts\\AddNodeToDSCConfig.ps1 -servername web1 -dscconfig webserverconfig.localhost"
    interpreter = ["PowerShell"]
  }
The full Terraform configuration looks like the following. Keep in mind I have all the variables set in a terraform.tfvars file:
variable "username" {}
variable "password" {}
variable "admin_password" {}

terraform {
  backend "remote" {
    organization = "LukeLab"

    workspaces {
      name = "VM-Web1"
    }
  }
}

provider "vsphere" {
  user           = "${var.username}"
  password       = "${var.password}"
  vsphere_server = "192.168.0.7"
  version = "~> 1.11"

  # If you have a self-signed cert
  allow_unverified_ssl = true
}

#Data Sources
data "vsphere_datacenter" "dc" {
  name = "LukeLab"
}

data "vsphere_datastore" "datastore" {
  name          = "ESXi1-Internal"
  datacenter_id = "${data.vsphere_datacenter.dc.id}"
}

data "vsphere_compute_cluster" "cluster" {
  name          = "Luke-HA-DRS"
  datacenter_id = "${data.vsphere_datacenter.dc.id}"
}

data "vsphere_network" "network" {
  name          = "VM Network"
  datacenter_id = "${data.vsphere_datacenter.dc.id}"
}

data "vsphere_virtual_machine" "template" {
  name          = "VMTemp"
  datacenter_id = "${data.vsphere_datacenter.dc.id}"
}

#Virtual Machine Resource
resource "vsphere_virtual_machine" "web1" {
  name             = "Web1"
  resource_pool_id = "${data.vsphere_compute_cluster.cluster.resource_pool_id}"
  datastore_id     = "${data.vsphere_datastore.datastore.id}"

  num_cpus = 2
  memory   = 4096
  guest_id = "${data.vsphere_virtual_machine.template.guest_id}"

  scsi_type = "${data.vsphere_virtual_machine.template.scsi_type}"
  firmware = "efi"

  network_interface {
    network_id   = "${data.vsphere_network.network.id}"
    adapter_type = "vmxnet3"
  }

  disk {
    label            = "disk0"
    size             = "${data.vsphere_virtual_machine.template.disks.0.size}"
    eagerly_scrub    = "${data.vsphere_virtual_machine.template.disks.0.eagerly_scrub}"
    thin_provisioned = "${data.vsphere_virtual_machine.template.disks.0.thin_provisioned}"
  }

  clone {
    template_uuid = "${data.vsphere_virtual_machine.template.id}"

    customize {
      windows_options {
        computer_name  = "Web1"
        workgroup      = "home"
        admin_password = "${var.admin_password}"

        auto_logon = "true"
        auto_logon_count = "1"
        run_once_command_list = ["powershell C:/DSCconfigs/ConfigureLCM.ps1"]


      }

      network_interface {
        ipv4_address = "192.168.0.46"
        ipv4_netmask = 24
      }

      ipv4_gateway = "192.168.0.1"
    }
  }
provisioner "local-exec" {
    command = "C:\\Scripts\\AddNodeToDSCConfig.ps1 -servername web1 -dscconfig webserverconfig.localhost"
    interpreter = ["PowerShell"]
  }


}
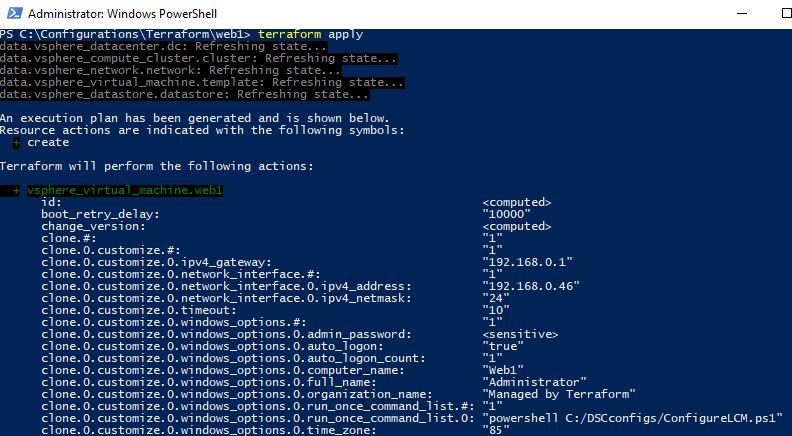
We run our terraform apply and see the build process start:
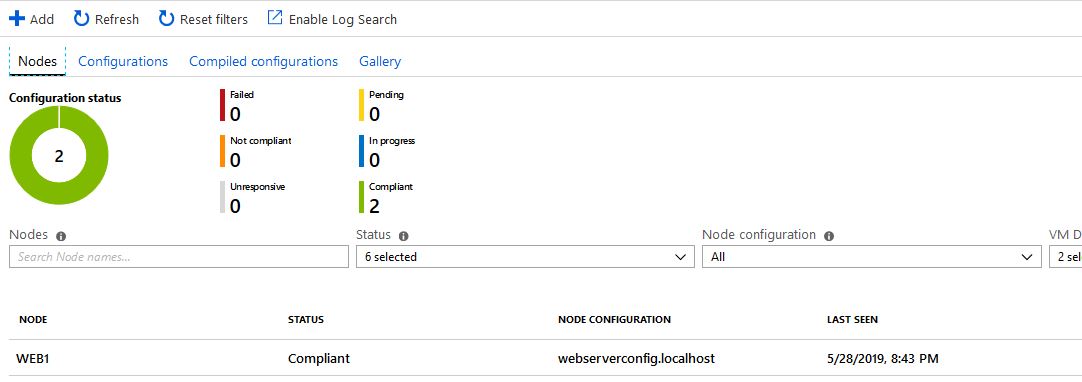
Once complete we can see that our Web1 VM node has deployed and been assigned a DSC node configuration:
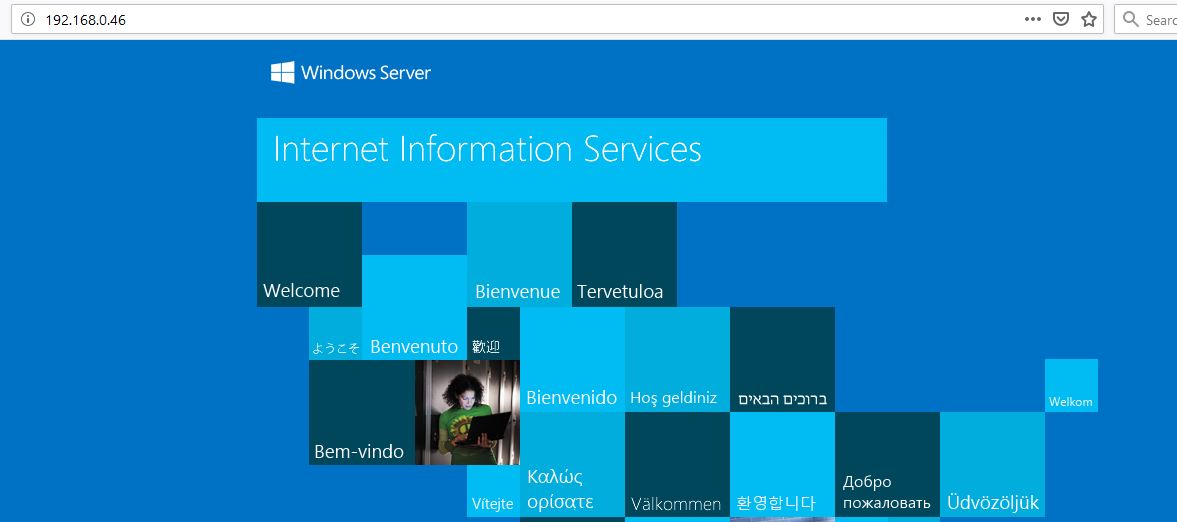
We can verify IIS is installed by navigating to the VM’s IP in a web browser:
Wrap-Up
The combination of Terraform and a Configuration Management tool has endless possibilities. You can get as granular as you want with a VM build. The next step would be to host all of the code for this VM into some sort of source control for versioning, which we’ll cover in a different blog post in the future.
What about you? Do you find this type of deployment management helpful? Let us know in the comments section below!
Want to make sure your VMs are optimized at all times? Here’s how to make your own EXSi dashboard using PowerShell


Not a DOJO Member yet?
Join thousands of other IT pros and receive a weekly roundup email with the latest content & updates!
More in this category


About the Author

Luke Orellana

