Save to My DOJO
Table of contents
- Why Ubuntu?
- Why Ubuntu Server Instead of Desktop?
- Downloading Ubuntu Server
- How to Build the Linux Hyper-V Virtual Machine
- Getting Started with Ubuntu Linux: 10 Things You Need to Know
- Useful Tools for Ubuntu Linux
- Hyper-V Specific Linux Post-Install Wrap-Up
- Rename the System
- Using this Installation to Clone Linux Guests
- Next Steps
Linux on Hyper-V is becoming more and more popular as Microsoft continues to increase their support for it. One of the nicest parts about it is the “It Just Works” aspect. For distributions that are less than a few years old, the Hyper-V Integration Components are built right in. There isn’t any time wasted fiddling with scouring the Internet to look for instructions on compiling or even scripting them in.
Oh, and if you’re curious if you need to purchase anything from Microsoft in order to run Ubuntu under Hyper-V, the answer is: no. There are paid services from Canonical that you might be interested in, but Microsoft isn’t asking for anything. No edition of Linux consumes a virtualization right from Microsoft.
Last updated September 9th, 2016: Xenial Xerus tools
Why Ubuntu?
I’m not a Linux expert by any stretch of the imagination. I’ve been using it off and on ever since I learned about it, but not enough to reach true proficiency. Traditionally, I’ve been a Red Hat person, but things got strange when Red Hat splintered out into RHEL, CentOS, and Fedora, and I started looking at my options. Over the last few years, I’ve switched over to Ubuntu. While I think that Red Hat still wins in the “polish” department, I found that Canonical had really nailed a lot of things in the ease-of-use and approachability departments with Ubuntu Desktop.
So, why Ubuntu specifically? Well, I wanted a major distribution backed by a commercial operation. That way, presumably, if you get really backed into a corner, you can get some paid assistance. Since I’ve never called or paid any of these companies, I guess I just took a leap of faith on the one that I chose (that would be Canonical). As to the exact distribution, I went through a few of them before settling on Ubuntu. Its installation still isn’t the best; I thought that CentOS pretty much crushed Ubuntu on that. However, once the server was up and running, I had an easier time getting things to work on Ubuntu without a lot of hard stops to go look things up on the Internet. There was guessing, and tinkering, and redoing, but really not much.
Why Ubuntu Server Instead of Desktop?
As I said, I was really impressed with Ubuntu Desktop. However, version 14 changed things (Ubuntu major versions are just the last two digits of the release year; minor versions are the month). The GUI requires 3D acceleration now. For hardware systems, that’s not a big deal. Even budget video chips have been doing basic 3D acceleration for a long time. Servers, though, not so much, and nearly nothing for standard Hyper-V guests. There are ways to make it better, but you just can’t get back to the interface speeds of 13 and earlier without hardware acceleration. In Hyper-V, that’s a deal-breaker for most people in my situation. There’s no way I’m setting up a RemoteFX system just to run Ubuntu Desktop when all I really need is server capabilities. But, with Server, all you’ve got is the plain-text command-line.
For a busy non-expert like me, that can seem daunting. But, let me put you at ease: if you have done as we’ve been begging you and gotten on board with PowerShell, even a little bit, or even if you’ve got some DOS in you, Linux is a whole lot easier than you think it is. You see, in Linux, pretty much everything is a file. In contrast, think about a Windows program. You have to install it, which creates two dozen files in eight directories and sixty to a hundred registry entries in every branch. Then you have to run one of its exe files. Or maybe a com file. Perhaps a cmd file that calls a com file. Hopefully there’s an lnk that calls at least one of them. There might an exe that attaches to six or thirty-six dll files, some of which might be in WinSxS, or maybe in System32, or maybe not. It might read some of those registry entries to get going. It might read app.config.xml. It might read an inf. It might have My.Settings. It’s probably got stuff in %APPDATA%, but maybe in %USERPROFILE%. Hopefully, its programmers learned to keep changeable things out of %PROGRAMFILES% or you’re going to have problems with User Account Control. It might have a developer that thought all of those things were stupid and went off grid doing something no one can predict. All this is if you’re lucky and don’t have to be concerned with whether or not it’s %PROGRAMFILES% because you’re on a 32-bit system or %PROGRAMFILES(X86)% because you’re on a 64-bit system — not to mention that only 64-bit files should live in SYSTEM32 now because someone still thinks that 16 bits ought to be enough for everybody. Got all that?
Now, back to that Linux program. It may have multiple executables, and that can be annoying. But, once you hit the right one, it will read a configuration file (which is almost always in plain text), and then it will start based on whatever it found. That, right there, describes about 99% of everything you’ll find in Linux. The hardest part is figuring out what to put into the configuration file. Any Internet search engine can get you through most of those. On top of that, as I look over my Nagios post, most of what we were doing involved typing in the terminal anyway. So, going with Server (which pretty just much means no GUI) is just not a big deal.
So, let’s get started.
Downloading Ubuntu Server
Acquiring Ubuntu is the easy part. Go to http://www.ubuntu.com. Click on Server in the top menu bar. Today, that takes you to http://www.ubuntu.com/server, and presumably will forever, but hey… links change. Click the Download button. Pick a distribution and get it. The current version is 16.04 “Xenial Xerus”, which is marked as “LTS”. That stands for “Long Term Support”. In Ubuntu’s case, that means that Canonical will provide direct support for this release for five years. By contrast, non-LTS releases are supported for a few months. Upgrades are generally painless in my experience so I don’t personally worry very much about it, but if your organization has tighter requirements, consider only using LTS releases. You can read about the differences on Canonical’s LTS wiki page.
With server, there is no longer a 32-bit option. If you are choosing an older or different distribution that still offers 32-bit, keep in mind that many of the Hyper-V integration components only work on 64-bit Linux guests.
The file that you download is an ISO. Put that in a place where your Hyper-V host can find it.
How to Build the Linux Hyper-V Virtual Machine
There’s no GUI and Ubuntu Server is a tiny little OS, so don’t create a large virtual machine. These are my guidelines:
- 2 vCPUs, no reservation. Utilization is going to be really minimal, but all modern operating systems work noticeably better when they can schedule two threads as opposed to one. If you’re strapped, you could limit these.
- Dynamic Memory on; 512MB startup memory, 256MB minimum memory, 1GB maximum memory. Ubuntu Server seems to have a sweet spot somewhere around 1GB. Of course, you can always adjust Dynamic Memory’s maximum upward, even when the VM is active. Start low.
- 40GB disk is probably much more than you’ll ever need. I use a dynamically expanding VHDX because there’s no reason not to. The published best practice is to create this with a forced 1 megabyte block size, which must be done in PowerShell. I didn’t do this on my first several Linux VMs and noticed that they do use several gigabytes more space, although still well under 10 apiece. I leave the choice to you.
- In my personal experience, Generation 1 just works better. I’ve noticed this for all virtual machines, but it’s especially true for Linux. The biggest issue with Gen 2 is that it has momentary network hiccups, which is not good for the things I envision using Linux for. Not everyone experiences these problems — your mileage may vary. If you choose to use Generation 2, remember to turn off Secure Boot because that’s not going to work for Linux until Hyper-V Server 2016.
The following is a sample script that you can modify to create a Linux virtual machine in Hyper-V:
$VMName = 'svlinux'
$VHDName = '{0}.vhdx' -f $VMName
$VMStoragePath = '\svstorevms'
$VHDStoragePath = Join-Path -Path '\svstorevmsVirtual Hard Disks' -ChildPath $VHDName
$UbuntuISOPath = '\svstoreisosubuntu-16.04-server-amd64.iso'

New-VM -Name $VMName -MemoryStartupBytes 512MB -SwitchName vSwitch -BootDevice CD -Path $VMStoragePath -Generation 1 -NoVHD
Set-VMMemory -VMName $VMName -DynamicMemoryEnabled $true -MinimumBytes 256MB -MaximumBytes 1GB
Set-VMProcessor -VMName $VMName -Count 2
New-VHD -Path $VHDStoragePath -SizeBytes 40GB -Dynamic -BlockSizeBytes 1MB
Add-VMHardDiskDrive -VMName $VMName -ControllerType IDE -ControllerNumber 0 -ControllerLocation 0 -Path $VHDStoragePath
Set-VMDvdDrive -VMName $VMName -ControllerNumber 1 -ControllerLocation 0 -Path $UbuntuISOPath
Add-ClusterVirtualMachineRole -VMName $VMName
Important: I’m going to give instructions at the very end of the article for using your new virtual machine as a clone basis. If you choose right now to name your VM and VHDX accordingly, you’ll have that much less work to do later.
From there, a simple Start-VM will get us going. Rev it up and get connected to the console using the method of your choice. Most of the rest of this portion will be the screenshots of what you’ll see.
- Choose your language:
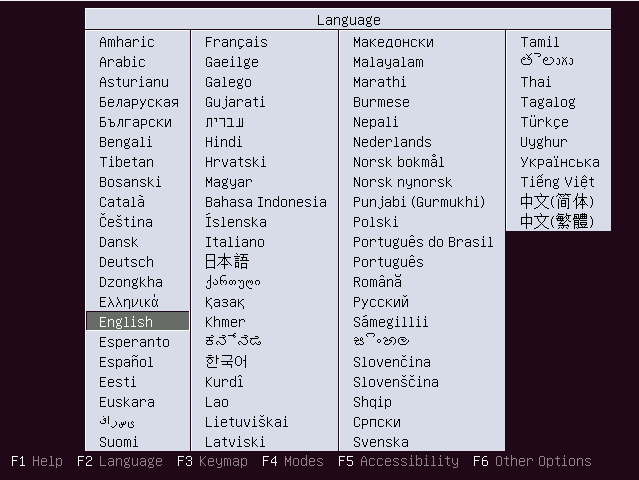
Language Selection
- Press Enter on Install Ubuntu Server:
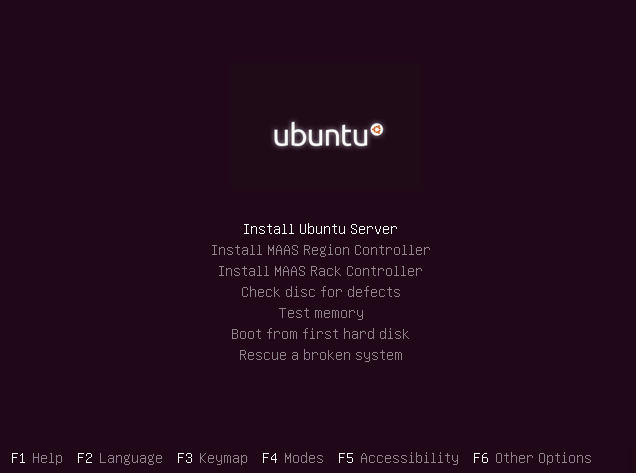
Install Selection
- Some text will roll by as it starts up the installer processes and then you get to pick the language again because reasons (I told you CentOS had a smoother installer).
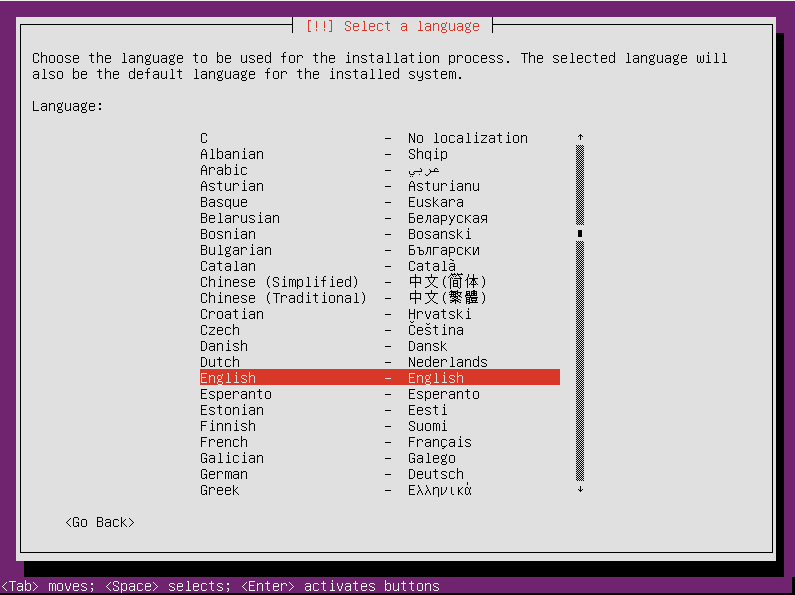
Language Selection, the Sequel
- Pick your locale:
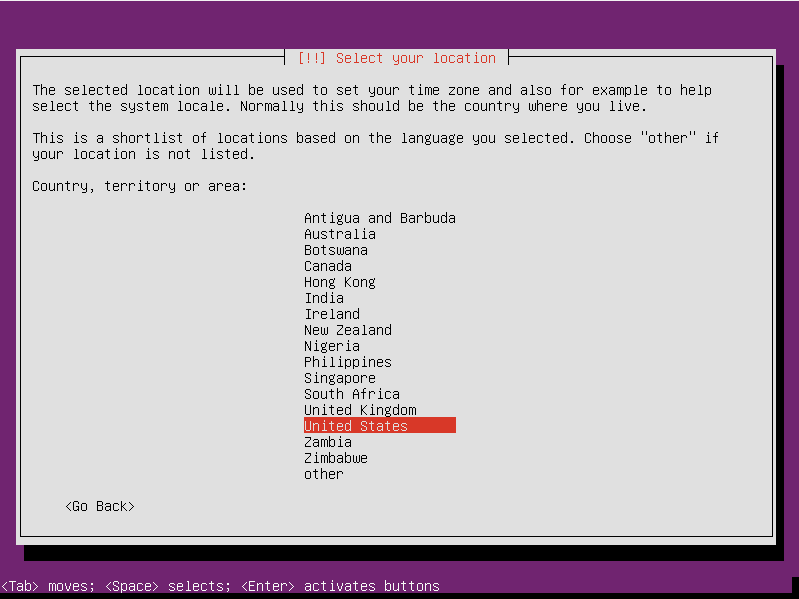
Locale Selection
- You can go through a wizard to detect your keyboard type by pressing keys that it asks for, or you can pick from a list. The wizard works well enough in my limited testing but most uni-lingual keyboards can be pretty easily selected by going the route of the list. Only the initial option is shown:
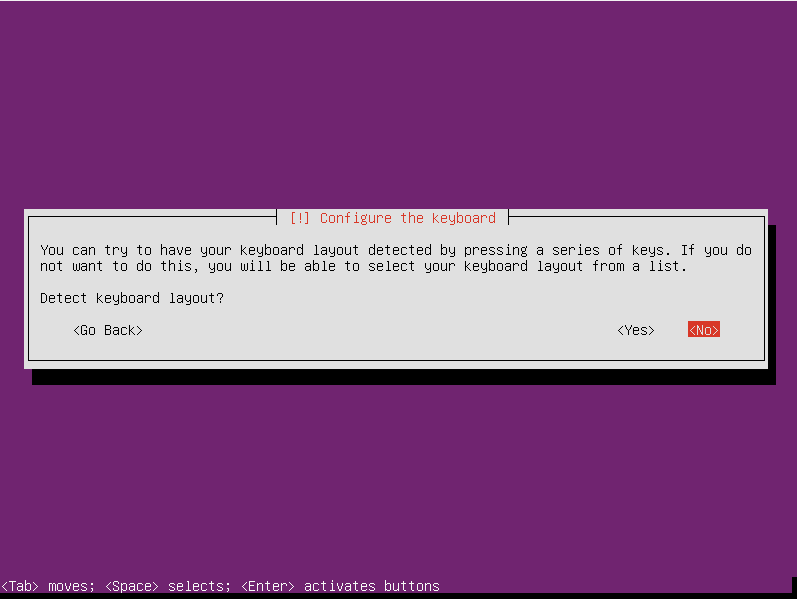
Keyboard Selection
- Some components will load. This isn’t terribly long. Don’t go away because there’s more to enter:
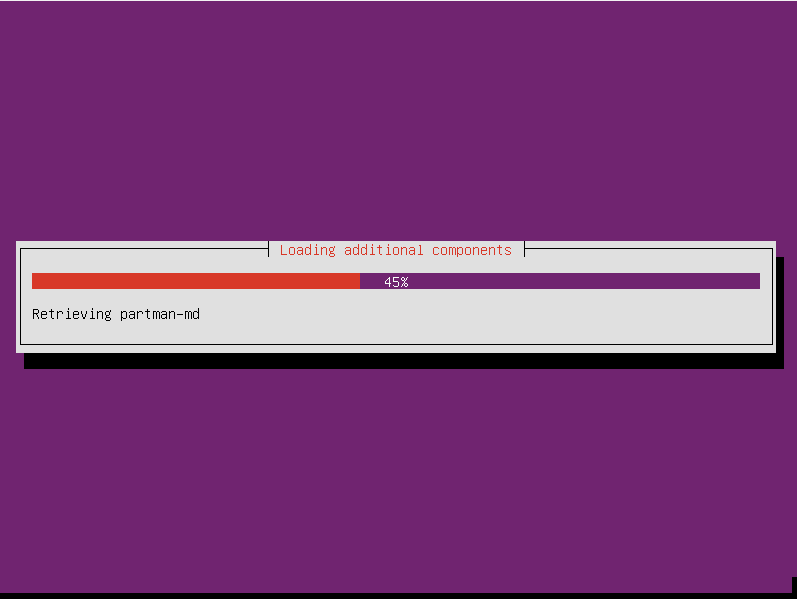
Initial Component Load
- Next is the computer name. If you’re going to template this VM, you can put in a generic name. Linux doesn’t have all the issues around computer renaming that Windows machines do, so I don’t invest a lot of effort here. As far as I know, you can enter a full domain name, but I never do.
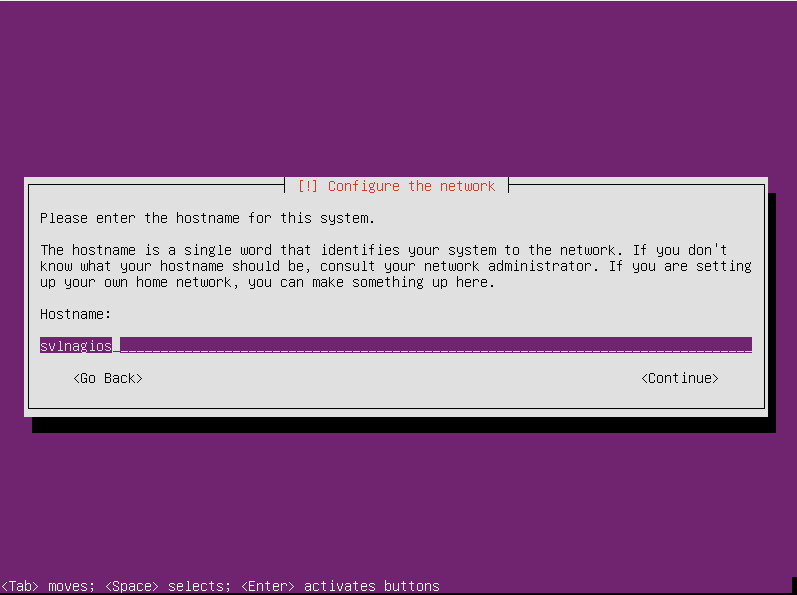
Computer Name
- Choose the display name for the primary user. I haven’t ever seen this show up again after entering it. I’m sure it’s in there somewhere.
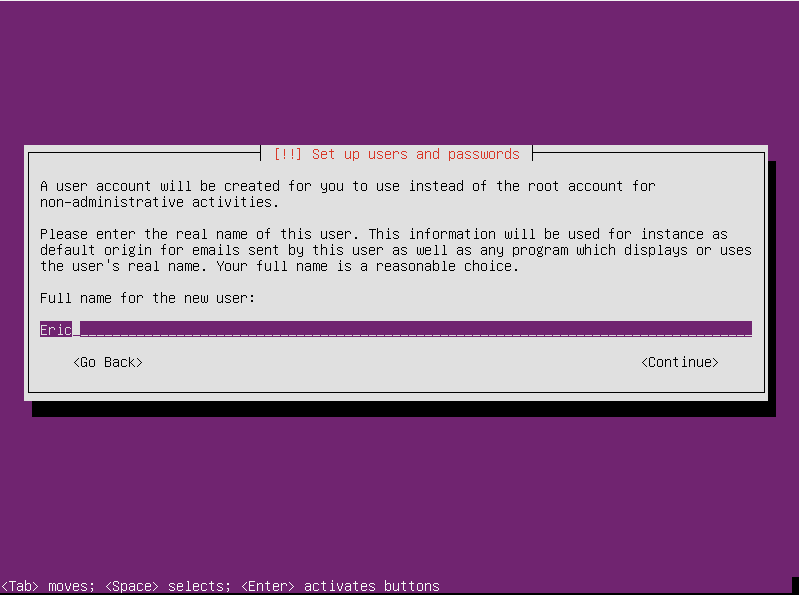
Display Name
- Choose your login name. This is the one that you’ll have to type, so curb your creativity.
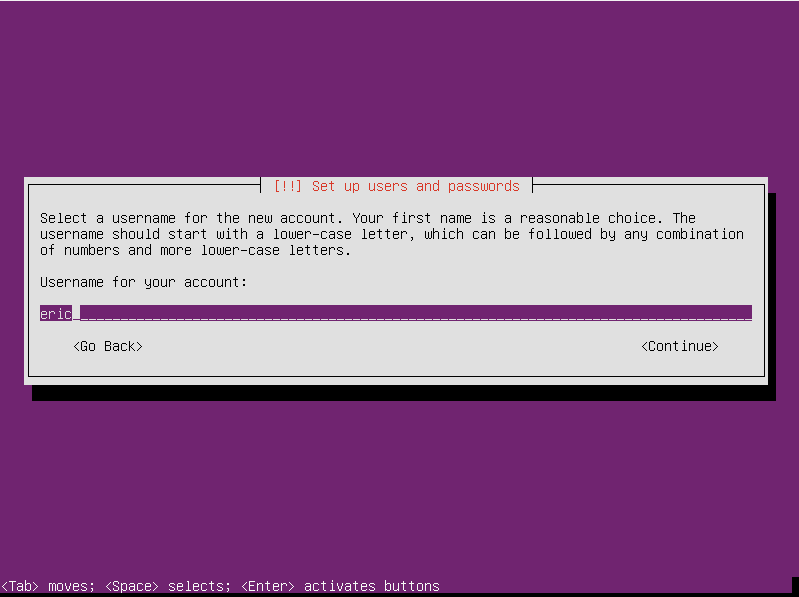
Choose Your Login Name
- Choose a password for the account you just created. It will have root powers, so you should choose something really hard to guess, like “password” (my lawyer would like me to remind you that any dumb things you do based on my advice are your fault). There will be another screen immediately after (not shown) asking you to confirm the password, so you should probably choose a password that you can remember.
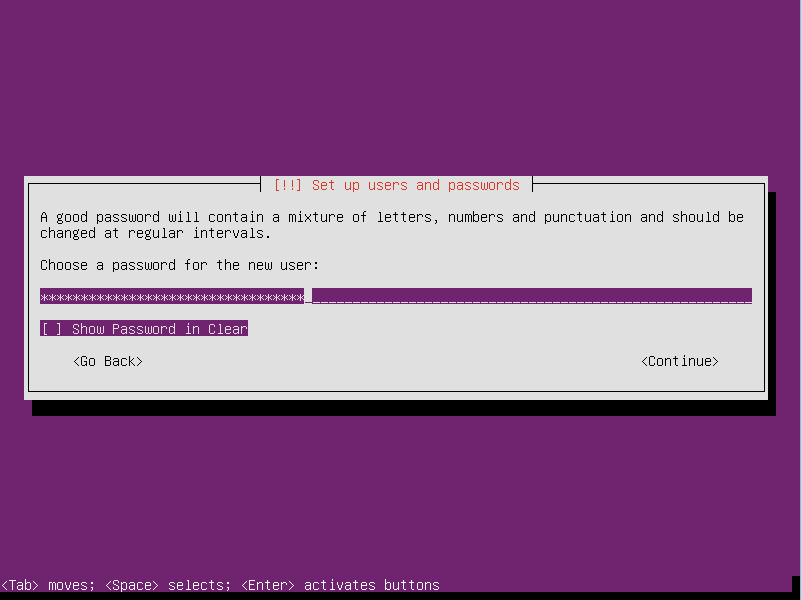
Password Selection
- The next question asks if you want to encrypt your home directory. I never do this because the only thing I store there are scripts and such that I’m probably going to publish online anyway. Do whatever you think is best.
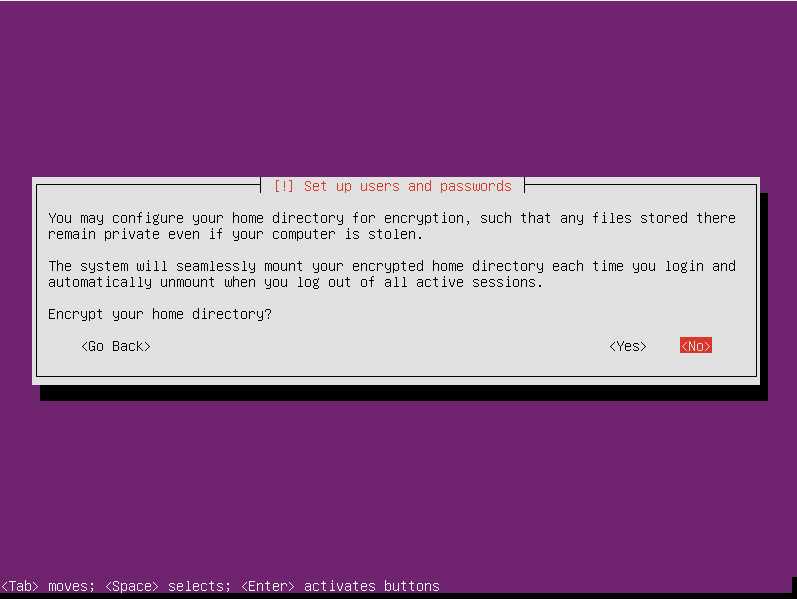
Encrypt Home Folder
- There will be a brief moment while it checks the network for time purposes. I didn’t check to see what happens if there’s no access or if it can’t figure out whatever it wants to figure out, but I assume it would have you pick your time zone from the list that it’s offering here. It correctly guessed mine so I didn’t have to do that. Here’s my screen:
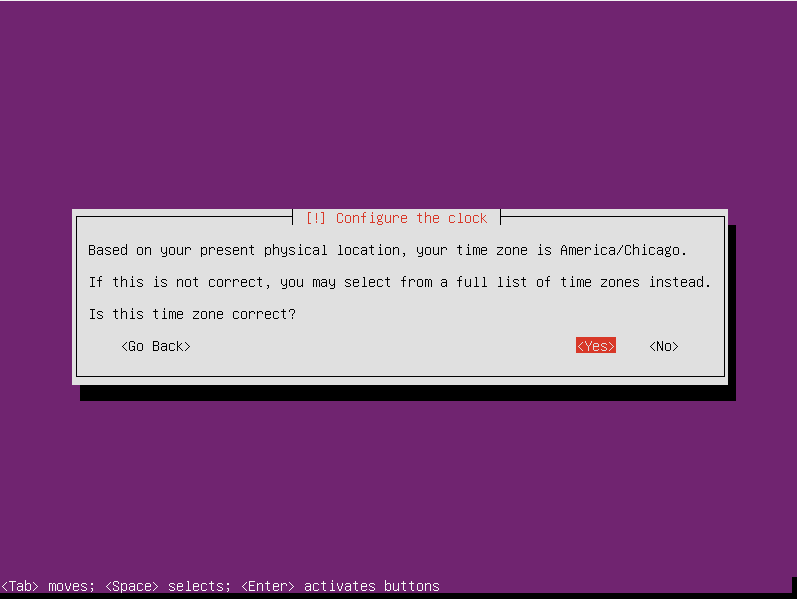
Choose Your Time Zone
- Now, we move on to disk configuration. We are not doing anything fancy in these VMs so fancy disk configuration is really not helpful. Do what you like. I took the default of Guided – use entire disk and set up LVM. If you choose something else, you’ll have to skip a few screen shots and join up with us later.
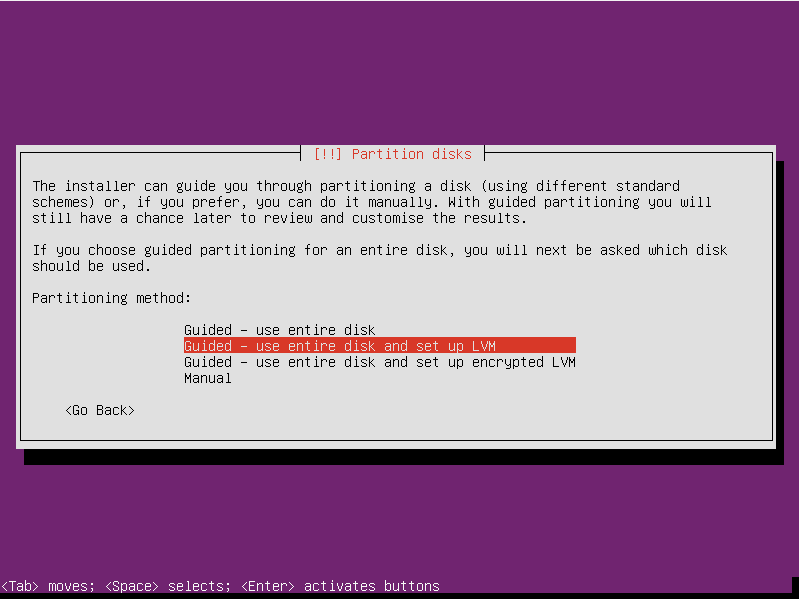
Disk Config Mode
- Now it will want to know which “physical” disks to configure. I made one 40GB disk in my VM creation script, so I have one 40GB disk to work with (before rounding):
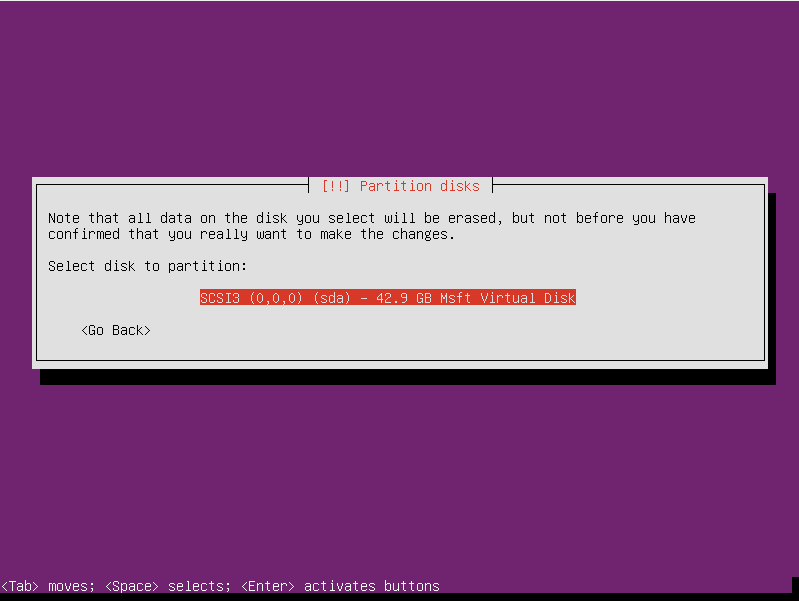
Disk Selection
- The final disk selection screen is really just a confirmation. It defaults to No, so don’t forget to arrow left to Yes or you’ll be going in circles.
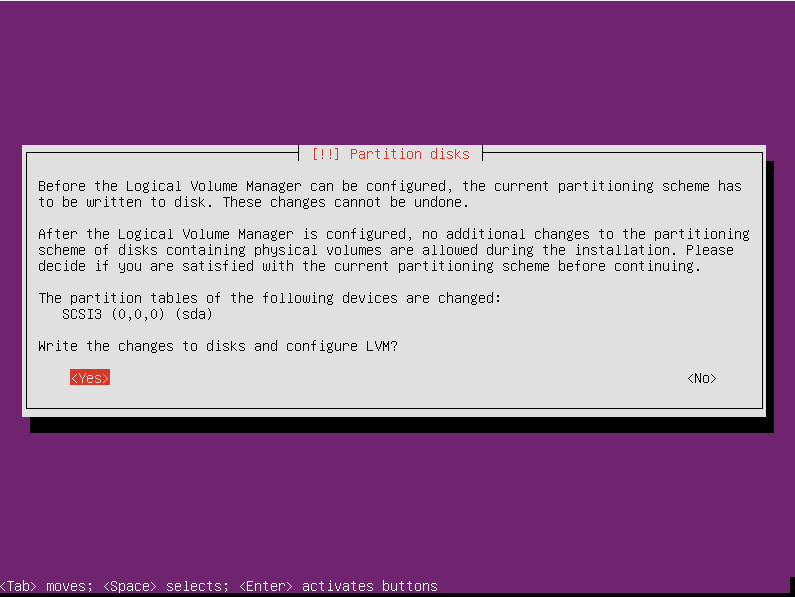
Confirm Disk
- With disk selection out of the way, we now move on to volume creation. You can do whatever you like, but again I just let the system have all available space to do what it likes. If you stumbled upon Microsoft’s best practices document, then rest assured that ext4 will be used for the data volume’s file system. I didn’t find any way to set the group size that they talk about, but I also don’t feel any performance problems in my Linux VMs — not that I’m one to get worked up over every last IOPS.
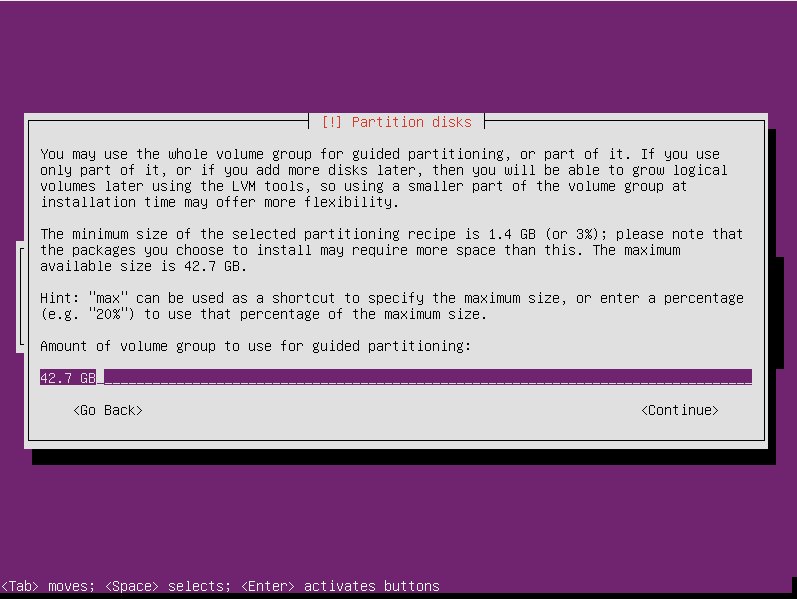
Volume Creation
- You are almost through with disk/volume configuration, but not quite! (Yes, the CentOS installer is smoother but this will be worth it) Make sure everything looks good, arrow left to Yes, and press [Enter].
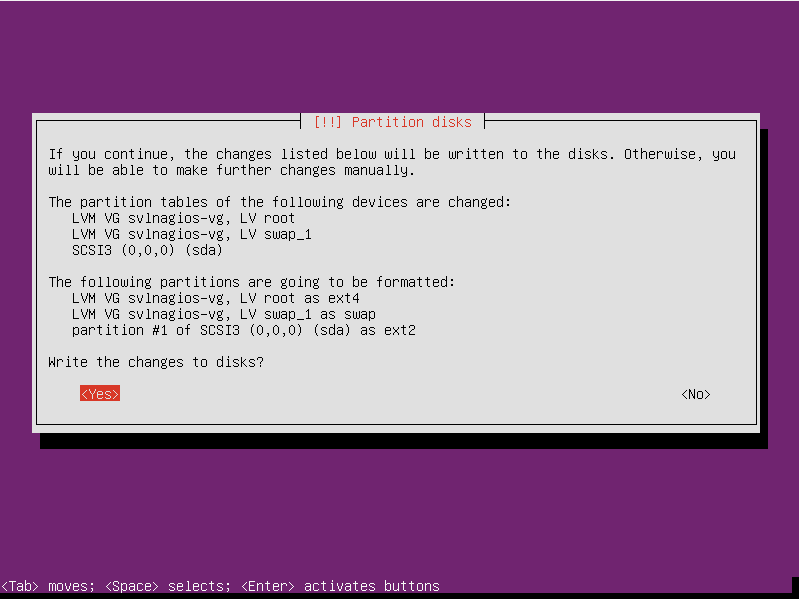
The Final Disk/Volume Screen
- You’ll see the formatting process, and then it will start the data copy. You’ll think you’re all done entering things, but, you’re not. This part is going to take a while, but don’t go far because it’s going to stop again.
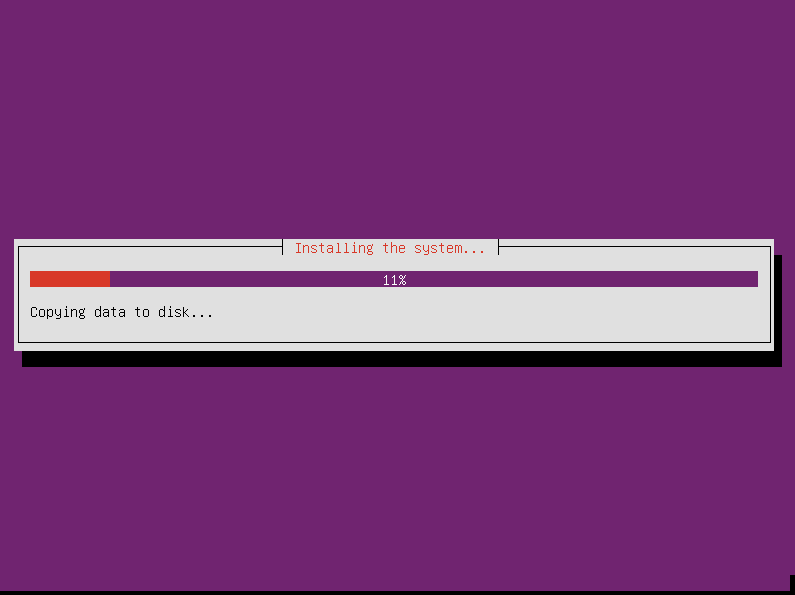
Copying Files
- After it gets done copying, it will then go on to configuring apt which is part of the package management system in Ubuntu. It will stop and ask you for the proxy information. I don’t know why it didn’t determine that I didn’t need a proxy when it was doing all those other network checks, but there you are. I neglected to get a screenshot of this, but it’s just a blank line where you type in the proxy address.
- After the proxy, you’ll get more installing and configuring. It will then stop and ask how you want to handle updates. You can do no automatic updating, install security updates automatically, or have Landscape manage it. Landscape is a service provided by Canonical. I don’t know anything about it. What I do is allow the system to perform security updates automatically and then I sometimes check for other updates manually.
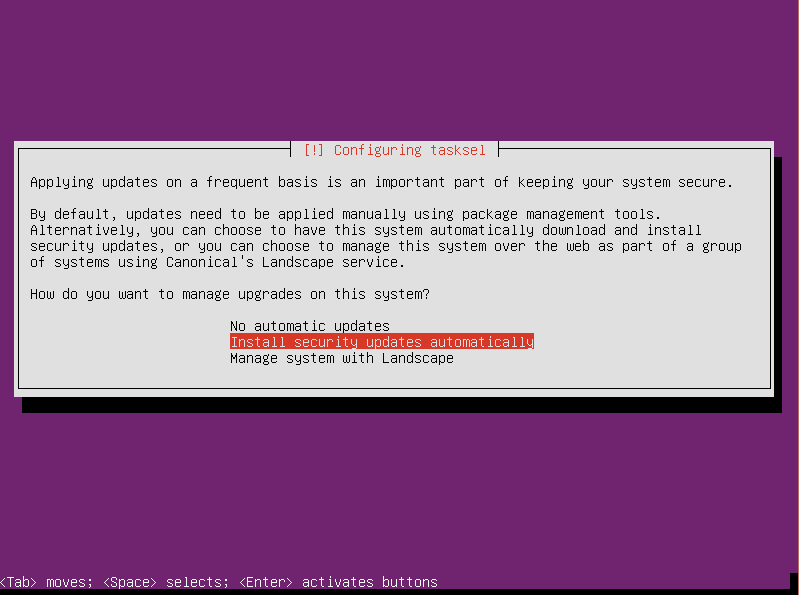
Automatic Update Selection
- There will be some more copying, and then you’ll be asked which packages you want to install. This screen has changed in 16.04, so make sure you pause if you’re used to earlier versions. It starts out with only standard system utilities selected. Move down to OpenSSH server and press the [Spacebar] so that an asterisk appears within its brackets. Other than that, I don’t select anything else here. If you know for a fact you’re building something that will need one of these and you don’t intend to use this VM as a base template, go ahead and select what you want.
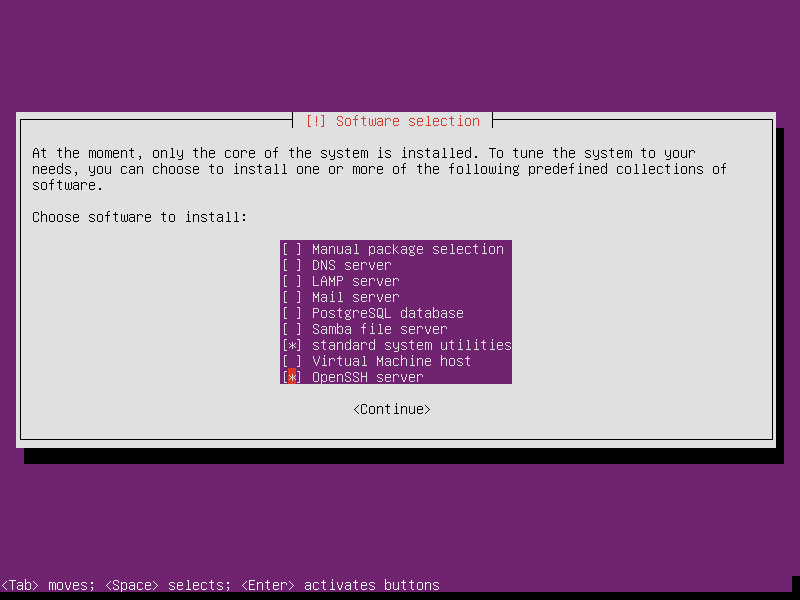
Package Selection
- There’ll be more copying and installing. This is the longest part yet. Once all of that completes, you’ll be asked if you want to install the GRUB loader. If you’re not familiar with this sort of thing, it’s what tells the computer how to proceed when it asks the hard drive how to boot. Since we’re just loading the one install of Linux here, it’s a really good idea to install GRUB.
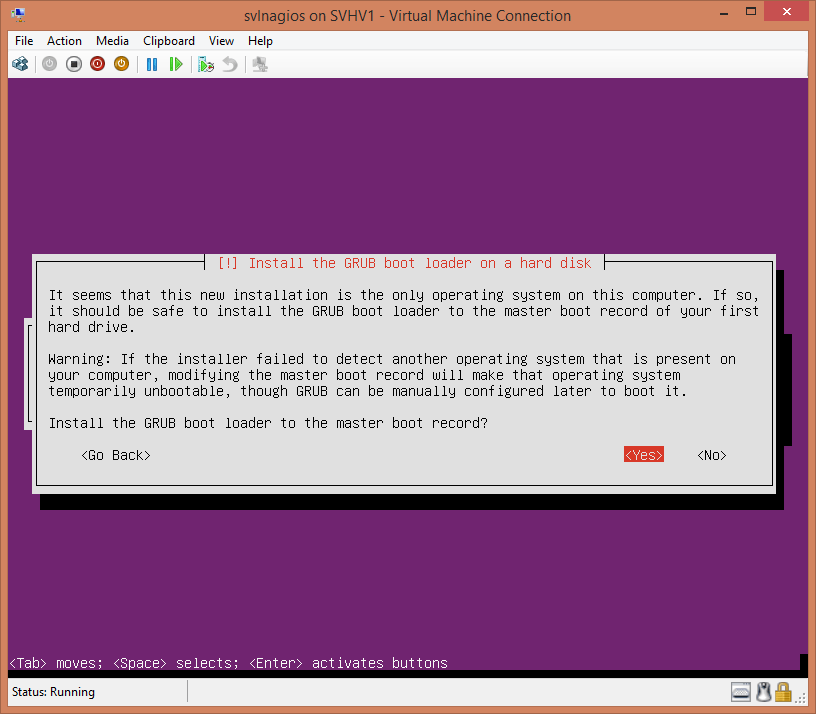
Install GRUB
- There will be some more installing and configuring, although not nearly as much as the last time. Finally, your persistence is rewarded with the completion dialog. It will eject the boot media for you. Just push [Enter] to continue and the system will run a few more things and automatically restart. I didn’t screenshot that, either.
Getting Started with Ubuntu Linux: 10 Things You Need to Know
When it boots back up, we’re going to go through a few quick things about Linux that will help you survive.
1. Text Acts Funny
One thing that might trip you up immediately is the fact that Linux’s outputs and inputs are not synchronized very well. The way that this often manifests, sometimes right away on the first boot, is that the cursor location where you type your login name may reset itself to the beginning of the line such that you’re typing over Linux’s login text:
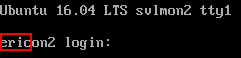
Odd Text Behavior
It’s totally OK. Just go with it. You’ll see this in some other places as well, although not nearly as often as here at the login prompt.
The other thing to be aware of is that the password entry is not echoed to the screen. Windows shows you black dots for password characters; Ubuntu shows you nothing. That’s OK, too.
2. Other Things Act Funny
“Funny” is probably not the best adverb to use here. People that use non-Windows operating systems consider all that I’m about to tell you as normal. But, if you’re one of those people, this post wasn’t meant for you anyway.
The directory separator (or “folder” separator, if that’s what you were taught) is the slash character: / . When it’s found at the end of a line, the backslash () character is the line continuation character in Ubuntu’s shell. When it’s found in a string, it escapes the character that comes right afterward. Basically, it works like the backtick (`) character in PowerShell.
Command parameters use a single or double hyphen, as opposed to the slash character in traditional DOS commands and command-line applications. PowerShell is more similar in this regard than DOS as it also uses the hyphen. As for the double hyphen in Linux parameters, I have no idea what that’s all about. My unofficial, unscientific observation is that the single hyphen usually goes with a single character parameter (like -r in shutdown) and the double hyphen usually accompanies a parameter that uses an entire word (like –help). I guess there’s probably something more to it, but I don’t know what it is. Reader John pointed out that the single-dash parameters can be entered all together after a single hyphen, just like you can do with netstat’s and attrib’s parameters in Windows/DOS. See the comments section for an example (and I bet more than a few of you just thought, “I can do what with netstat?”).
Remember how I said that everything in Linux is a file? Well, since everything in Linux is a file, everything in Linux is organized in a directory structure. / isn’t just a character, it’s a place. It’s the “root” of the entire system. Everything hangs off of it. There’s no drive letters, no registry, nothing like that. cd / takes you to the root.
PowerShell’s requirement that you run executable programs and scripts in the same directory by using .executablename mirrors Linux’s requirement that you do the same with ./executablename. If you’re not accustomed to the command line, the . character means “this directory” and the .. character sequence means “the parent of this directory” in both Windows and Linux. Three dots doesn’t mean anything. To point to the parent of the parent, you do this: ../...
Linux recognizes two types of files: executable and not executable. It doesn’t really do extensions. For example, when you name a file “runthis.bat” on a Windows system, if you attempt to run it using the command processor (which is a fancy way for saying “double-click on it in Explorer” or “type runthis.bat at a command prompt”), Windows will look at the extension and attempt to treat it as a batch file based on that. Linux doesn’t work that way. When you try to run a file through the command processor, Linux first looks to see if it’s marked as executable. If not, it stops right there. If it is, it looks at the file header. If the file is machine code, it executes it that way. If it’s marked with human-readable encoding, like UTF-8, then it tries to figure out what it is from the first bits of data that it encounters. So, you’ll see a great many scripts that start with something like #!/bin/sh. That tells the system to run the contents through the “sh” interpreter found in “/bin/”. You’ll find others that call on Perl, so on and so forth.
To mark a file as executable:
chmod +x ./thatscriptfileyouwanttouse
There are no drive letters. All devices, including drives, are found in — conveniently enough — /dev. Figuring out which is which can be tough, and this is a place where my non-expert status shines. /dev/sda# are my drives. For the machine that I built for this post, /dev/sda5 is the equivalent of the C: drive. It actually showed all this during the installation, if you were paying attention. Since we’re only using a single data volume in our Linux systems, I don’t know that I care enough to investigate further. One thing that’s nice to know is that you can find the contents of the CD drive in /dev/cdrom.
Linux is VErY cASe sensITiVe. I think this is largely due to tradition. Even as “recently” as an 8MHz 80286, case-insensitive processing was very expensive. Linux’s roots go back much further than that. Case-insensitivity is a fairly minor operation these days, but Linux has not changed. Everything must be typed exactly as the system expects it.
Tab completion exists, but it is different, and in many ways, less robust than it is in PowerShell or the Vista/2008+ command processor. Basically, you can navigate the directory structure with it, but you often need to seed it with the first few characters of what you’re looking for. It won’t work for most command parameters like it does in PowerShell.
It’s not dir , it’s ls. Use mkdir instead of md, rm instead of del.
3. Help is Available
Most commands and applications have a -h and/or a –help parameter that will give you some information on running them. –help is often more detailed than -h. You can sometimes type man commandname to get other help (“man” is short for “manual”). It’s not as consistent as PowerShell help, but then PowerShell’s designers got to work with the benefits of hindsight and rigidly controlled design and distribution.
4. You Can Go Home
You’ve got your own home folder, which is the rough equivalent of the “My Documents” folder in Windows. It’s at the universal alias ~. So, cd ~ takes you to your home folder. You can reference files in it with ~/filename.
5. You’re not the Boss, Except When You Are
You can’t log in directly as “root”, which is the equivalent of “Administrator” on Windows. But, the account you made is “root”. You just don’t have root powers until you specifically ask for them. It’s sort of like “Run as administrator” in Windows, but a lot easier. In fact, the intro text tells you a little bit about it:

Sudosplaining
So basically, if you’re going to do something that needs admin powers, you just type “sudo” before the command, just like it says. The first time, it will ask for a password. It will remember it for a while after that. However, 99% of what I do is administrative stuff, so I pop myself into a sudo session that persists until I exit, like this:
sudo -s
You’ll have to enter your password once, and then you’ll be in sudo mode. You can tell that you’re in sudo mode because the dollar sign will change to a hash sign:
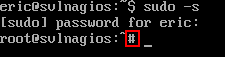
Sudo Up
As our reader John pointed out in the comments below, this is still a root-level account even when you’re not logged in as root. I do this on these systems because they’re servers and if I’m logged into them at all, I’m doing administrative work. Remember to respect the powers of this account; don’t share its password, don’t leave it logged on, don’t open an SSH session and walk away from your unlocked desktop, etc. If you’re going to make a Linux system your primary desktop, make a non-administrative account to use. You can use SUDO to switch to another account.
6. “Exit” Means Never Having to Say Goodbye
“logoff” in Windows is “logout” in Ubuntu Server, with a “but”. If you’ve escalated yourself with sudo -s , you have to “exit” first. “Exit” always works, so I’ve trained myself to use that. Just keep typing “exit” and you’ll eventually return to a login screen.
7. Single-Session is for Wimps
One of the really nifty things about Linux that I’d like to have in Windows is multiple concurrent sessions. See that “tty1” at the top? You’re in terminal 1. Press [Alt]-[Right Arrow]. Now you’re in tty2! Keep going. 6 wraps back around to 1.
8. Patches, Updates, and Installations, Oh My.
Pretty much all applications and OS components are “packages”. Aptitude (“apt”) and “dpkg” are your package managers. They’re a bit disjointed, but you can usually find what you need to know with a quick Internet search.
Have your system check to see if updates are available (more accurately, this checks the version data on download sources):
apt-get update
Install package patches and upgrades:
apt-get upgrade
Install system patches and upgrades:
apt-get dist-upgrade
List installed packages:
dpkg --get-selections
Find a particular package, in this case, “perl” (spelling/case counts!):
dpkg --get-selections | grep perl
See the locations and files that a package references (helps you trace down that executable or configuration file):
dpkg -L perl
Install something (in this case, the Apache web server):
apt-get install apache2
Just a note, “apt-get install” is pretty smart. It can often guess at what you mean. It won’t install anything unless it has a really good match, but it will make suggestions if you get close. In fact, if you type something at a command line and the shell can’t figure it out, it will try to suggest packages that contain something like what you typed. It can be annoying when it’s just a regular typo, but it can also be helpful.
9. System Control
Ubuntu’s equivalent to Task Manager is top. Type top at a command prompt and you’ll be taken right to it. Use the up and down arrows and page up and page down to move through the list. Type a question mark [?] to be taken to the help menu that will show you what else you can do.
10. OK, I’m Done Now
If you’ve used the shutdown command in Windows, then you’ll have little trouble transitioning to Linux. shutdown tells Linux to shut down gracefully with a 1 minute timer. All active sessions get a banner telling them what’s coming.
Immediate shutdown (my favorite):
shutdown now
Reboot immediately:
shutdown -r now
There’s an -H switch which, if I’m reading this right, does a hard power off. I don’t use that one.
Be aware that the shutdown command only stops the machine most of the time. Sometimes, you’ll have to use Hyper-V’s VM control tools to hard power off or reset the virtual machine. This behavior has gotten much better in recent versions — I haven’t noticed any problems for a long time.
Useful Tools for Ubuntu Linux
There are more things you need to do to finish up your install, but before we get there, we need to look at the tools you’re going to need.
Text Editors
The built-in text editing tool that I use is Nano. Just type nano at any prompt and press [Enter] and you’ll be in the nano screen. The toolbar at the bottom shows you what key presses are necessary to do things, ex: [CTRL]+[X] to exit.
The remote text editing tool that I use is Notepad++. It is a little flaky — I sometimes get Access Denied errors with it that I don’t get in any other remote tool (setting it to Active mode seems to help a little). But, the price is hard to beat. If I run into real problems, I run things through my home folder. To connect Notepad++ to your host:
- In NPP, go to Plugins->NppFTP->Show NppFTP Window (only click if it’s not checked):
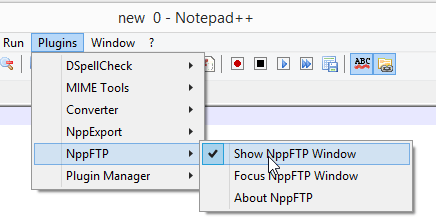
NPP FTP Window Selector
- The NppFTP window pane will appear at the far right. Click the icon that looks like a gear (which is, unfortunately, gray in color so it always looks disabled), then click Profile Settings:

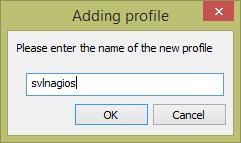
- In the Profile Settings window, click the Add New button. This will give you a small window where you can provide the name of the profile you’re creating. I normally use the name of the system.
- All the controls will now be activated.
- In the Hostname field, enter the DNS name or the IP address of the system you’re connecting to (if you’re reading straight through, you might not know this yet).
- Change the Connection type to SFTP.
- If you want, save the user name and password. I don’t know how secure this is. I usually enter my name and check Ask for password. If you don’t check that and don’t enter a password, it will assume a blank password.
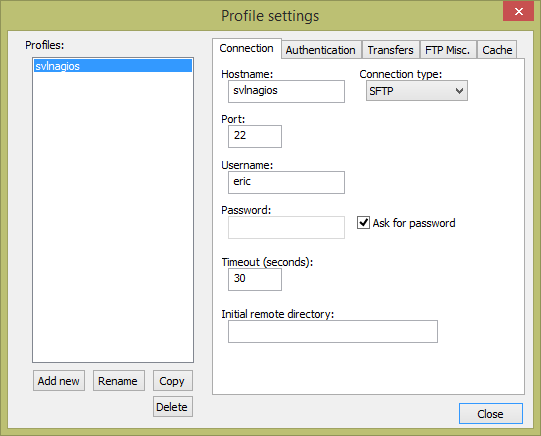
NPP FTP Profile
- You can continue adding others or changing anything you like (I suggest going to the Transferstab and setting the mode to Active). Click Close when ready.
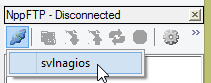
- To connect, click the Connect icon which will now be blue-ish. It will have a drop-down list where you can choose the profile to connect to.
- On your first connection, you’ll have to accept the host’s key:
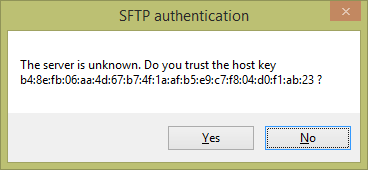
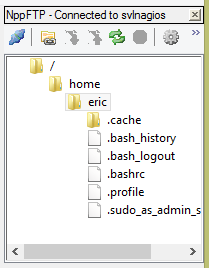
- If the connection is successful, you’ll attach to your home folder on the remote system. Double-clicking an item will attempt to load it. Using the save commands in NPP will save back to the Linux system directly.
Remember that NPP is a Windows app, and as a Windows app, it wants to save files in Windows format (I know, weird, right?). Windows expects that files encoded in human-readable formats will end lines using a carriage-return character and a linefeed character (CRLF, commonly seen escaped as rn). Linux only uses the linefeed character (LF, commonly seen escaped as n). Some things in Linux will choke if they encounter a carriage return. Any time you’re using NPP to edit a Linux file, go to Edit -> EOL Conversion -> UNIX/OSX Format.
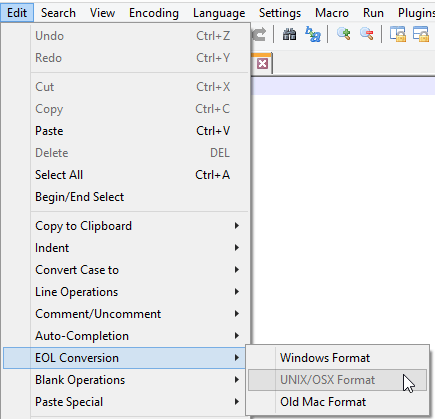
NPP EOL Conversion
WinSCP
WinSCP allows you to move files back and forth between your Windows machine and a Linux system. It doesn’t have the weird permissions barriers that Notepad++ struggles with, but it also doesn’t have its editing powers.
- Download and install WinSCP. I prefer the Commander view but do as you like.
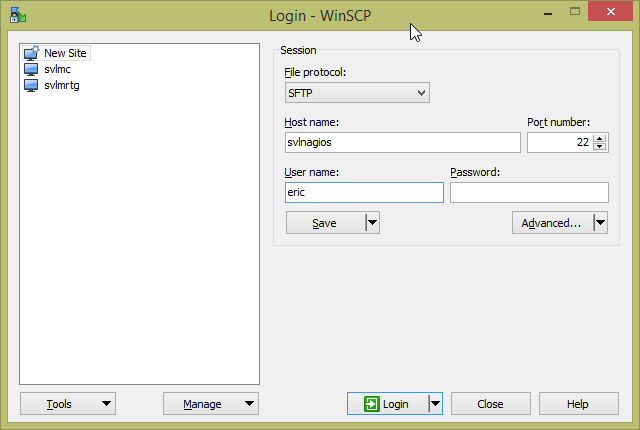
- In the Login dialog, highlight New Site and fill in the host’s information:
- Click Save to keep the profile. It will present a small dialog asking you to customize how it’s saved. You can change the name or create folders or whatever you like.
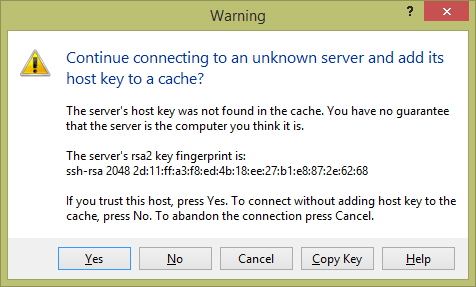
- With the host entry highlighted, click Login. You’ll be prompted with a key on first connect:
- Upon clicking Yes, you’ll be connected to the home folder. If you get a prompt that it’s listening on FTP, something went awry because the install process we followed does not include FTP. Check the information that you plugged in and try the connection again.
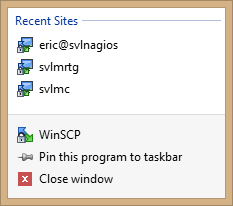
- WinSCP integrates with the taskbar for quick launching:
PuTTY
The biggest tool in your Linux-controlling arsenal will be PuTTY. This gem is an SSH client for Windows. SSH (secure shell) is how you remote control Linux systems. Use it instead of Hyper-V’s virtual machine connection. It’s really just a remote console. PuTTY, however, adds functionality on top of that. It can keep sessions and it gives you dead-simple copy/paste functionality. Highlight text, and it’s copied. Right-click the window, and it’s pasted at the cursor location.
- Download PuTTY. I use the installer package myself, but do as you like.
- Type in the host name or IP address in that field.
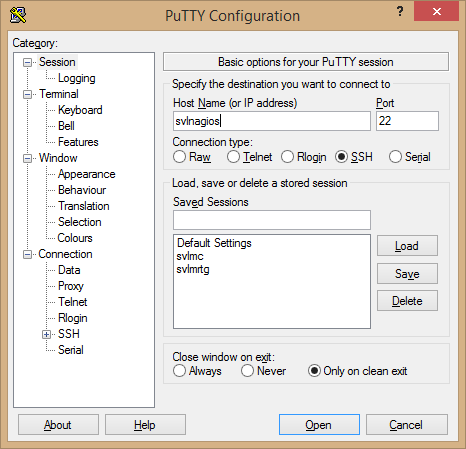
- PuTTY doesn’t let you save credentials. But, you can save the session. Type a name for it in the Saved Sessions field and then click Save to add it to the list. Clicking Load on an item, or double-clicking it, will populate the connection field with the saved details.
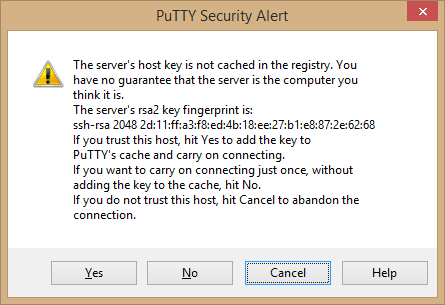
- Click Open when ready. On the first connection, you’ll have to accept the host key:
- You’ll then have to enter your login name and password. Then you’ll be brought to the same type of screen that you saw in the console:
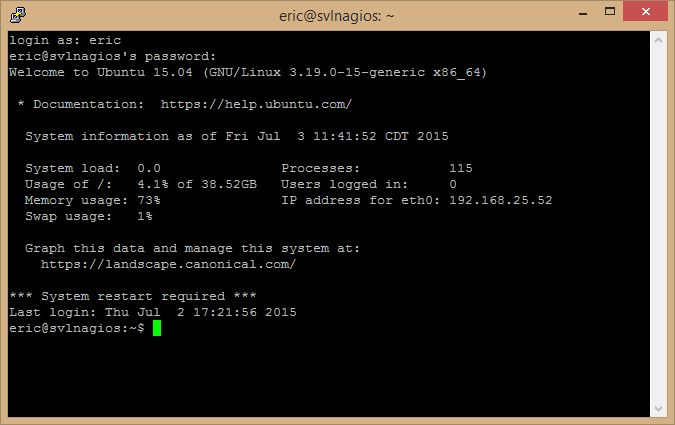
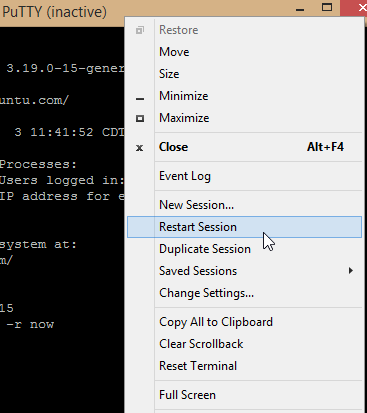
- Right-click the title bar of PuTTY for a powerful menu. The menu items change based on the session status. I have restarted the operating system for the screenshot below so that you can see the Restart Session item. This allows you to quickly reconnect to a system that you dropped from… say, because you restarted it.
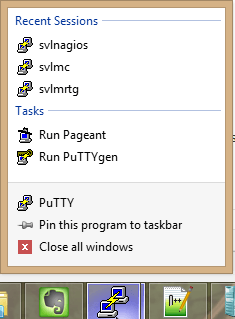
- PuTTY also has taskbar integration:
- When you’re all done, remember to use “exit” to end your session.
Hyper-V Specific Linux Post-Install Wrap-Up
With all the configuration that goes into the installation, there’s not a whole lot to do afterward. There are a few very important steps, though.
Hyper-V Tools for Linux
Out of the box, Ubuntu Server has everything you really need to make it work under Hyper-V. Tools are available to make it even better.
Let’s begin by loading a kernel set that allows us to rely on fewer drivers than the default kernel set.
If you are using a non-LTS version:
apt-get install linux-virtual
If you are using 16.04 LTS:
apt-get install --install-recommends linux-virtual-lts-xenial
With that done, we can now load the Hyper-V tools.
If you are using a non-LTS version:
apt-get install linux-tools-virtual linux-cloud-tools-virtual
If you are using 16.04 LTS:
apt-get install --install-recommends linux-tools-virtual-lts-xenial linux-cloud-tools-virtual-lts-xenial
Thanks to reader Matthew for pointing out the differences for the LTS versions. More information and commands for earlier LTS distributions can be found in the TechNet blog article that Matthew pointed out us.
These tools enable the following:
- VSS Snapshot daemon. Its intent is to allow Linux virtual machines to be backed up online. I haven’t used anything but Altaro for a while, but I already saw that it was backing up Linux VMs online without any special settings. What this gives Altaro customers is the two-way communication about the backup between the guest and the host. So, basically, Hyper-V Manager should now report that the guest is being backed up. I’m not sure if it grants anything else.
- KVP daemon. “KVP” means “key-value pair”. In Windows, this allows you to perform small data exchanges between the hypervisor and the guest by reading and setting special registry keys. Linux, of course, just uses the regular file system structure. You can read the details on using this feature on both Windows and Linux on this TechNet article.
- Host-to-Guest file copy. You have to enable Guest Services on the virtual machine and restart it. Then use Copy-VMFile:
Copy-VMFile -Name svlnagios -SourcePath 'C:tempdemofile.tar.gz' -DestinationPath '/home/eric' -FileSource Host
MAC Control
Linux really doesn’t like its adapters’ MAC addresses to change. On a standalone host, this might not ever be a problem. In a cluster, it will be a problem. Lock it in.
- After the virtual machine has booted at least once, shut it down.
- Change the VM’s properties so that it uses a static MAC address for the virtual adapter.
- GUI Method. In Hyper-V Manager, open the VM’s properties dialog. Click the + next to the virtual adapter in the left pane. Select the Advanced Features sub-tab. In the center pane, change the MAC setting to Static. You can override the address if you want to. (Note: if you have never turned the VM on, the suggested address will be all zeroes).
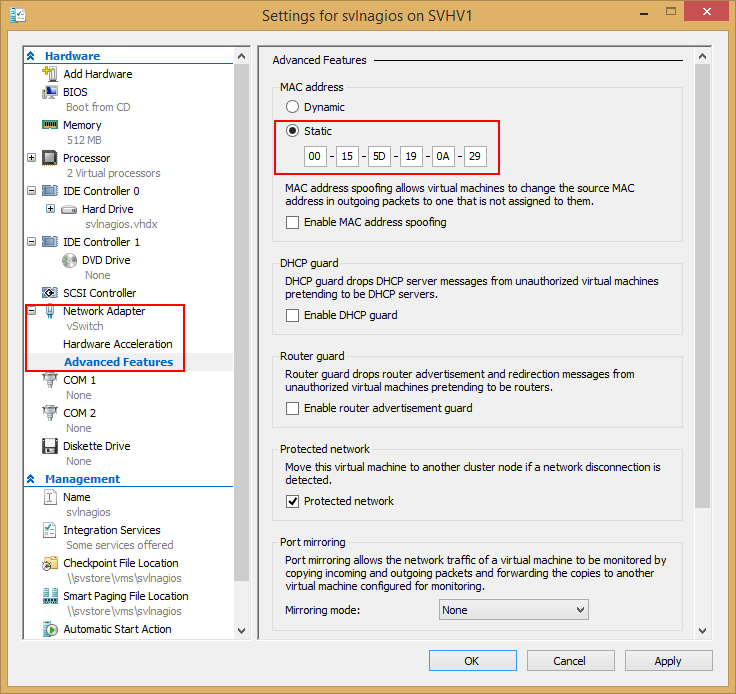
Static MAC
- Powershell Method.
- If you don’t want to manually specify an address, verify that it has one already:
Get-VMNetworkAdapter -VMName 'svlnagios' | select MacAddress
- If it’s got one, apply it statically:
Set-VMNetworkAdapter -VMName 'svlnagios' -StaticMacAddress (Get-VMNetworkAdapter -VMName 'svlnagios').MacAddress
Of course, you can always assign one of your own.
- If you don’t want to manually specify an address, verify that it has one already:
- GUI Method. In Hyper-V Manager, open the VM’s properties dialog. Click the + next to the virtual adapter in the left pane. Select the Advanced Features sub-tab. In the center pane, change the MAC setting to Static. You can override the address if you want to. (Note: if you have never turned the VM on, the suggested address will be all zeroes).
When complete, turn the VM back on.
NOOP
One of the very basic things that an operating system does is coordinate input and output operations. The Linux kernel has four I/O scheduling modes. For physical hardware, I’m sure that there is some gigantic debate raging out there on the Internet somewhere over which is “best”. It’s probably about as heated as the debates over whether a Star Destroyer’s turbolasers would actually make an asteroid explode. In terms of Hyper-V, that debate has about the same significance. Hyper-V does the actual I/O scheduling because it’s in charge of hardware. So, we want to tell our Linux machine to not get involved by setting its I/O scheduling mode to “NOOP”. These instructions are shown with sudo whenever that is necessary, but remember you can sudo -s and skip typing it on each command.
Edit the GRUB loader:
sudo nano /etc/default/grub
This will load the GRUB configuration file. Find the line that says:
GRUB_CMDLINE_LINUX_DEFAULT=""
Change it to:
GRUB_CMDLINE_LINUX_DEFAULT="elevator=noop"
Press [CTRL]+[X]. You’ll then need to press [Y] to save the changes, then [Enter] to indicate that you want to save the data back to the file you found it in. That will leave you back at the prompt.
And finally:
sudo update-grub2
sudo shutdown -r now
IP Addressing
I use DHCP reservations for all my Linux systems. I have to give them static MACs anyway, so why not integrate? I’ve also got my DHCP servers set to auto-update DNS for all systems whether they ask for it or not, so I can use name resolution right away without any magic.
The DHCP client in Ubuntu is “dhclient”. To see what its current status is (will also try to get an IP if it hasn’t got one):
dhclient -v
If it complains about “no broadcast interfaces found”, you can try to force it to renew:
dhclient eth0 -v
To release an address:
dhclient -r -v
If you prefer static addressing, I found a tutorial for you. Personally, I’d use nano instead of vi, but again, it’s all up to you.
Rename the System
This isn’t a necessary thing for everyone, but if you want to use this as a template then you’ll need to know how to rename its clones.
sudo hostname newhostname
Change the local name in the hosts file:
sudo nano /etc/hosts
Change the hostname file:
sudo nano /etc/hostname
Using this Installation to Clone Linux Guests
If this is your first installation of Linux on Hyper-V, you can use it as a basis to create others. Linux does not use GUIDs like Microsoft does so there’s no SID or anything like that to worry about. However, any SSL keys used in one system will be transferred to any clones. For what I’ve shown you here, the only keys that exist are for your SSH server. Security best practices dictate changing this key, although things will work even if you don’t.
To properly prepare the Linux installation that we created above for cloning:
- If necessary, rename the operating system using the steps in the previous section. Use something generic (I picked ‘xenialtemplate’).
- Shut down the guest. You now have two options:
- If you wish to keep all of the configuration, like CPU and memory, just export it to a safe location and be done with it. This option works well if you built it using a good name for the purpose. If you didn’t you can rename the virtual machine and its VHDX first. If you choose to export, you’re finished!
- You can copy out only the VHDX and continue using this virtual machine. To do that, continue reading these steps.
- Remove the virtual hard disk from the virtual machine (this is to clear the security descriptors).
- Copy the virtual hard disk to a safe location with a generic name (ex. ‘xenialtemplate.vhdx‘).
- Re-attach the source VHDX to the original virtual machine.
- Follow the below steps for clean-up.
To deploy a clone from your saved system:
- If you exported the template, use an import operation (copy!) to build your new deployment. If you saved only the VHDX, create a new VM without a virtual hard disk. Copy the source VHDX to the desired location, rename it in accordance with the new virtual machine’s name, and attach it.
- Boot the guest and login.
- Use the steps in the preceding section to rename the guest.
- Enter: rm /etc/ssh/ssh_host_*. This deletes the SSH server’s host keys.
- Enter: ssh-keygen -A. This rebuilds the SSH server’s host keys.
That’s it!
Next Steps
As I said before, this post is really just to get you going. I’m going to be back soon with some very compelling reasons for you to go through this (but really, it wasn’t that bad, admit it).
Make sure to get your system patched before moving on.


Not a DOJO Member yet?
Join thousands of other IT pros and receive a weekly roundup email with the latest content & updates!
More in this category


About the Author

Eric Siron


522 thoughts on "How to run Linux on Hyper-V with Ubuntu Linux Server as a Guest"
Hi all
You can use Generation 2 vm since Ubuntu 14.04 (just make sure to disable secure boot)
Also I get better performance by using a static VHDX
Yes, Generation 2 can definitely be done, but they never seem as stable in my environment as generation 1 and I know that I’m not the only one with that experience.
Since most deployments aren’t very sensitive to disk performance, it makes sense for almost everyone to use dynamic VHDX for Ubuntu Server. For a measly 1 or 2 percent speed hit, the actual used disk footprint shrinks to a little over 1 GB of space.
Fixed disk are not for performance in Ubuntu VM, on heavy load, I/O schedulers doesn’t handle dynamic expense very well. With a fixed disk you eliminate this problem. Even with NOOP Scheduler
We have many Generation 2 Linux Vm in production, and we do not have any real trouble.
Dynamically Expanding Disk, immediately after a shrink operation
root@svlnagios:~# dd if=/dev/urandom of=speedtest bs=1M count=2048
2048 0 records in
2048 0 records out
2147483648 bytes (2.1 GB) copied, 272.07 s, 7.9 MB/s
root@svlnagios:~# dd if=speedtest of=/dev/null bs=1M
2048 0 records in
2048 0 records out
2147483648 bytes (2.1 GB) copied, 166.079 s, 12.9 MB/s
Same disk, same location, immediately after being converted to fixed
root@svlnagios:~# dd if=/dev/urandom of=speedtest bs=1M count=2048
2048 0 records in
2048 0 records out
2147483648 bytes (2.1 GB) copied, 323.637 s, 6.6 MB/s
root@svlnagios:~# dd if=speedtest of=/dev/null bs=1M
2048 0 records in
2048 0 records out
2147483648 bytes (2.1 GB) copied, 160.431 s, 13.4 MB/s
———————————————–
That’s 4% slower performance for the dynamic disk on the read operation and a 2% gain for the dynamic disk on the write, even though it included an expansion. I don’t see anything there that justifies giving up the extra storage space per system to hold a lot of zeros. In case you’re curious as to just how many zeros we’re talking about:
FileSize
——–
5515509760 (dynamic)
42953867264 (same disk converted to fixed)
If sacrificing that space works for you, then that’s good for you. But, I see no reason to change my general recommendation.
I’m also glad that you’re not having problems with Gen 2. But, if you had to go to fixed to get rid of I/O problems that I’m not seeing in Gen 1, maybe that’s a sign. Either way, I’ve had problems with Gen 2 and so have other people. Because Gen 2 adds nothing of value to Linux guests and there is a fair mass of anecdotal evidence that it’s problematic, I feel comfortable staying with that recommendation as well.
Hi all
You can use Generation 2 vm since Ubuntu 14.04 (just make sure to disable secure boot)
Also I get better performance by using a static VHDX
This is a cool introduction for people who don’t know much about linux. If I may make a couple of suggestions, though:
1. Please do not tell people to just log in as root. Unless you are in a position where you need be logged in as root to run a series of commands (i.e., ./root_script.sh > /var/log/mydir/root_log), you should stick with running things as your standard user or with sudo. If you find yourself using sudo *all* the time, you might have messed up directory permissions. More on this: http://askubuntu.com/a/16179/22063
2. In linux, you don’t just have files and directories- you just have files. Even directories are just “special” files. http://unix.stackexchange.com/a/18606/42292
3. You should be able to use “logout” to log off.
4. Single dashes are flags, and you can have a lot of those together, like “tar -xvzf myfile.gz” http://serverfault.com/a/387936/89049
Hi John,
Thanks for the comments!
I don’t think I told anyone to actually log in as root, did I? I’d hope not, since, as far as I can tell, you can’t actually log in as root anymore. Yes, I typically do “sudo -s” but that’s because I’m generally only on a Linux system for the purpose of doing admin stuff and then I get out. I may not have made that clear enough here so I certainly welcome the reminder. Even if I did make it clear, the reminder never hurts.
Fair enough on the directory/file non-distinction, although I think that probably makes things more confusing than they need to be.
That’s good info on the single-dashes vs. double-dashes! Thanks!
Eric,
great timing! I also started a few months ago to investigate the possibilities with Linux under Hyper-V, as using Microsoft under SPLA (for service providers) is straight forward a pain in the butt.
We already provide Linux mail servers to our customers with great success. And we can simply use HA setups, replication and whatever without having to bother a lot with licensing agreements. The next big thing I am really interested in is if there are real replacements for Remote Desktop Session Host and if Samba 4 can replace a basic Domain Controller.
I’m keen to see what you cherry picked for your next Linux post 😉
Keep up the great posts, always loving to delve into it.
Cheers
Juri
Hi Eric,
I have spent several days reading your various and highly informative blog posts on Hyper-V. My head still hurts, although your posts are the first to begin making some sense to me. I think your writing style is a good match or something. I have have very recently began testing the waters with Hyper-V Server 2012 R2 and knew very little about it. In fact, I reaslised just how little I knew about it after reading some of your posts. What caught my eye this time around however, is that you are using Ubuntu Server 15. I admit that I’m just playing around with this for the moment, at least until I build sufficient confidence in what I’m doing to deploy this. One of the VM’s I’ll be hosting on Hyper-V will be a Plex media server, built on top of Ubuntu Server 15, bare metal is a little Dell R210 R2.
I also have plans to have CentOs/ Asterisk/ FreePBX sitting in another VM and my DC sitting in yet another rolling out AD, DHCP and DNS. Storage for the media is giving me a headache as I can’t really do much internally nor can I add an HBA due to the need for a TDM card for the PBX, so I have opted to use one of the internal NIC’s as a direct iSCSI link to another server. This of course means that all other traffic, including management of the host will be going over a single Gbit NIC. It’s not ideal, but it’s what I have to work with. Any pointers/ tips you could share would be most welcome.
rgds
Alastair
Hi Alastair,
Thanks for the comments! I like it when I help someone.
I’m afraid I’m not familiar with the R210. Does it only have one expansion slot? If so, you’re going to have to QoS that network card. Look at the second example on this link for some starting ideas. If it weren’t for Plex, I think you’d probably be able to get by without a lot of drama. Plex is going to throw the balance off, though.
Hi Eric,
I have spent several days reading your various and highly informative blog posts on Hyper-V. My head still hurts, although your posts are the first to begin making some sense to me. I think your writing style is a good match or something. I have have very recently began testing the waters with Hyper-V Server 2012 R2 and knew very little about it. In fact, I reaslised just how little I knew about it after reading some of your posts. What caught my eye this time around however, is that you are using Ubuntu Server 15. I admit that I’m just playing around with this for the moment, at least until I build sufficient confidence in what I’m doing to deploy this. One of the VM’s I’ll be hosting on Hyper-V will be a Plex media server, built on top of Ubuntu Server 15, bare metal is a little Dell R210 R2.
I also have plans to have CentOs/ Asterisk/ FreePBX sitting in another VM and my DC sitting in yet another rolling out AD, DHCP and DNS. Storage for the media is giving me a headache as I can’t really do much internally nor can I add an HBA due to the need for a TDM card for the PBX, so I have opted to use one of the internal NIC’s as a direct iSCSI link to another server. This of course means that all other traffic, including management of the host will be going over a single Gbit NIC. It’s not ideal, but it’s what I have to work with. Any pointers/ tips you could share would be most welcome.
rgds
Alastair
Hi Eric
Thanks for this great article !
Just below your poweshel script to create a VM, you wrote “From there, a simple Start-VM will get us going. Rev it up and get connected to the console using the method of your choice”.
Is there a way to do that from a Linux client ?
Sort of, but it’s pretty painful. You have to find a WBEM/WMI/CIM client for Linux that can talk to a Windows host and use the WMI or CIM objects and commands. I got some things working a few years ago but decided that it was much more than most people were going to be willing to go through. Some things in Windows require Packet Privacy and that wasn’t implemented in the open source Linux client that I found. I do believe that all of the items and functions in the virtualization namespace were working, but I don’t know about virtualizationv2. I don’t even remember what client I was using then.
In Server 2016 you’ll be able to use SSH and it will be a lot easier.
Hello.
Thanks for a very good post on the subject!
I have one problem in the Hyper-v Manager, I cannot se what IP adress the guest has. Status is OK but no IP.
Any suggestion on how to solve this? I can login to the firewall and see what the IP is in the DHCP leases, but I would like to get it to work as it should.
It doesn’t work for Linux guests.
Hello.
Thanks for a very good post on the subject!
I have one problem in the Hyper-v Manager, I cannot se what IP adress the guest has. Status is OK but no IP.
Any suggestion on how to solve this? I can login to the firewall and see what the IP is in the DHCP leases, but I would like to get it to work as it should.
Found your post while sorting something out running Ubuntu Server in HyperV, so thank you (I missed the linux-virtual package from MS’s Technet article – which is great, but it splits instructions and best practices up).
As someone who is far more comfortable in *nix than Windows, I thought I would comment on this:
“Tab completion exists, but it is different, and in many ways, less robust than it is in PowerShell or the Vista/2008 command processor. Basically, you can navigate the directory structure with it, but you often need to seed it with the first few characters of what you’re looking for.”
You have to give it a few characters to remove ambiguity— hitting tab will autocomplete with no input if there is no ambiguity. Hitting tab-tab will display a list of options matching what you’ve typed already.
Using a more modern shell (like zsh) will allow autocomplete of parameters and only-relavent filesystem entities.
Is “Command Processor” the same as the DOS-like Command Prompt you get by running “cmd” from the Start Menu? If so, the suggestion that bash’s autocomplete is less robust is very amusing.
PS:
You can combine your two apt-gets into one line;
This:
# apt-get install linux-virtual
# apt-get install linux-tools-virtual linux-cloud-tools-virtual
Becomes:
# apt-get install linux-virtual linux-tools-virtual linux-cloud-tools-virtual
And it will all just work and saves some time.
Thanks for the insights!
Note that I did qualify the robustness comment. It could be a matter of familiarity, but I find the way that tab completion operates even in the lowly cmd prompt (recent versions, to be sure) to be somewhat more intuitive than in the *nix shells I’ve used to date.
I assumed that running all of those apt-get items on a single line would work, but I also assumed that there was a reason the directions that I found didn’t write them that way and that I wouldn’t have the *nix knowledge to sort out any problems. Thanks for the confirmation that it can all be on one line.
It looks like Microsoft/Canonical have changed this process slightly.
Now there are specific commands to run based on what version of Ubuntu you are running. If you just run the commands above it installs an old incompatible version of the tools so things light the IP addresses in the Linux VM don’t display in Hyper-V.
https://technet.microsoft.com/windows-server-docs/compute/hyper-v/supported-ubuntu-virtual-machines-on-hyper-v
Additionally you need to fully remove the previous version and reboot the VM before installing these updates.
That’s some good info, thanks for sharing. I have several 16.04 Ubuntu machines working on the instructions in this article that have not updated themselves into problems. I’m incorporating these new commands and will update the article once I have some more concrete steps.
Found your post while sorting something out running Ubuntu Server in HyperV, so thank you (I missed the linux-virtual package from MS’s Technet article – which is great, but it splits instructions and best practices up).
As someone who is far more comfortable in *nix than Windows, I thought I would comment on this:
“Tab completion exists, but it is different, and in many ways, less robust than it is in PowerShell or the Vista/2008 command processor. Basically, you can navigate the directory structure with it, but you often need to seed it with the first few characters of what you’re looking for.”
You have to give it a few characters to remove ambiguity— hitting tab will autocomplete with no input if there is no ambiguity. Hitting tab-tab will display a list of options matching what you’ve typed already.
Using a more modern shell (like zsh) will allow autocomplete of parameters and only-relavent filesystem entities.
Is “Command Processor” the same as the DOS-like Command Prompt you get by running “cmd” from the Start Menu? If so, the suggestion that bash’s autocomplete is less robust is very amusing.
PS:
You can combine your two apt-gets into one line;
This:
# apt-get install linux-virtual
# apt-get install linux-tools-virtual linux-cloud-tools-virtual
Becomes:
# apt-get install linux-virtual linux-tools-virtual linux-cloud-tools-virtual
And it will all just work and saves some time.
Thanks for the information here. I wondered if you had some advice on how i can attach a usd or cdroom or and drive to the guest ubuntu system running on hyper v
Hyper-V does not provide USB pass-through services, so you’re kind of stuck there. Enhanced Sessions are only available for certain Windows guests and not any Linux guests.
For CD/DVD drives, the option is on the virtual machine’s property page. Find the virtual CD/DVD drive and there you can pick an ISO or have it pass-through any CD/DVD drive that it detects on the host.
thank you very much
Hi Eric,
Thanks for the article. I did the install using Server v16.x Everything seemed to go well until rebooting:
Boot Failed. EFI SCSI Device.
PXE Network Boot Using IPV4
……………
PXE-E8: Server response timeout
Boot Failed. EFI Network.
Boot Failed. EFI SCIS Device.
No Operating System was Loaded. Press a key to retry the book sequence.
Any ideas?
Lambert
I have not yet tried Linux under 2016 or in a Generation 2 virtual machine, so I don’t yet have any knowledge. If Secure Boot is enabled, try turning that off first. Microsoft has made Secure Boot useless anyway.
Hi Eric,
Thanks for the article. I did the install using Server v16.x Everything seemed to go well until rebooting:
Boot Failed. EFI SCSI Device.
PXE Network Boot Using IPV4
……………
PXE-E8: Server response timeout
Boot Failed. EFI Network.
Boot Failed. EFI SCIS Device.
No Operating System was Loaded. Press a key to retry the book sequence.
Any ideas?
Lambert
Great article! I have an issue with a RHEL VM running on Hyper-V the disk is dynamic and is growing but Linux is not seeing the additional space. The disk if seen from Hyper-V is 62 and will grow to 100GB but Linux only sees the original 50GB allocated.
Windows guests need to have their volumes expanded or additional volumes created to use any unallocated space in the containing virtual disk. I do not know how to do such a thing in RHEL, but it would stand to reason that the same principles would apply.
Has anyone had a problem with the virtual hard drives changing order. It’s happened to me a couple of times and I have to reconfigure a couple of things every time it happens. I’m running 16.04 on a hyper-v cluster with MySQL.
Thank you for your detailed post. Very helpful!
For some reason I am getting Integration Services: Update Required
Any idea what is causing this?
uname -a returns:
4.4.0-57-generic #78-Ubuntu SMP Fri Dec 9 23:50:32 UTC 2016 x86_64 x86_64 x86_64 GNU/Linux
lsmod gives me:
hv_vmbus 90112 7 hyperv_keyboard,hv_netvsc,hid_hyperv,hv_utils,hyperv_fb,hv_storvsc,pci_hyperv
Thanks!
Hi Lee,
The integration services will always report as out-of-date for Linux guests. The tools currently only know how to check the version of the services in Windows guests.
Good to know. Thank you for your quick reply!
Thank you for your detailed post. Very helpful!
For some reason I am getting Integration Services: Update Required
Any idea what is causing this?
uname -a returns:
4.4.0-57-generic #78-Ubuntu SMP Fri Dec 9 23:50:32 UTC 2016 x86_64 x86_64 x86_64 GNU/Linux
lsmod gives me:
hv_vmbus 90112 7 hyperv_keyboard,hv_netvsc,hid_hyperv,hv_utils,hyperv_fb,hv_storvsc,pci_hyperv
Thanks!
Hi Eric,
(I tried posting this a few days ago but it hasn’t shown up for some reason…)
I found this article very useful when setting up my first Linux VM a couple of weeks ago – we’re running a Ubiquiti UniFi Video NVR system on a VM, and I used your guide to run it on Ubuntu Server 16.04 and it all went swimmingly. We’re running it on Hyper-V Server 2012R2 as a Gen1 VM (because I thought Gen1 would be safest for Linux) – we have other 2016 servers, but the environment we’re using it in only has 2012R2 with no requirement to upgrade at this stage.
There was one bit of annoying oddness that I’ve come across that I thought I’d share – for some reason the Linux installer didn’t format its storage offset correctly. Checking the drives with fdisk results in the warning “Partition 2 does not start on physical sector boundary.” The OS drive was created as a raw VHDX and I allowed the Ubuntu installer to create vomumes and format as it saw fit during the installation process. I’ve read that this isn’t a big deal, but it has just annoyed me – I like to do things properly from the outset.
So what are your thoughts – is this something worth fixing? And how would you go about setting up the storage prior to installation to avoid it?
Thanks,
Trevor
I haven’t seen that sort of behavior since WS2003. I thought that everyone had worked it out by now.
If you’re not doing data-intensive operations, then it probably won’t matter. Does this help?: http://en.community.dell.com/techcenter/enterprise-solutions/w/oracle_solutions/1297.how-to-align-disk-partitions-using-the-fdisk-utility
This is a very old article, but it helped me get the latest Ubuntu Server into my Hyper-V. THANK YOU SO MUCH for taking the time to write this!
Assign Memory. Specify at least 1 GB of memory for your Ubuntu Linux machine with GUI. You can edit memory settings after VM creation. Tick the Configure Networking. Select a virtual switch to which the virtual network adapter of your VM will be connected. The Default Switch is used in this case. Later you can create and configure other virtual switches and connect your VM to the appropriate networks.