Save to My DOJO

Table of contents
Although most VMware administrators probably back up their virtualized environments regularly, backups are often centred around the virtual machines and not necessarily on the underlying infrastructure. Even so, it’s a good idea to backup (or at least document) your ESXi host configuration. Doing so will allow you to put things back to normal following a configuration error, boot disk failure, or another minor catastrophe. Fortunately, VMware provides native tools that make the process easy.
Before I Begin…
The approach that you will have to use varies depending on the version of VMware that you are using. If you are running VMware 6.x for example, then you will need to leverage vSphere CLI. However, this tool has been deprecated, which means that a different tool will be needed for those who wish to create a backup of a vSphere 7.x environment.
vSphere 6.x
The VMware tool for backing up host configurations is a command-line utility named vicfg-cfgbackup. There are two important things that you need to know about this utility before using it.
First, vicfg-cfgbackup is designed to be run in the VMware CLI environment. You can download the current version of vSphere CLI here. This tool adds VMware support to the Windows Command Prompt. Hence, the commands that I will be discussing in this blog post should be entered into a command-line environment, not PowerShell.
The second thing that you need to know about the vicfg-cfgbackup tool is that the vicfg-cfgbackup command’s syntax varies slightly depending on whether or not you are running the command on a Windows system. For this blog post, I will be working in a Windows environment. You will therefore see me adding a .PL file extension to the end of the vicfg-cfgbackup command. The .PL extension should not be used in non-Windows environments.
The reason why the .PL extension is required in Windows environments is because the vicfg-cfgbackup tool is based on Perl. You will therefore need to have Perl installed to use the vicfg-cfgbackup tool. It is also worth noting that your Perl deployment will need to have the XML/LibXML.pm library installed. Otherwise, you will get an error stating that windows “can’t locate XML/LibXML.pm in @INC (you may need to install the XML::LibXML module).”
You can download this library at https://metacpan.org/pod/XML::LibXML
If you happen to be using ActiveState Perl, then you can install the required module by entering the following command:
Ppm install XML::LibXML
You can see what the process of installing the required module looks like in Figure 1.
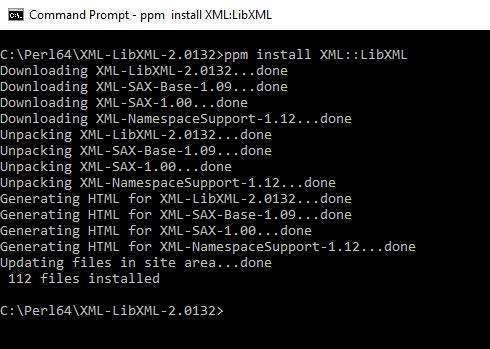
Figure 1
This is how you install the XML::LibXML module if you are running ActiveState Perl.
Backing Up the Host Configuration
As previously noted, the process of backing up a vSphere host’s configuration is relatively easy. You can do it with a single command. In a Windows environment, that command is:
Vicfg-cfgbackup.pl –server=<the host’s IP address> –username=root -s <output file name>
To give you a more concrete example, I have an ESXi host with an IP address of 147.100.100.224. If I wanted to create a configuration backup named 224CFG and place that backup into my PC’s C:\Data folder, then the command that I would use to do so would be:
Vicfg-cfgbackup.pl –server=147.100.100.224 –username=root -s C:\Data\224cfg
As you can see in Figure 2, upon entering this command, you are prompted to enter the root password. Once you do, the firmware configuration is written to backup.
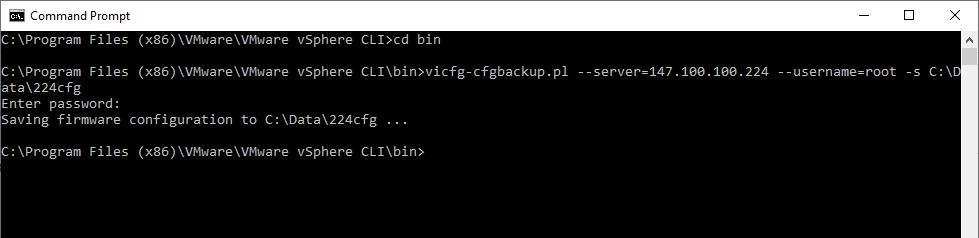
Figure 2
This is how you create a backup file.
As you look at the figure above, there are a couple of things that are worth paying attention to. First, you will notice that I had to execute the command in the C:\Program Files (x86)\VMware\VMware vSphere CLI\bin folder. This is not the default folder that appears when you open the command prompt environment.
Another thing to note is that when you enter the root password, nothing appears on the screen as you are typing. This is normal behaviour.
One more thing that I want to mention is that VMware allows you to use any filename that you want when creating a backup. I used 224cfg as a file name because 224 is the last part of the host’s IP address, and the cfg portion of the filename indicates that this is a configuration backup. Such a filename is fine for use in a demo environment such as the one that I am using, but in a production environment, there are two things that I recommend including in your filename.
The first thing is some sort of host identifier. Having a host identifier isn’t mandatory, but it is helpful to know which host a backup was created on. The other thing you should include in the file name is a reference to the host’s build number. Knowing the build number will be helpful if you ever have to restore the backup.
Restore vSphere Host Configuration
The single most important thing that you need to know before attempting to restore a host’s configuration data is that the host’s build number must match the build number saved within the backup file.
Suppose for a moment that you were to create a host configuration backup but don’t really have any immediate need for it. Now suppose that some time passes, and during that time, you perform a couple of software upgrades to your ESXi host. If there were suddenly a need to restore the host configuration, you would find that the restore operation would fail because the configuration backup build number is older than the host’s build number.
In a situation like that, there are two options available to you. The first option is to try to force the restoration despite the version mismatch. The vicfg-cfgbackup command supports the use of an -f flag. This flag causes vicfg-cfgbackup to ignore the version mismatch and restore the configuration anyway. Of course, in a version mismatch situation, forcing a restoration can yield unpredictable results.
The other option is to reinstall ESXi onto the host from scratch (being careful to install the correct version). You would then be able to restore the configuration backup and then update the host to the same build number it had been running before the failure. At that point, it would be an excellent idea to create a new configuration backup so that you can avoid having to work through the process that I just described if another restoration becomes necessary.
This brings up another important point. I very strongly recommend retaining copies of the installation media for all of the VMware software versions that you have installed in the past. You cannot simply assume that VMware will always make old versions of its software available for download.
This, of course, raises the question of how you can compare build numbers. There doesn’t seem to be an easy way to derive the build number from the backup file. That’s why I recommend including it as a part of the file name. You can check the host’s build number by using this command:
esxcfg-info -u
Before you restore the backup, you will need to place the host into maintenance mode. Upon doing so, you can restore your backup by using this command:
vicfg-cfgbackup.pl –server=<the host’s IPaddress> –username=root -l <the backup’s path and filename>
If, for example, I wanted to restore the backup that I created earlier, I could use this command:
vicfg-cfgbackup.pl –server=147.100.100.224 –username=root -l c:\data\backup
You will notice that this command contains the -l switch. This switch tells vicfg-cfgbackup that you are performing a restoration, not a backup.
vSphere 7
As previously noted, VMware has deprecated the vSphere CLI (https://kb.vmware.com/s/article/78473), and will not be using it in the future. As such, vSphere 7.x uses a completely different (but easier) method for backing up and restoring an ESXi host configuration.
Rather than using the vSphere CLI, the new technique involves using the ESXi Command line. In order to do so, you will need to be logged in as the root user.
The first step in the process is to synchronize the configuration with persistent storage. To do so, enter the following command:
Vim-cmd hostsvc/firmware.sync_config
Once the synchronization process completes, you can perform the backup. The command used for doing so is:
Vim-cmd hostsvc/firmware/backup_config
This command backs up the host configuration by creating a .TGZ bundle file. Upon the command’s completion, the console will display a URL from which you can download the bundle. At that point, you can simply open a Web browser and download the bundle file.
It is worth noting that downloading the bundle file will require you to make a slight modification to the URL that is provided. The URL includes an asterisk that takes the place of your host’s fully qualified domain name (FQDN). You will need to substitute your host’s FQDN or IP address for the asterisks. Suppose for example that your host’s IP address was 10.1.1.0. In that case, you would change http://*/downloads… to http://10.1.1.0/downloads…
Restoring the vSphere Host Configuration Backup
The process of restoring the backup is just as easy as that of creating the backup. As was the case for vSphere 6.x however, you must make sure that the VMware host is running the same build as was used when your backup was created.
The first step in restoring a backup is to rename your backup file. Remember, the backup is a .TGZ file. In order for you to be able to restore this file, you will need to change its name to configBunfle.tgz. The filename is case sensitive.
The next thing that you will need to do is to place the VMware host server into maintenance mode. You can do so by entering the following command:
Vim-cmd hostsvc/maintenance_mode_enter
Now that the host is in maintenance mode, you will need to copy your backup file to the ESXi host. As an alternative, however, you can copy the file to a datastore. To perform the actual restoration, enter the following command:
Vim-cmd hostsvc/firmware/restore_config 1 /<backup file location>/configBundle.tgz
The number 1 in the command shown above forces an override of any UUID mismatch that may occur. If you do not wish to override such a mismatch, you can omit the 1. It is also worth noting that the host will be rebooted upon the command’s completion.
Conclusion
VMware makes it really easy to backup and restore a host’s configuration, regardless of which version of VMware you are using. The one thing to remember, however, is to keep your host configuration backups up to date as you update your VMware hosts to newer builds.


Not a DOJO Member yet?
Join thousands of other IT pros and receive a weekly roundup email with the latest content & updates!
More in this category


About the Author
Brien Posey

