Save to My DOJO

VMware makes its own lightweight Linux operating system called Photon OS. Although VMware Photon OS is optimized for cloud computing platforms such as those offered by Amazon and Google, Photon OS is also optimized for use in VMware environments.
VMware Photon OS is primarily intended for use as a container host, and works with Docker, Garden, and Rocket. Administrators can use these container hosts as a platform for migrating lab-based containers to production container hosts running on premises or in the cloud.
Acquiring Photon OS
VMware makes Photon OS freely available through GitHub. Download packages are available in ISO and OVA format, and are also available for Amazon AWS, Google Cloud, Microsoft Azure, and Raspberry PI.
System Requirements
In order to deploy a minimal Photon OS installation, you will need at least 512 MB of hard disk space, although it is recommended to have at least 2 GB of space available. A developer installation requires at least 1.2 GB of space, with 4 GB or more recommended, and an edge deployment consumes a minimum of 700 MB of space, with 2 GB or more being recommended.
In addition to the required hard disk space, you will need at least 2 GB of memory.
Installing Photon OS
The Photon OS installation process can vary slightly depending on the installation source that you choose to use. For the purpose of this blog post, a full ISO was downloaded from the GitHub repository and installed onto a VMware virtual machine. For the purposes of this blog post, we’ll assume that you know how to create a VMware VM, and walk you through the Photon OS deployment process.
When the newly created VM boots from the ISO file, you should see the Photon OS splash screen, shown in Figure 1.
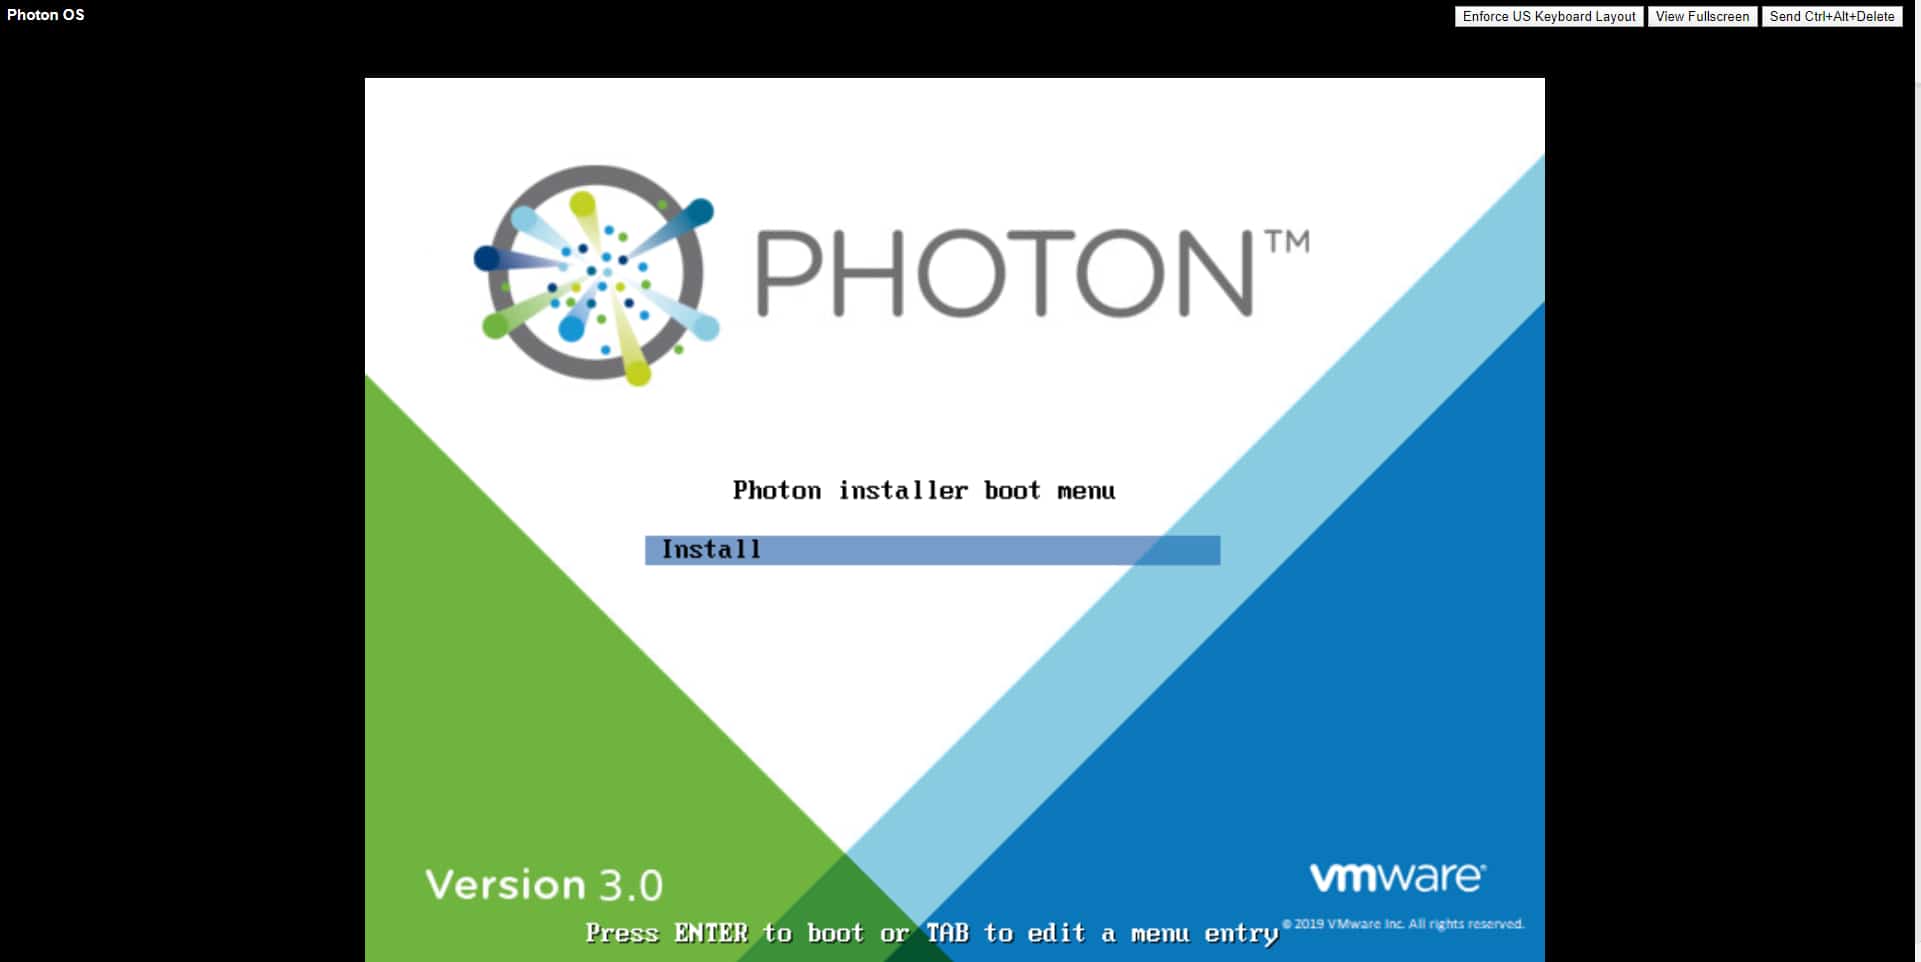
This is the first screen that you will see upon booting the VM.
Press Enter on the screen shown above, and VMware will launch the Photon Installer. The screen that you will be taken to prompts you to accept the VMware End User License Agreement. After accepting this agreement, you will see a screen asking you to choose a virtual disk and to choose how it should be partitioned. In most cases, you can simply choose the Auto partition option, shown in Figure 2.
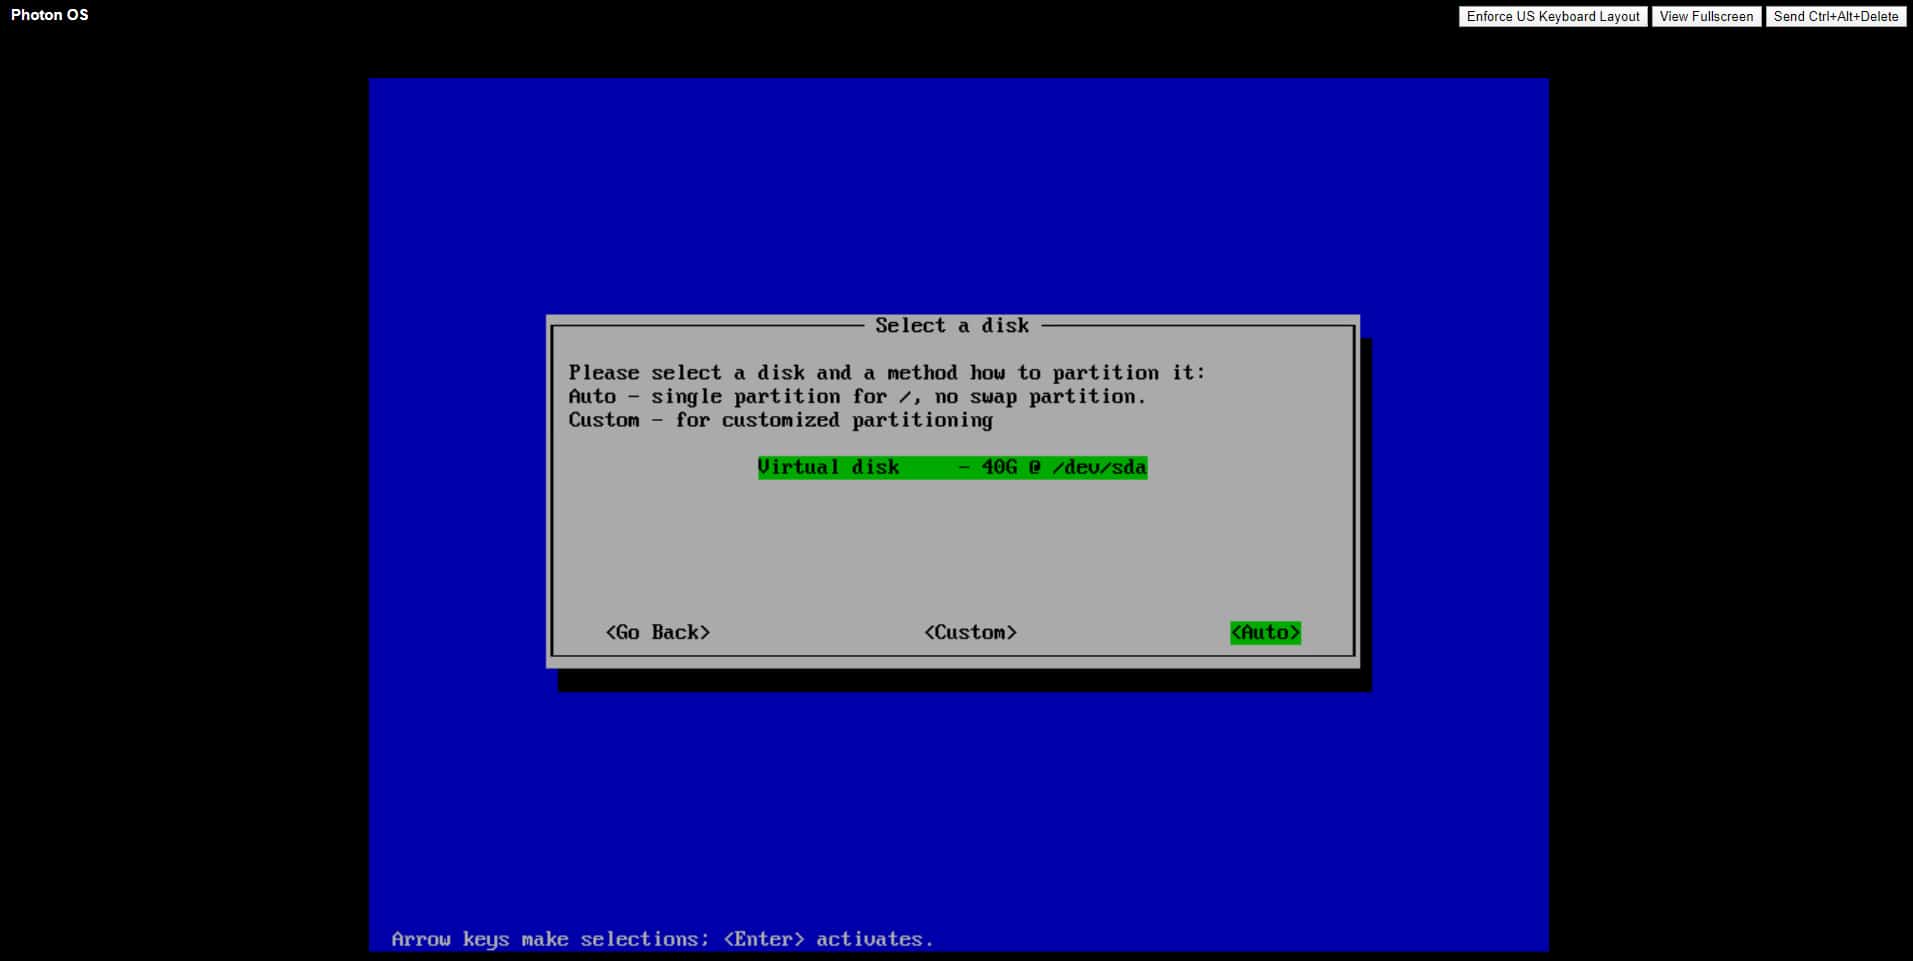
Choose the option to auto partition the virtual disk.
At this point, you will be asked to choose the installation type that you wish to perform. Your options will vary based on the installation media that you have downloaded. If you opted for the full ISO file, then your options include Photon Minimal, Photon Developer, Photon Edge, and Photon OSTree Host. The remainder of this blog post is based on a Photon Developer deployment.
Upon making your selection, you will be taken to a screen that asks if you wish to configure the network automatically or manually.
After you have made your selection, the installer will check to see if you are installing Photon OS within a VMware virtual machine. If a VMware hypervisor is detected then you will be given the option to install a VMware hypervisor optimized kernel, as shown in Figure 3. Be sure to choose this option if it is available.
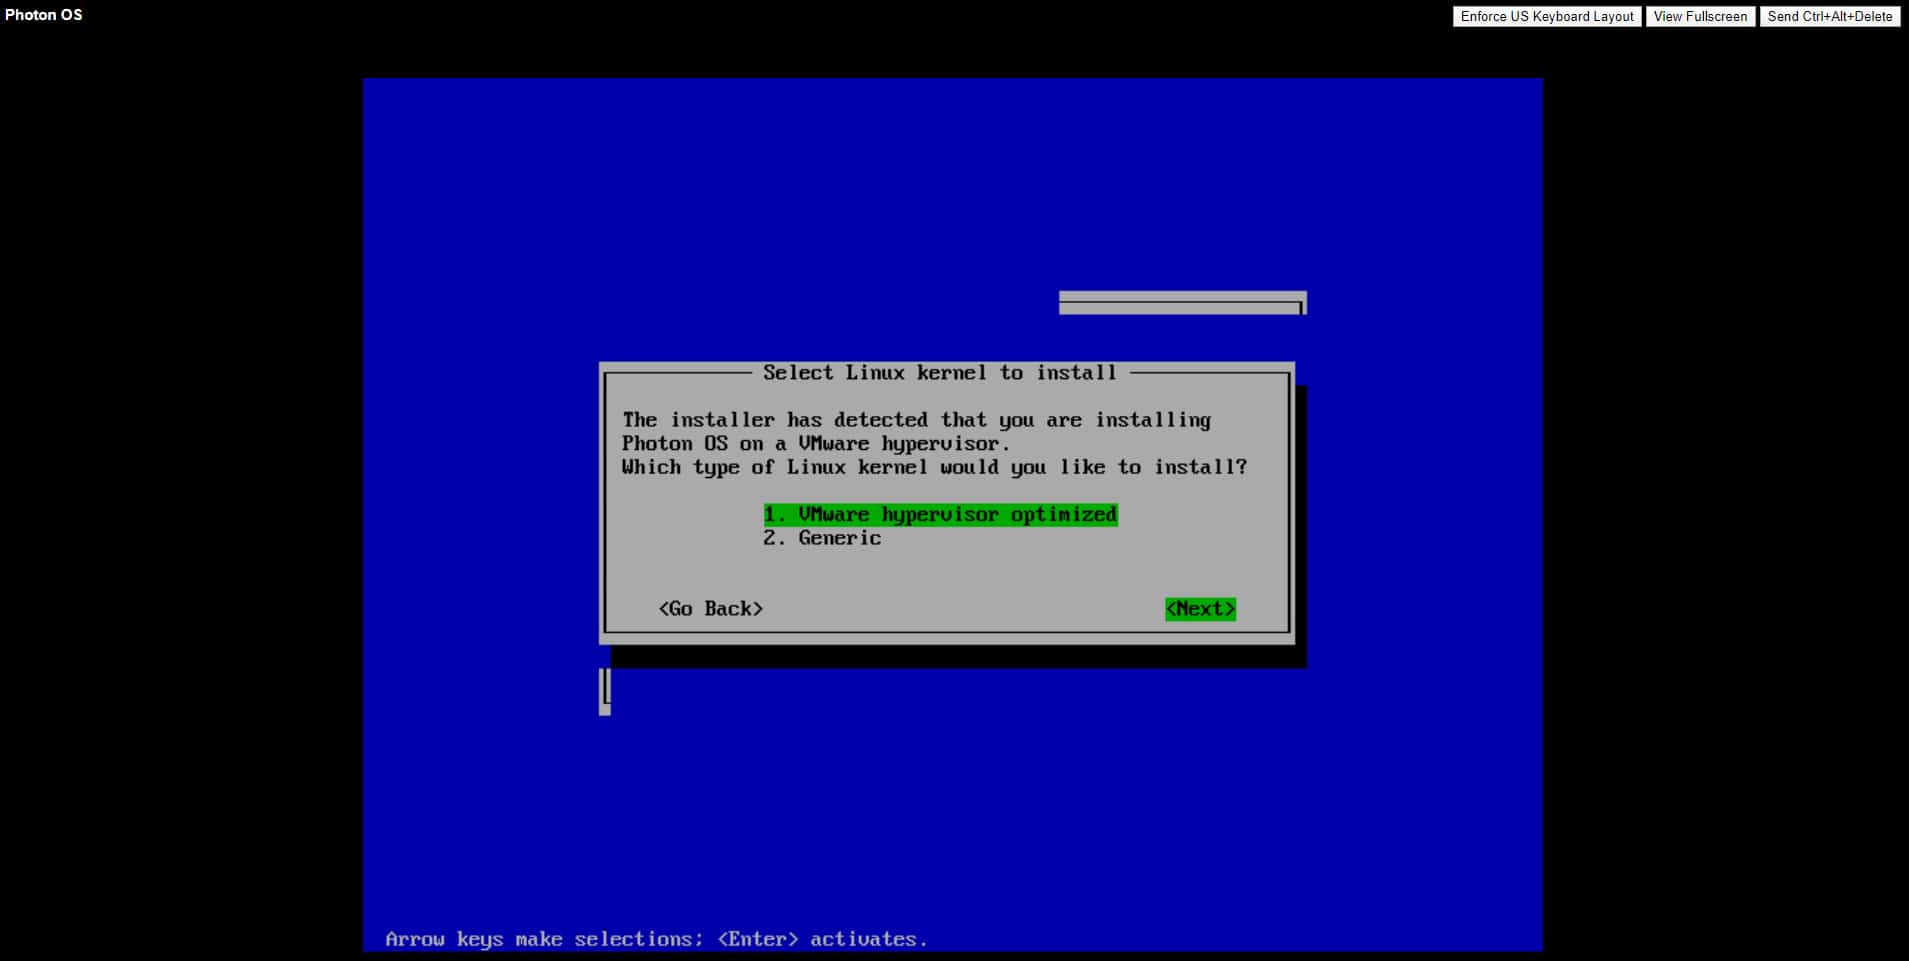
You should select the VMware hypervisor optimized kernel.
The next screen that you will see asks you to choose a hostname for your Photon VM. You will also need to provide a secure root password. When you are done, choose the Yes option to begin the installation process. Because Photon is such a lightweight operating system, it typically takes less than a minute to install.
Starting and Enabling Docker
Now that you have installed Photon OS, the next step in the process is to configure it to act as a container host. To do so, log into Photon OS and enter the following commands to enable Docker:
systemctl start docker
systemctl enable docker
You can see what this process looks like in Figure 4.

Testing Docker
Now that Docker has been installed and is running, you can test it by trying to pull the Hello-World image from the Docker Hub. To do so, simply enter the following commands:
docker pull hello-world
docker run hello-world
Upon doing so, you should see a message that says Hello From Docker! You can see what this looks like in Figure 5.
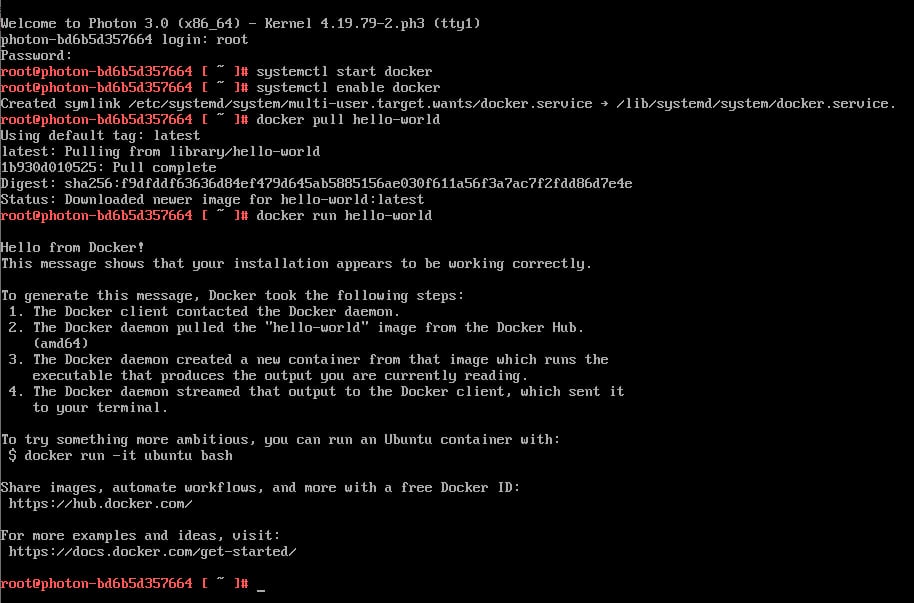
Photon OS displays a message saying Hello from Docker, indicating that the Docker containers are working properly.
Conclusion
The use of Docker, Garden, and Rocket containers is common in many cloud environments, For those environments that employ containers, VMware’s Photon OS may serve as the perfect lightweight platform on which to deliver critical applications and services.


Not a DOJO Member yet?
Join thousands of other IT pros and receive a weekly roundup email with the latest content & updates!
More in this category


About the Author
Nick Cavalancia

