Save to My DOJO
Today, I’m going to show you how to set up an iSCSI target server on a Linux box. The whole idea here is to mount an iSCSI LUN as a shared VMFS datastore on ESXi. This solution is great for testing or home lab environments. It’s a good compromise if you cannot afford, or don’t have access, to a proper SAN / NAS solution. You can, of course, use something like FreeNAS, OpenFiler or a Windows server as an alternative. This is something I explain in Of Storage, Protocols, and Datastores.
In our case, good old standard Linux will suffice. Without further ado, let’s begin.
What you’ll need
I’ve set up a VM, running Centos 7, hosted on ESXi 6.5 with the following specifications: 1 CPU, 4GB RAM, and two drives – 40GB and 50GB in size. You can use a physical Linux box if you wish since the outlined procedure works either way.
The secondary drive will be set up as an iSCSI LUN. This will be presented, via the iSCSI target service, to those ESXi hosts where it will be mounted as a VMFS datastore. As is often the case, some commands may differ depending on the Linux distro used. I always stick to CentOS just because it’s the distro I’m most familiar with.
Preparing the disk
The following is a step-by-step procedure on how to create and/or prepare a secondary disk on a Linux machine. This will serve as your iSCSI LUN. Have a look at How to Manage Disk Space on VMware Linux Virtual Machines if you want to learn more about the subject matter. Assuming your Linux machine is up and running, go ahead and carry out these steps. You can skip this section to the next if your machine is already adequately configured, as in having one with spare disk space that can be readily allocated.
Step 1 – Login as root
Step 2 – Run the following command to update your OS to the latest and install the targetcli package which will be needed later on
yum -y update
yum -y install targetcli
Step 3 – Add a second disk to the VM using a vSphere client. This step is optional if the Linux machine used has already been configured. If not, proceed as follows. We first need to determine the SCSI bus the disk is connected to and then trigger a scan using the echo … trick. In my case, the disk is attached to host2.
grep mpt /sys/class/scsi_host/host?/proc_name
echo "- - -" > /sys/class/scsi_host/host2/scan
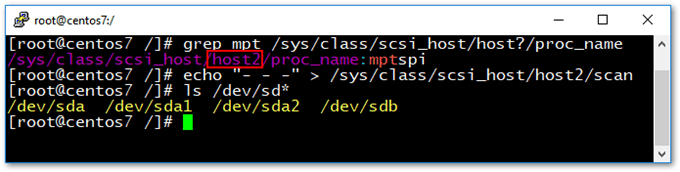
Scanning for a new SCSI disk in Linux
Step 4 – Next, we need to create a partition on the newly added disk, this in my case being /dev/sdb. Again, this step is optional. I’ll be using the fdisk tool to create a primary partition on the disk as per the following procedure.
fdisk /dev/sdb
- Press [n] and [Enter]
- Press [p] and [Enter]
- Press [1] and [Enter]
- Press [Enter] to accept the default first sector.
- Press [Enter] to accept the default last sector.
-
Press [w] and [Enter] to commit the changes to disk. You should now have a new partition called sdb1.
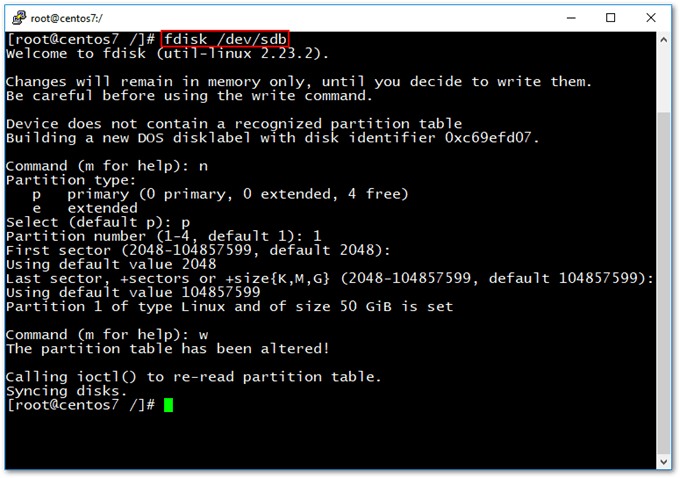
Creating a primary partition on the newly added disk
Step 5 – We have 2 choices here, either use the entire disk or use LVM. LVM is, give and take, the equivalent of dynamic disks in Windows, great if you want to create volumes that span multiple devices. I’ll be using LVM just to demonstrate the very basics.
Run the following commands to create an LVM logical volume. The lv-iscsi name assigned is completely arbitrary.
pvcreate /dev/sdb1
vgcreate vg-iscsi /dev/sdb1
lvcreate -l 100%FREE -n lv-iscsi vg-iscsi
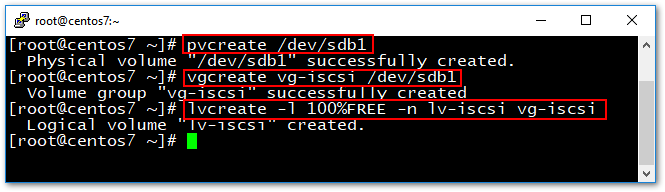
Using LVM commands to create a physical volume, volume group, and a logical volume
Setting up the iSCSI target
targetcli is a command-line object-oriented utility. It admittedly takes some time to get used to and to be completely honest, I have only used it a couple of times to date. I find it easier, and less error-prone, to set up iSCSI targets using some form of UI. For further details, have a look at this site.
Anyway, here are the commands you need to type in.
targetcli
cd /backstores/block
create scsids1 /dev/vg-iscsi/lv-iscsi
cd /iscsi
create iqn.2017-11.local.centos7:disk1
cd iqn.2017-11.local.centos7:disk1/tpg1/acls
create iqn.2017-11.local.centos7:node1
cd ..
set attribute authentication=0 demo_mode_write_protect=0
set attribute generate_node_acls=1
cd luns
create /backstores/block/scsids1
cd /
saveconfig
exit
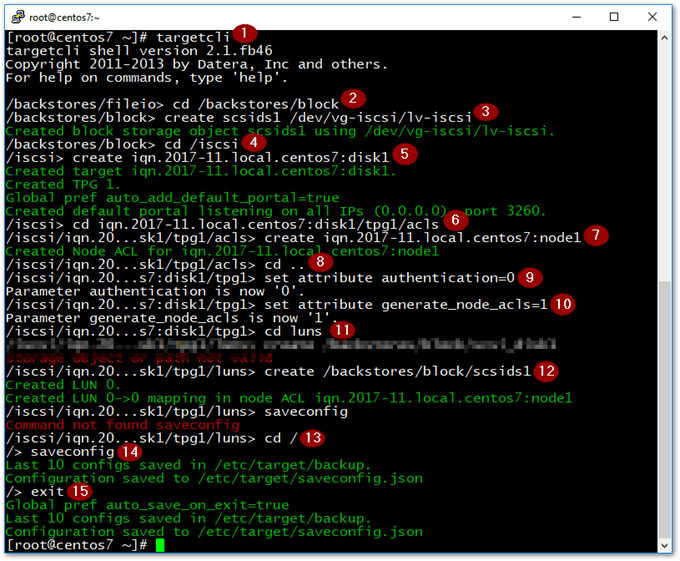
The targetcli utility is a command-line driven tool used to create and configure iSCSI target servers
The command labeled 9 in the screenshot above, should read set attribute authentication=0 demo_mode_write_protect=0. When I omitted the demo_mode_write_protect=0 bit, ESXi failed to mount the datastore throwing a Cannot change the host configuration error as shown next. I ran across the same issue when trying to mount the LUN on Windows via the iSCSI initiator client.
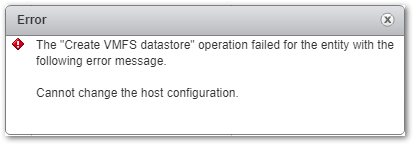
The LUN will fail to mount if it is write-protected
Mounting the iSCSI LUN as a datastore on ESXi
The following procedure can be executed on both vCenter managed and standalone hosts. You can use any of the vSphere clients but, personally, I prefer using the vSphere Web client.
Step 1 – Configure the iSCSI Software Adapter
If not already included, you must add the iSCSI Software Adapter first by clicking on the green plus sign (4) on the Storage Adapters (3) page under the Configure tab (3) after selecting the host on which the LUN will be mounted(1).
Step 2 – Add and configure the iSCSI Target
Once the adapter is added, highlight it (5) and click on the Targets tab (6). Click on the Add button (6) on the Dynamic Discovery page.
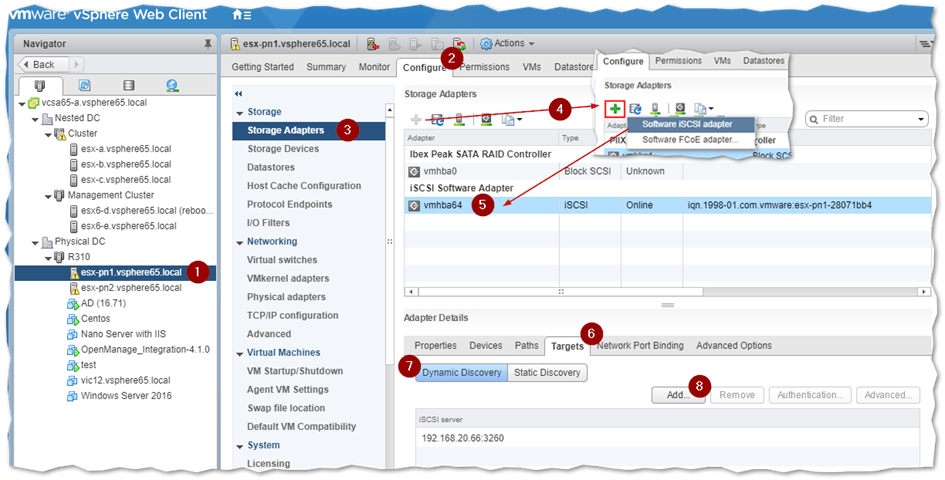
Adding and configuring the iSCSI Software Adapter on ESXi
In the iSCSI Server field, type in the IP address of the CentOS machine. Leave the port set to 3260 unless you changed this on the iSCSI target server. Press OK to continue.
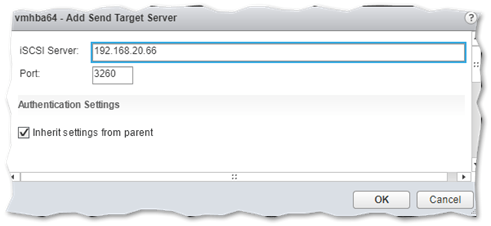
Adding the iSCSI target server to the iSCSI Software Adapter list of targets
Remain on the same screen and click on Rescan all storage adapters icon to have ESXi detect the iSCSI LUN. On the next screen, leave both options enabled and press OK.
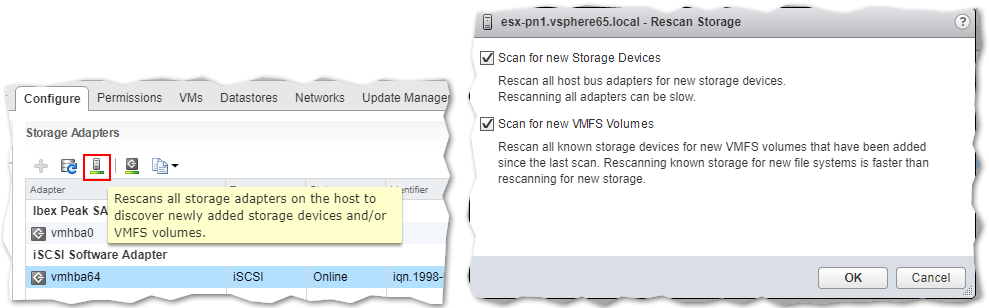
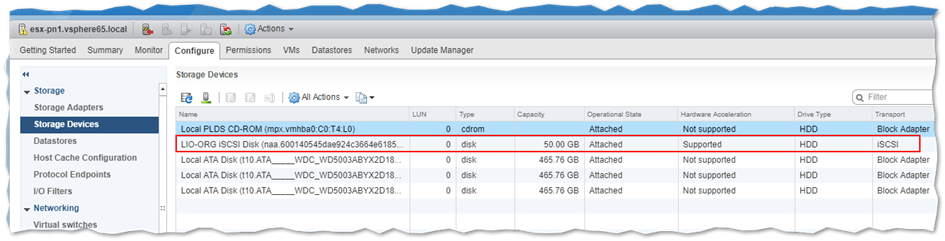
Moving on to the Storage Devices page, you should see the LUN listed as a new disk.
Step 3 – Mount the datastore.
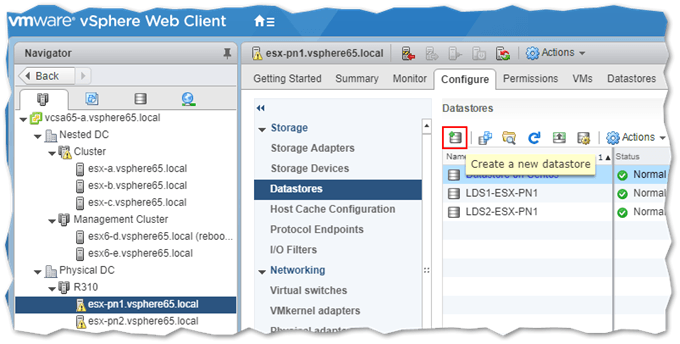
Click on the Datastores page and then click on the Create a new datastore icon. Follow the instructions presented by the New Datastore wizard.
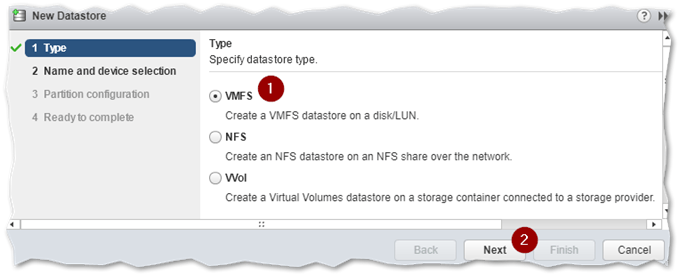
First, we need to specify the type of datastore we want to be created. Since we’re after a shared iSCSI datastore, VMFS is the option we need to use. Select it and press Next to continue.
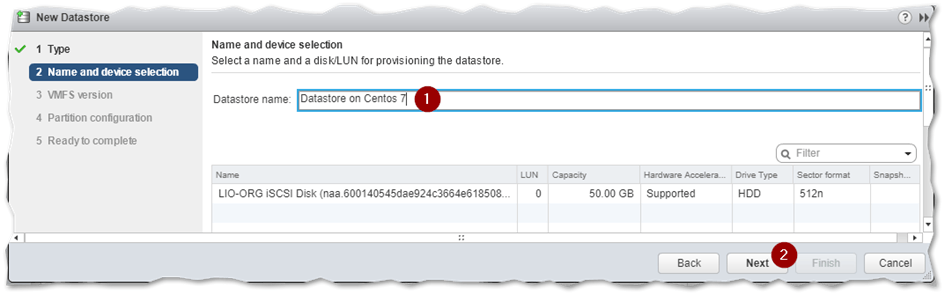
Type a name for the datastore (1) and click on the disk, corresponding to the LUN, from the bottom pane. In the next screenshot, you can see I only have one disk listed which is automatically selected. Press Next to continue.
Choose the VMFS version you want the LUN initialized to. Note that VMFS 6 can only be accessed by ESXi 6.5 hosts. Press Next to continue.

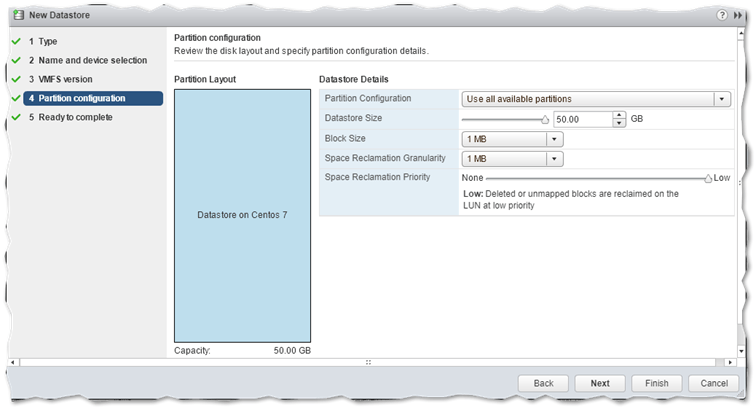
Review the partition information and set the Datastore Size if you don’t wish to use the whole disk. The rest of the settings cannot be changed, at least not in this case. Press Finish to create the datastore.
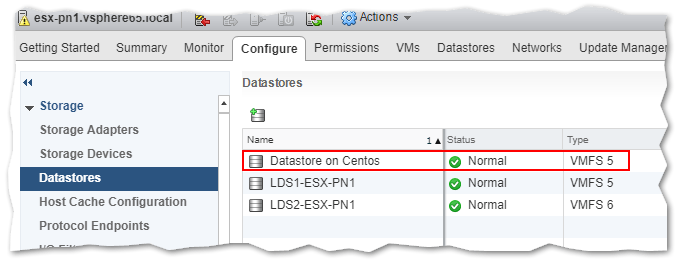
You should now see the datastore listed under Datastores along with any other previously created.
Once the datastore is created and initialized, you can easily mount it on other hosts by configuring the iSCSI Software Adapter and performing a scan. There is no need to go through the whole datastore creation procedure as ESXi detects that the LUN has already been initialized and mounted elsewhere as shown in the video below.
Conclusion
Once you get the hang of it, you can quickly create iSCSI LUNS on Linux and present them to ESXi as datastores. I did mention that this solution is a good compromise to alternatives such as FreeNAS or OpenFiler and perhaps less so to enterprise-level offerings from Netapp, HP, and other major players. Having said that, I would love to hear your thoughts on using similar setups in production environments especially in terms of performance and reliability, bearing in mind that most SDS solutions having Linux running at the core.
If you liked this post, why not have a look at our ever-growing list of VMware related posts?
Finally, as always, if you’ve got any feedback on the information presented here or if you’re having trouble setting up Linux iSCSI target to ESXi let me know in the comments below and I’m happy to lend a hand as soon as possible.


Not a DOJO Member yet?
Join thousands of other IT pros and receive a weekly roundup email with the latest content & updates!
More in this category


About the Author
Jason Fenech

