Save to My DOJO
Table of contents
A major vSphere update is something people are generally eager to test even if it means losing sleep deciding on whether to upgrade a 30-host cluster or not! Update 1 for vSphere 6.5 was recently released and with it a number of new vSphere client features, which is the subject of today’s post.
As you may know, the vSphere Web client will soon be permanently replaced by a better performing HTML5 based vSphere client. This latest client started life as a VMware Fling which eventually found its way in vSphere 6.5 as a second web-based vSphere client. The main problem, at the time, was the lack of functionality this new client provided when compared to its Adobe based sibling. With vSphere 6.5 Update 1, the HTML5 vSphere client enjoys a major boost making it suitable for daily use.
For today’s post, I picked 8 new features added to this latest vSphere client showing you exactly how to use them.
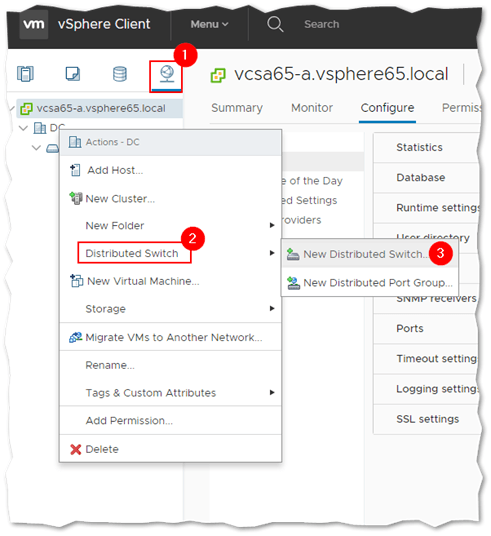
1. Distributed switches
With older releases of the vSphere client (HTML5), creating a new distributed switch (vDS), adding hosts to it, and managing advanced features was out of the question. This is no longer the case with vSphere 6.5 U1.
To create a new vDS, switch to Networking view, click on a datacenter and select New Distributed Switch from the Distributed Switch menu.
Creating a new distributed switch
Complete the New Distributed Switch wizard by supplying a name for the switch, the vDS version and various settings such as the number of uplinks and whether or not you want a default port group created.
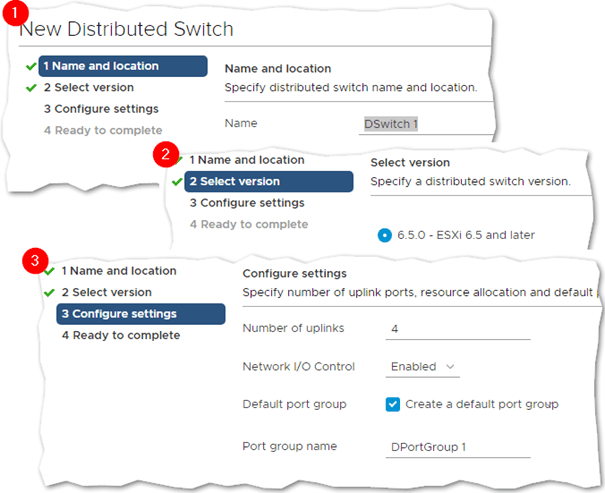
Completing the New Distributed Switch wizard
Other vDS functionality includes:
- Add and manage hosts.
- Remove distributed switch.
- Manage port groups for batch operations.
- Storage providers master details read-only view.
- Advanced features: NetFlow, port mirror (add/remove monitoring session), private VLAN configuration.
2. VM deployment options
The New Virtual Machine wizard can now be invoked practically from anywhere, resource pools included. Additionally, there are a couple of new deployment options when you compare this latest release of the client with the first one released. These include the option to deploy from template and clone an existing virtual machine.
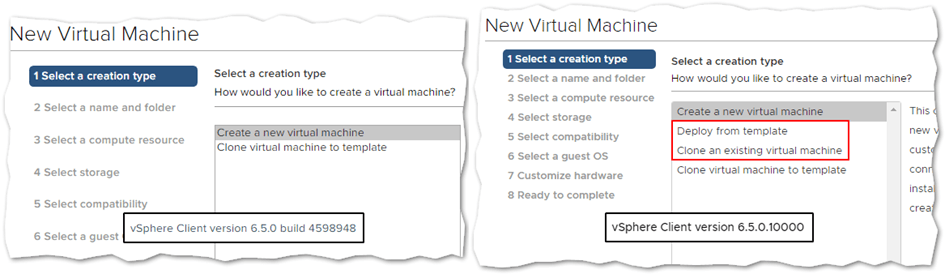
VM deployment options as available in the first and latest iteration of the HTML5 client
3. New VM hardware and options
You can now add existing hard disks to a virtual machine as well as create RDM disks. In addition, Boot Options, VMware Tools, and Power Management have now been added to the VM options tab.
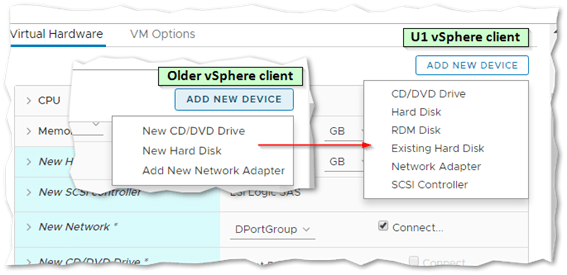
New hardware can now be added to VMs
The remote console option is now included in the VM context menu.
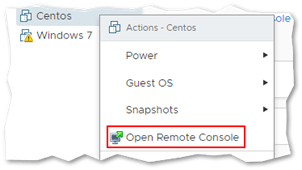
You can now remote console to a VM from its context menu
4. Migrating VMs
It is now possible to perform a number of move and migrate operations on virtual machines previously only possible via the vSphere Web Client. These include:
- Drag & drop between datastore and a datastore cluster.
- Move a virtual machine to a folder.
- Migration to new compute and storage resource.
- Migration to another cluster.
- Concurrent migration of multiple virtual machines.
- Migration across vCenter Servers.
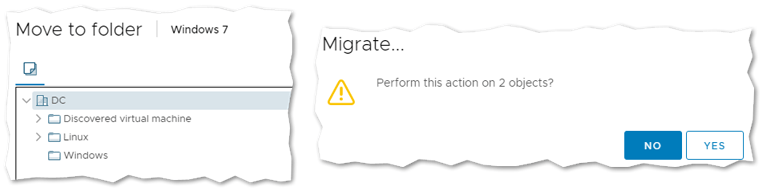
Moving a VM to a folder and migrating multiple VMs concurrently is now possible with vSphere Client 6.5 U1
5. ESXi host management
Added functionality in this department includes the ability to migrate VMs to another network, 2-factor authentication, and editing of the TCP/IP stack just to mention a few.
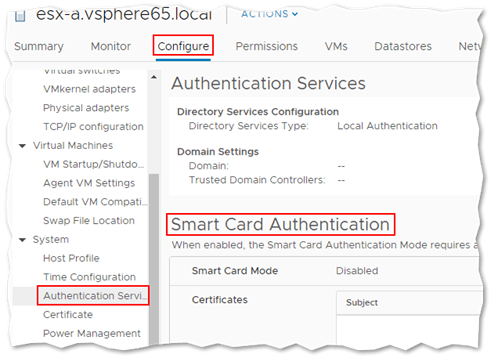
Setting up smart card authentication on ESXi as part of a 2-factor authentication scheme
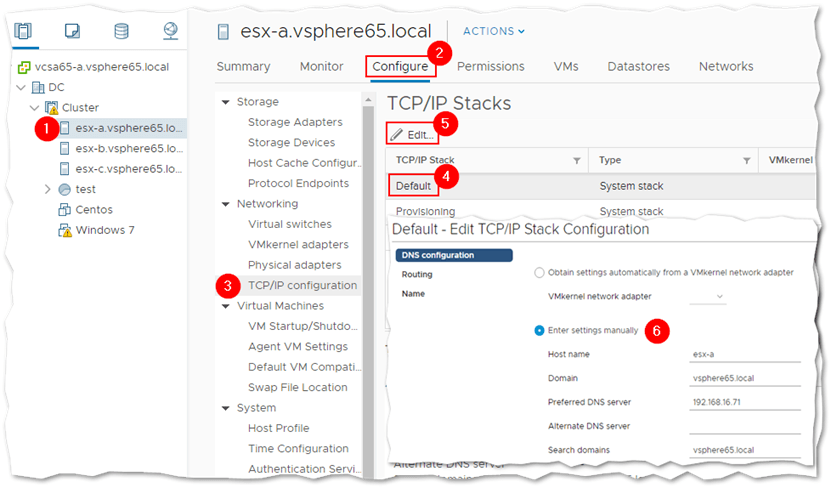
Editing the properties of designated TCP/IP stacks
There’s also a ton of storage / vSAN related functionality that’s been added to the client. These include:
- Host VVOL protocol endpoints.
- Erase partition.
- Turn locator LED on and off.
- Mark and unmark flash disk.
- Global view.
- Storage policy rules view.
- VM compliance view against storage policy.
- VM storage policy assignments (read-only view).
- Integrate storage policies in the wizard for deploying OVFs.
- Storage policy delete, check compliance, and reapply.
- Reset VSAN default policy.
- Hardware iSCSI to IPv6 support.
- Edit advanced options.
- Edit host cache configuration.
- Protocol endpoint properties, paths, and datastores.
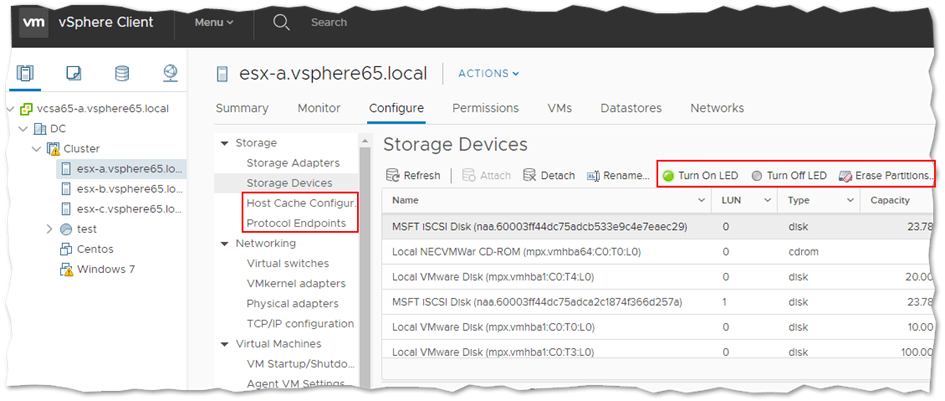
Many new storage related features have been added to vSphere client 6.5 U1
6. Guest OS Customization
Finally, it is now possible to customize the Guest OS of an existing VM during a cloning operation.
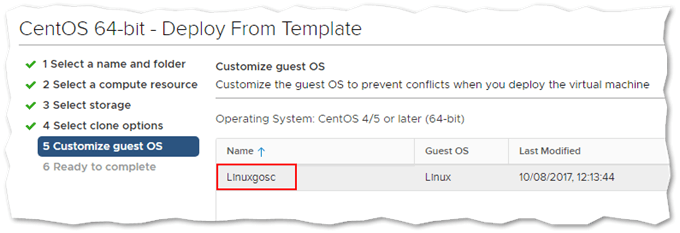
Customizing the guest OS on a template
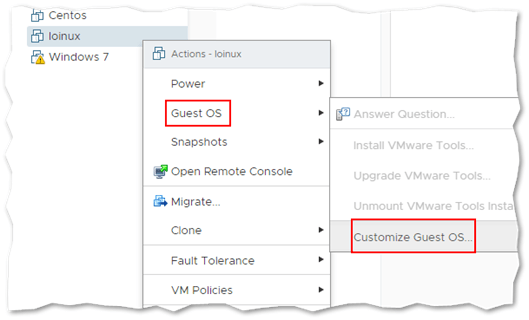
Modifying Guest OS customization for a deployed virtual machine
Note: I cover Guest OS customization in my vSphere VM templates series (Parts 1 – 2 – 3 – 4).
7. Registering a VM or template
Technically the functionality was introduced with the PO1 release but it’s worth mentioning if you’re still running the client that ships out with 6.5 GA. U1 builds up on 6.5b by adding UI validations and text customization to the VM registration process.
To reiterate, If you have a VM or template which is no longer listed in the inventory but is still responsive, you can easily add it back by browsing the parent datastore and re-registering it via its VMX file. You can do this by changing the view to datastore, right-click on a datastore where the VM or template folder resides. Click on Register VM to add back the resource to the inventory.
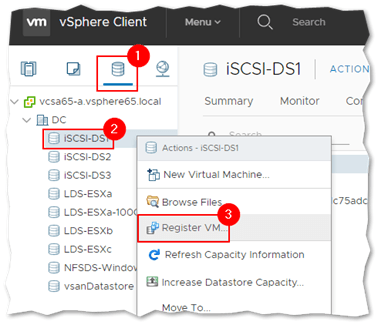
Registering a virtual machine back to inventory
On the Select File screen, navigate to the VM folder, select the VM’s VMX file and click OK.
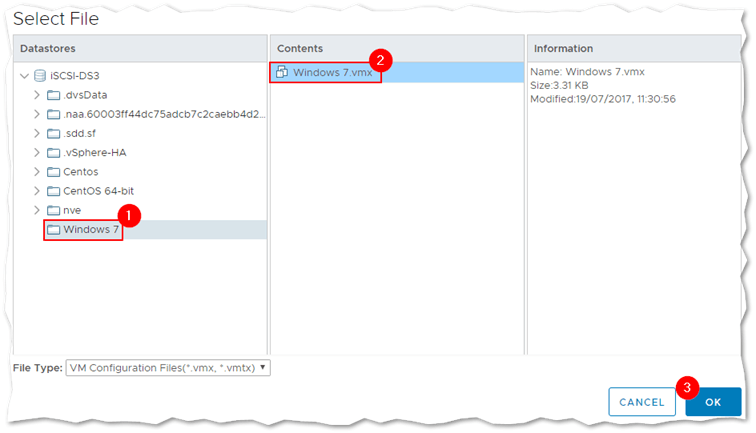
Registering a VM via its VMX file
Using the Register Virtual Machine wizard, complete the task by assigning a name to the VM, a location and selecting the host on which it will reside.
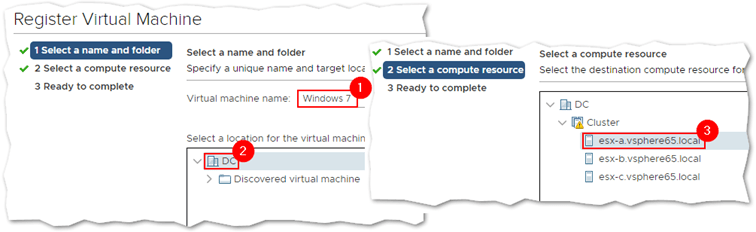
Completing the Register Virtual Machine wizard
Alternatively, drill down to the VM’s folder using the datastore browser, selecting the VMX file as you do. Clicking on Register VM, brings up the Register Virtual Machine wizard just described.
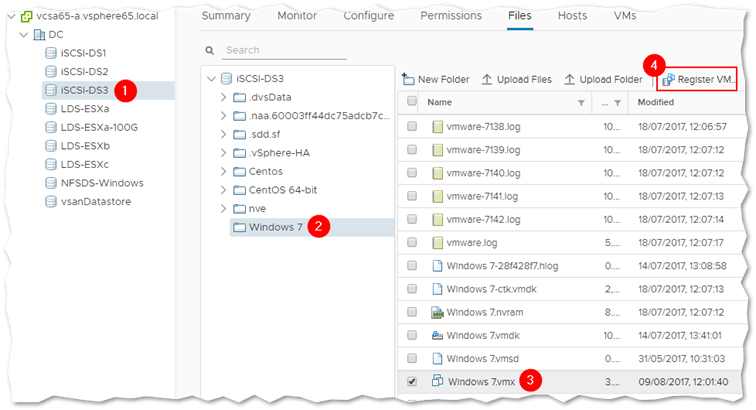
Using the datastore browser to register a VM via its VMX file
8. Assorted features
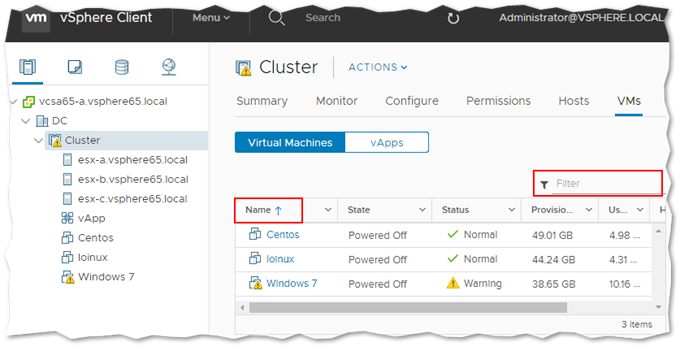
There are also a ton of UI improvements that include quick filters, a live refresh, sorting and filtering by column, and a VM list for vAPPs. Though not a UI improvement per se, you can now select the full range of metrics when using advanced performance charts.
Content libraries have also be revamped in that now you can:
- Display content library templates and other file types.
- Delete content libraries.
- Create a subscribed library.
On the cluster side of things, you can now set DRS/HA overrides, configure predictive DRS, create datastore clusters as well as configure SDRS rules and VM overrides.
Conclusion
Work on the vSphere Client (HTML5) is advancing at a rapid pace. With 90% of the features now available, it will soon fully replace the Adobe Flex-based client for a better performing and safer management experience. The Functionality Updates for the vSphere Client post will give you an idea of what’s currently supported.
You may also be interested in An HTML5 based vSphere Web Client, finally! which looks at the origins of the HTML5 vSphere client and how it may be installed as a Fling which gives you access to the latest updated version.
[the_ad id=”4738″][the_ad id=”4796″]


Not a DOJO Member yet?
Join thousands of other IT pros and receive a weekly roundup email with the latest content & updates!
More in this category


About the Author
Jason Fenech

