Save to My DOJO
Table of contents
- Applicability of this Article
- Prerequisites for Windows Deployment Services
- Installing Windows Deployment Services
- Initial WDS Configuration
- Creating WDS Boot Images
- Adding Install Images to a WDS Server
- Limiting the Users that Can Install a WDS Image
- Linking Systems to Active Directory Accounts in WDS
- Setting a Hyper-V Virtual Machine to PXE Boot
- Add Driver Packages to a WDS Server
- Enjoy Your WDS Installation!
Most Hyper-V literature focuses on installation and maintenance of the hypervisor. Most of the rest of it focuses on maintenance and operation of virtual machines. We don’t talk very much about deploying guests. When we do, we tend to focus on all of the switches and options that pertain to the virtual machine object. We pay almost no attention to the guest operating system. This leads to many unanswered questions, primarily: “What’s the best way to deploy Hyper-V virtual machines.” Unfortunately, there isn’t a “best” way. Windows Deployment Services (WDS) presents itself as a strong contender.
This guide is part of a 2-part series. The other guide focuses on How to Deploy Hyper-V Hosts.
Applicability of this Article
I mentioned in an earlier article that WDS has many uses far beyond Hyper-V, and that’s still true. In this article, I will show you how to take the generic Windows Server install ISO that you download from Microsoft and use it to deploy Hyper-V virtual machines. If you trim away the parts about Hyper-V, you can deploy to physical machines just as easily. To aid you in that quest, I will also show how to set up driver packages.
This article does not show how to use an already-deployed system as a base image. You may want to use that technique if you’ve got particular software that you want in the image, including driver packages that can only be deployed by .exe or .msi.
Prerequisites for Windows Deployment Services
I find WDS easy to set up and configure, although it may not look that way at first glance. You’ll need a few things to get started.
- A Windows Server GUI system. I don’t believe that WDS works on Server Core at all. You can manage it remotely using RSAT (Remote Server Administration Tools) but only from Server SKUs. Windows 10 RSAT does not contain the WDS tools.
- An Active Directory domain that contains the WDS system and the Hyper-V host(s). WDS can work without a domain, but people who choose workgroup mode prefer doing things the hard way. I don’t want to ruin anything for them by providing a how-to.
- Enough local storage on an NTFS volume to hold at least one installation image. The system running WDS must be able to access the storage location through a drive letter. WDS is not cluster-aware, so I recommend that you avoid CSVs.
- A DHCP system. I only use Windows-based but it would be possible to use others.
- Install images for Windows Server and/or Hyper-V Server. You can start with physical media or downloaded ISOs.
- Every system that will receive an image from a WDS server must be PXE-capable. Your network infrastructure must allow PXE booting.
Installing Windows Deployment Services
Windows Deployment Services ships as an innate role of Windows Server. I will be demonstrating on WS2016. All currently-supported versions provide it and you follow nearly the same process on each of them.
- Start in Server Manager. Use the Add roles and features link on the main page (Dashboard) or on the Manage drop-down.
- Click Next on the introductory page.
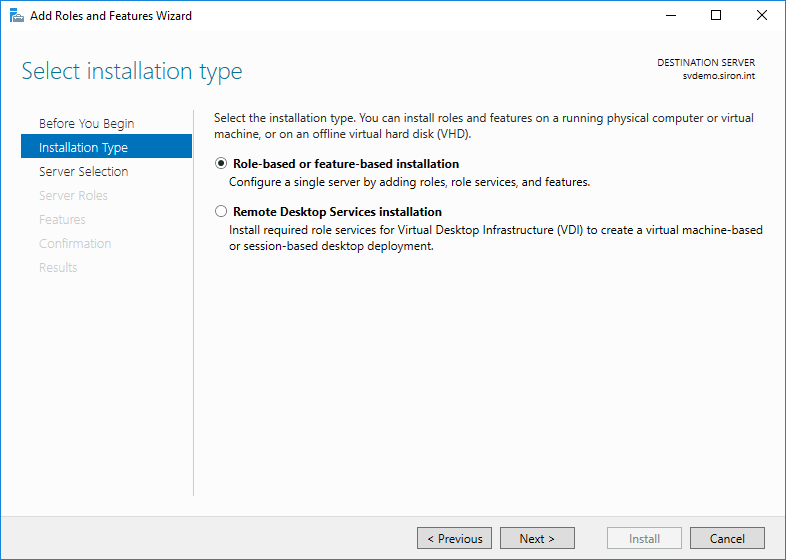
- Choose Role-based or feature-based installation.
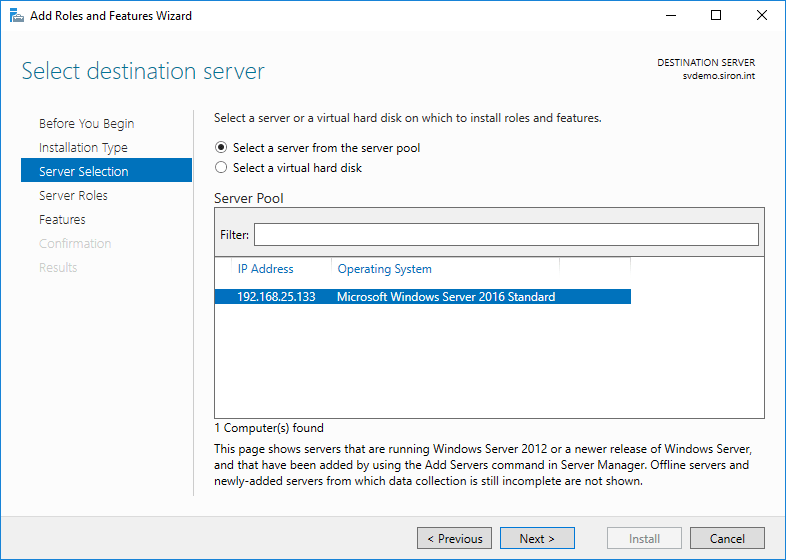
- On the assumption that you’re running locally, you’ll only have a single server to choose from. If you’ve added others, choose accordingly.
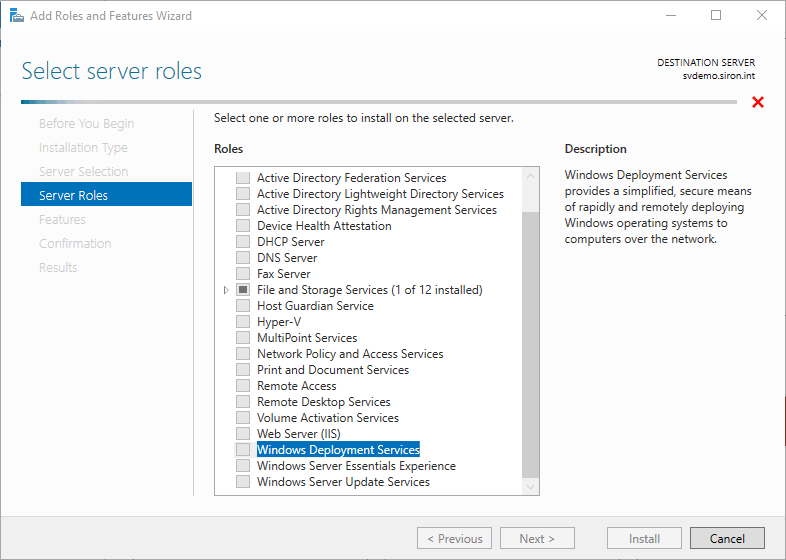
- Check Windows Deployment Services.
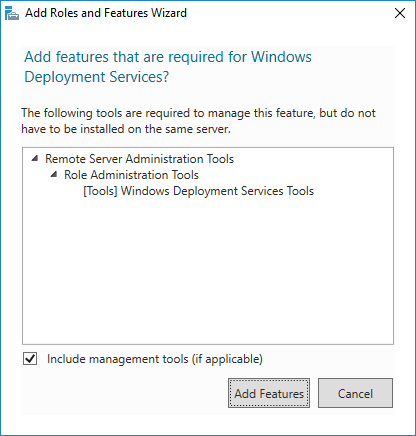
- Immediately upon selecting Windows Deployment Services, you’ll be asked if you’d like to include the management tools. Unless you will always manage from another server, leave the box checked and click Add Features.
- Click Next on the Select server roles page and then click Next on the Select server features page (unless you wish to pick other things; no others are needed for this walkthrough).
- You’ll receive another informational screen explaining that WDS requires further configuration for successful operation. Read through for your own edification. You can use the mentioned command line tools if you like, but that won’t be necessary.
- You will be asked to select the components to install. Leave both Deployment Server and Transport Server checked.
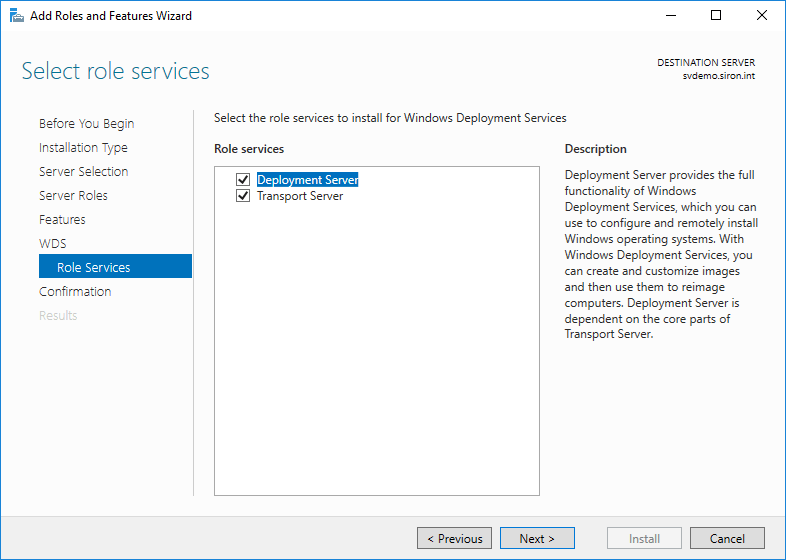
- Click Install on the final screen and wait for the installation to finish.
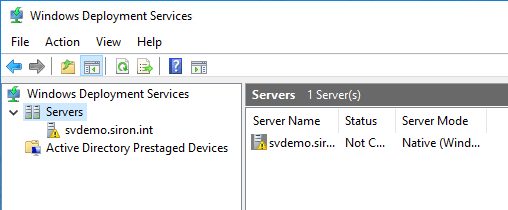
You’ve finished the installation portion.
Initial WDS Configuration
Under Administrative Tools on the WDS host (now further named “Windows Administrative Tools” on the Start menu in Server 2016), you’ll now find Windows Deployment Services. Open that up to begin initial WDS configuration.
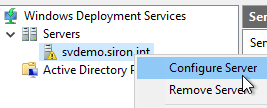
- Right-click on the newly installed server (it will have a yellow triangle overlay icon) and click Configure Server.
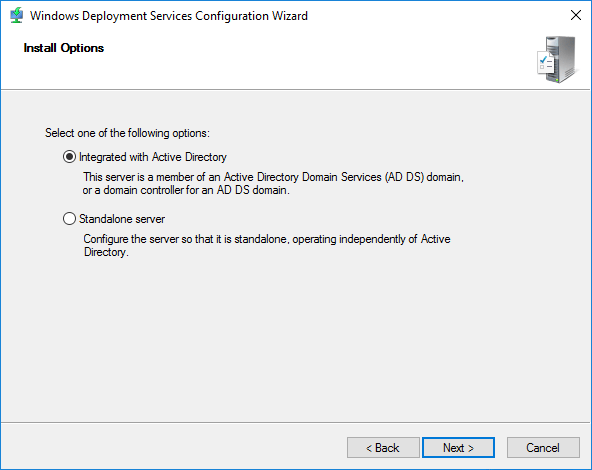
- The initial wizard screen discusses the prerequisites. It mentions a DNS server, which I neglected to mention. That’s because I only work with Active Directory systems, and you can’t AD without DNS.
- On the next screen, choose Integrated with Active Directory.
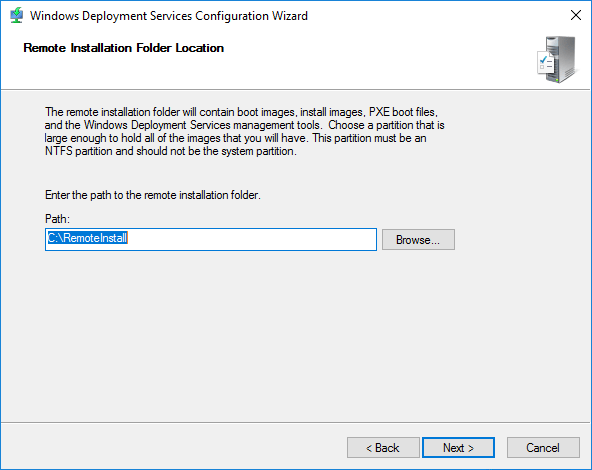
- Choose a location to store the images that this server will deploy. The location that you specify must be accessible via a drive letter that’s local to the WDS system. The wizard will automatically create a REMINST share on the specified folder to make it available to deploying systems.
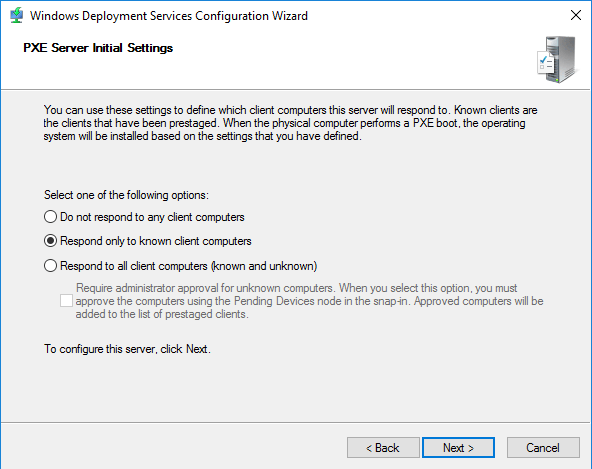
- Choose the client response action. If you’re not sure what to pick, don’t worry. You can easily change this option later.
- Do not respond to any client computers. You could set this option to give yourself more time to configure the server.
- Respond only to known client computers. This option requires the most hands-on management. You must determine the hardware ID of computers that this host will respond to and configure them in Active Directory. I’ll show you how to do that in a moment. If you use Active Directory-Based Activation or KMS and you can’t isolate your PXE network, this setting ensures that your licenses aren’t given to unauthorized systems.
- Respond to all client computers (known and unknown), with optional Require administrator approval for unknown computers. This option can be dangerous but reduces administrative effort. Even if you aren’t using automatic key deployments and/or can limit the scope of PXE booting to secured networks, I still recommend that you set the Require administrator approval option. If WDS deploys to a computer without a pre-staged account, it gets a generic name and gets placed in the domain’s default computer OU. That requires even more busy work to clean up than the other choices.
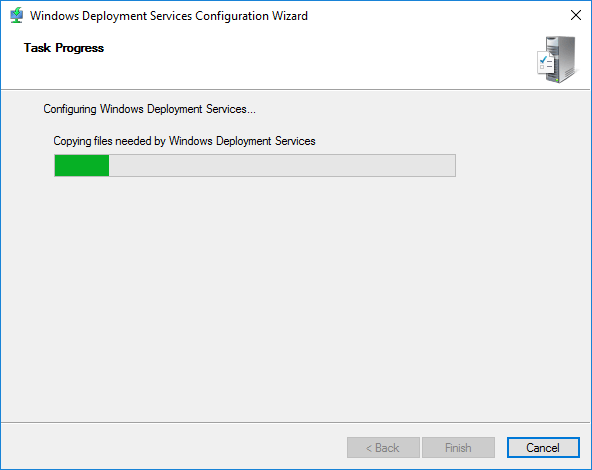
- WDS will perform configuration.
- The final screen allows you to jump into image selection. I avoid this option because it’s not the same process that you’ll use with an active WDS server. If you choose to do so, then you will need to provide the path to a location that contains an operating system’s boot.wim and install.wim.
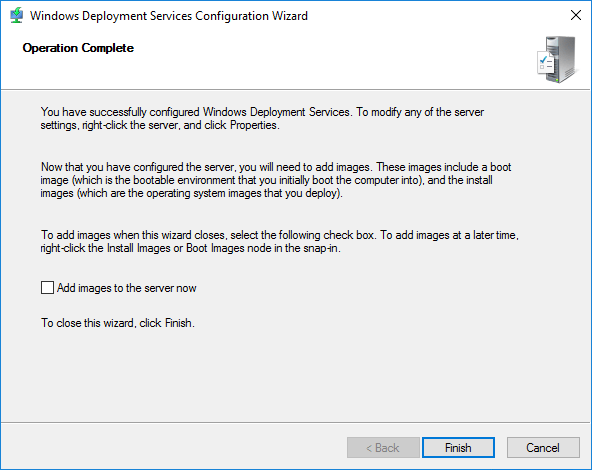
Now your WDS system can listen for and respond to PXE requests, but doesn’t know about any clients and doesn’t have anything to deploy.
Creating WDS Boot Images
When a system starts up and PXE directs it to the WDS server, it first receives a boot image. The boot image should match the operating system it will deploy. You can obtain one easily.
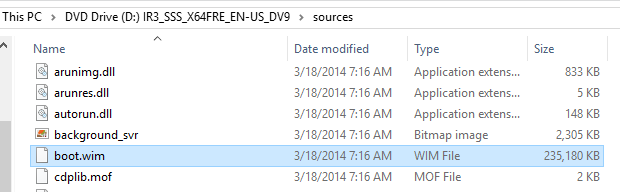
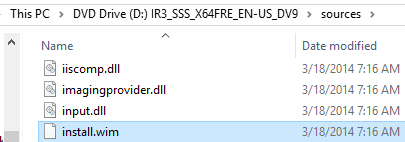
- Find the DVD or ISO for the operating system that you want to install. Look in its Sources folder for a file named boot.wim. That’s what you want.
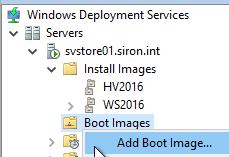
- On your WDS server, right-click the Boot Images node and click Add Boot Image.
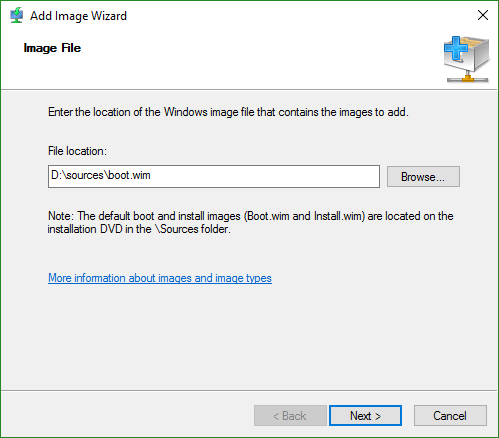
- On the first page of the wizard, browse to the image file. You can load it right off the DVD as it will be copied to the local storage that you picked when you configured WDS.
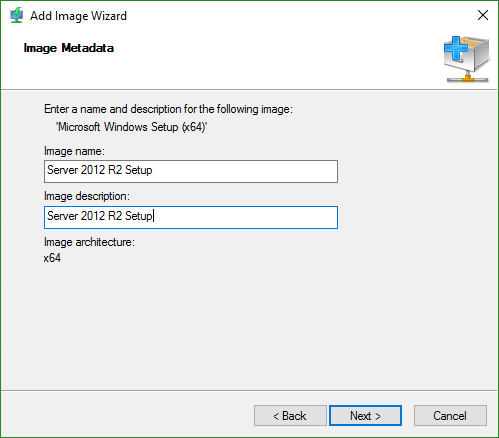
- You’re given an opportunity to change the boot image’s name and description. I would take that opportunity, because the default Microsoft Windows Setup (x##) won’t tell you much when you have multiples.
- You will then be presented with a confirmation screen. Clicking Next starts the file copy to the local source directory. After that completes, just click Finish.
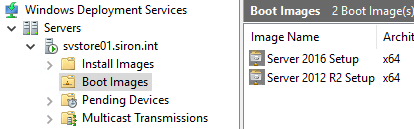
Your boot image will then appear in the list in the right pane.
Adding Install Images to a WDS Server
After the boot image, a newly-deploying system will require an install image. Install images contain the Windows/Windows Server deployment, plus anything that you’ve added. Adding install images is a very simple process.
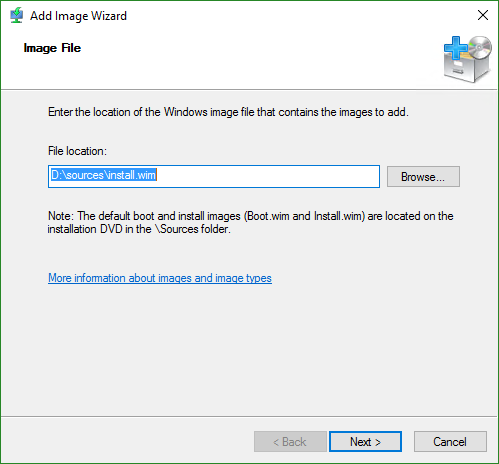
- First, you will need a WIM file that contains the operating system to deploy. Remember the boot.wim file that you found in step 1 of the boot image section? Go back there and locate install.wim.
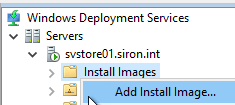
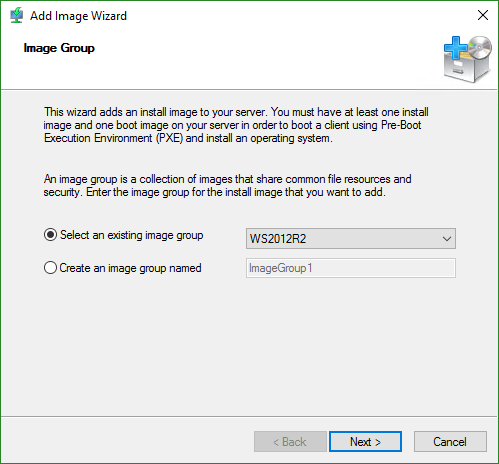
- Second, you need an install group, if you don’t already have one. WDS will deduplicate the images inside an install group, so organize them by operating system. You can create the install image groups separately, or while you are importing an install image. To create one separately, right-click Install Images and click Add Image Group. You’ll get a small dialog where you can enter the name for your group.
- To add an image, right-click Install Images and click Add Install Image.
- Choose or create the image group to add the image to.
- Locate the install image file that you found in step 1.
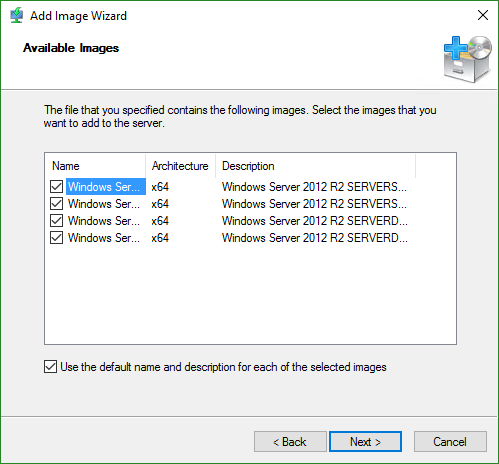
- The WIMs that come in Microsoft’s deployment images typically contain multiple images. In this screenshot, you are looking at two editions of Windows Server 2012 R2 (Standard and Datacenter), each in two install modes (full and Core). Move the column header sliders around to see the names and descriptions more clearly. You can remove any editions that you don’t want to new systems to use; for instance, uncheck the Datacenter editions if you aren’t licensed. If you check the box at the very bottom of the dialog, you can rename those. If you don’t, then they’ll be what you have to choose from when you are installing a new system via WDS.
- If you didn’t leave that box checked, you’re now looking at a screen that asks you to enter a name and description. I didn’t do that, so I have no screen shot. Every image that was checked to be included in step 6 will have its own dialog page.
- After that, just Next and Finish. The file will be imported. It will take some time as it prepares/calculates deduplication info.
That’s all it takes to add images. Now, when systems boot, they’ll have each of these items as possible install images… maybe. You can override that.
Limiting the Users that Can Install a WDS Image
During the deployment process, WDS prompts for user credentials before showing available images. You can restrict image access by user account and/or group membership.
- In WDS, open the Install Images section to install group that you want to work with. You can set permissions on the group or any one of the images in the group.
- To set permissions on the group, right-click the group and click Security in the menu.
- To set permissions on a specific image, left click the image group in the tree to show the images in the right pane. Right-click the desired image and click Properties. Switch to the User Permissions tab.
- You’ll now be viewing a standard Windows ACL dialog. In order to apply an image, an account needs Read and Execute permissions. By default, Authenticated Users have Modify permissions and any account that resolves to a member of the local Users group has Read and Execute permissions. You’ll need to break inheritance to remove those before you can set more granular permissions. Remember to leave SYSTEM and Administrators with Full Control or you’ll wind up with problems.
In the article on using WDS for specific systems, I talked about locking an install image to specific machines by using filters. You can apply those alongside, or instead of, user permissions.
Linking Systems to Active Directory Accounts in WDS
This section is technically optional. If you follow this part, new systems will deploy with a computer name that you select and into the Active Directory OU that you select. If you skip this part, computers will deploy with a generic name into the default OU (usually Computers). I always use these steps to pre-stage my computer accounts and then leave them linked.
-
- Gather the system’s BIOS UUID. This article focuses on new Hyper-V guests, so I’d guide you to the fourth option below. However, I’m including the other possibilities for completeness.
- If it’s a Windows system and it’s already deployed, you can collect its UUID from an elevated PowerShell prompt with: gwmi Win32_ComputerSystemProduct | select UUID.
- If it’s a Linux system and it’s already deployed… well… you can’t push Linux with WDS so this article is probably not very helpful for you. But you can still get its BIOS UUID by installing the dmidecode package from your distribution’s repository and running: sudo dmidecode -s system-uuid.
- If the system is physical and not yet deployed, you can set it to boot to PXE and start it up. When you see something like the following, record the GUID:

PXE GUID
- If the system is a Hyper-V guest and not yet deployed, you can extract its GUID using WMI. That’s non-trivial enough that I wrote an entire script to not only extract the UUID, but to update an Active Directory computer account with it. If the Hyper-V VM in question was copied from another, then it likely has an identical UUID which will cause problems. I have a PowerShell script and an EXE utility that will allow you to modify the UUID.
- If the system is a guest on another hypervisor, search for a technique to determine the UUID. You can usually try the PXE method with a VM as well.
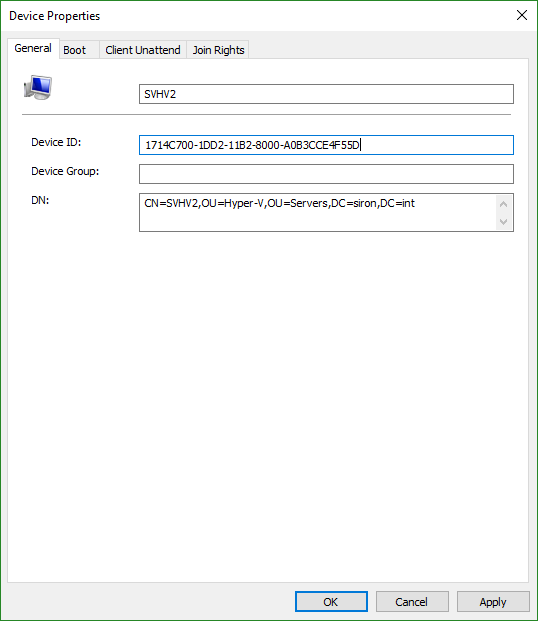
- Decide on a name for the system, if you don’t already have one in mind/in production. If it doesn’t already exist, create that computer account in Active Directory in the desired OU.
- On the computer account’s properties sheet in Active Directory Users and Computers, switch to the Attribute Editor tab.
- Double-click the netbootGUID item. Leave the drop-down on Hexadecimal. Paste/type in the UUID without spaces or dashes.
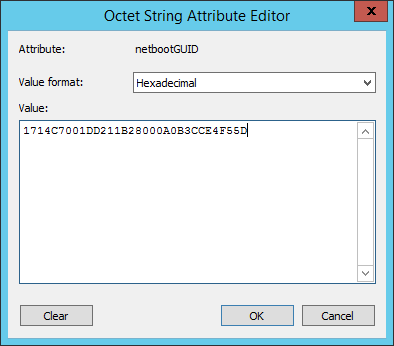
- If you look at it in the list, it will have reversed a bunch of the characters. I don’t know why it does this, but that’s how WDS works:
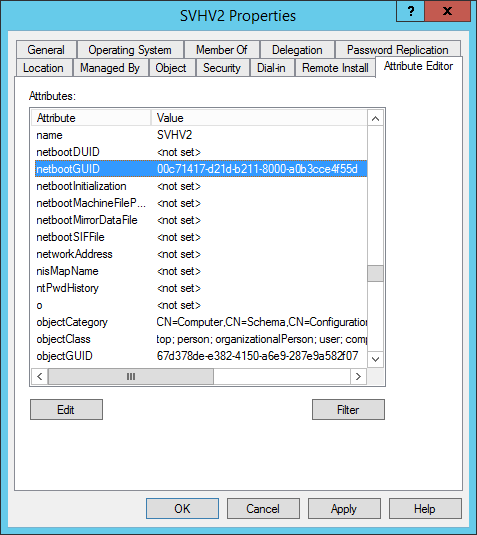
- In WDS, click on Active Directory Prestaged Devices. You should now see your new/updated device in the list. Double-click it to check the UUID. If it’s incorrect, just paste over the correct UUID. You don’t need to worry about braces or dashes; it will figure it out. You can’t use spaces, though. Remember that when you open it, WDS will have reversed several of the characters. Don’t try to make it stop. If you succeed, it won’t match when it boots.
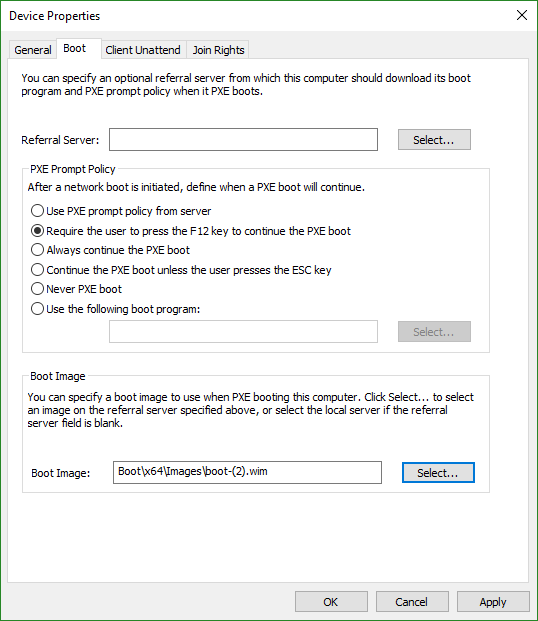
- Switch to the Boot tab. Set the PXE mode to whatever suits you; just make sure that you pick something that allows you to start in PXE mode or you’ll have trouble following the rest of this article. Select a boot image or it won’t work at all.
- Gather the system’s BIOS UUID. This article focuses on new Hyper-V guests, so I’d guide you to the fourth option below. However, I’m including the other possibilities for completeness.
WDS does include an Add Device “wizard”. It’s not very smart, though. You need to know the distinguished name (DN) of the target OU. That’s not tough. But, you can only use it to add devices. You can’t work with systems that exist in the directory but don’t have their netbootGUID property set. If you install ADUC on the WDS system, then it injects a new dialog into the new computer account wizard. That dialog allows you to set the GUID more easily but doesn’t let you set the boot.wim. The way that I showed you is a bit clumsier, but it’s easier overall and universally applicable.
Setting a Hyper-V Virtual Machine to PXE Boot
Your WDS infrastructure can now accept inbound requests. Now you move on to the guests. WDS operates by responding to PXE requests (pre-boot execution environment) that arrive over the network. So, we need to set our virtual machines to boot from the network.
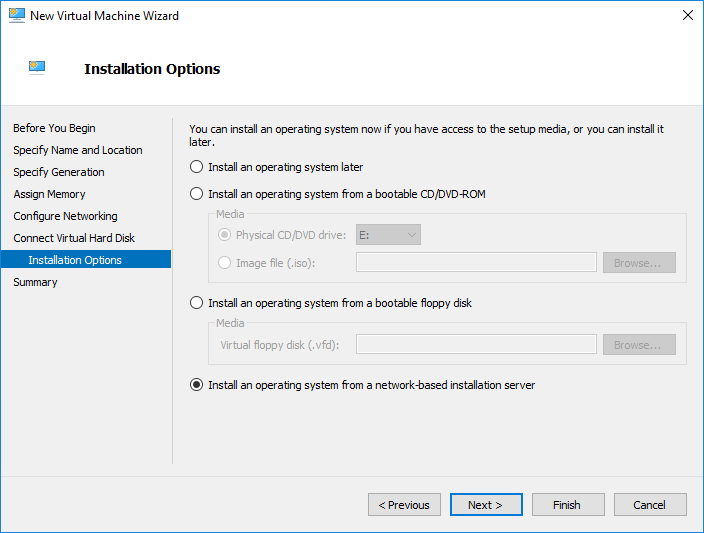
- Create the Hyper-V virtual machine using the technique of your choice. Make sure that you do create and attach a new virtual disk to hold the operating system. You can use Generation 1 or Generation 2. Generation 2 will probably deploy more quickly because it can use the faster synthetic virtual network adapter, but deployment speed depends on more than the network. If you use the wizard in Hyper-V Manager or Failover Cluster Manager, one of the installation options is Install an operating system from a network-based installation server. If you choose that option, you’ll be able to skip down to step 4. The following screenshot was taken from a Generation 1 VM. Generation 2 VMs use the same wording, but the screen looks a bit different because there’s no floppy disk choice.
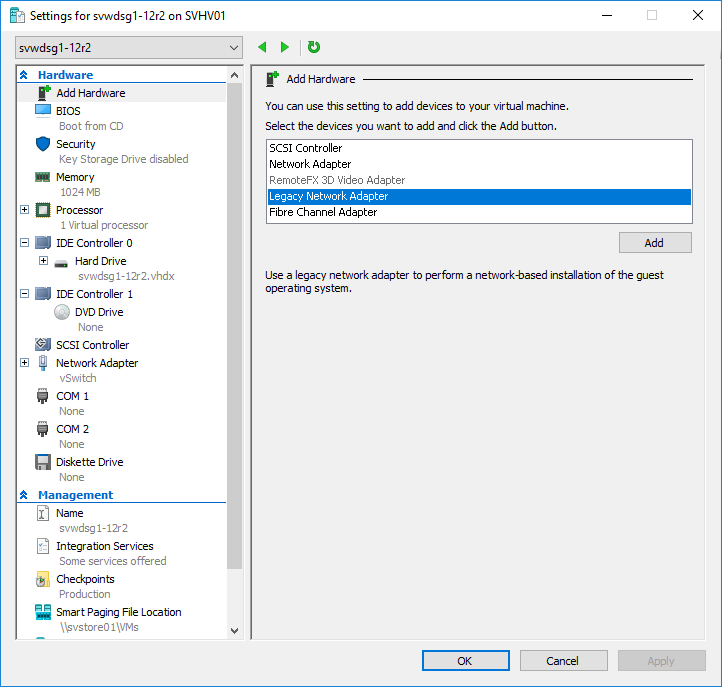
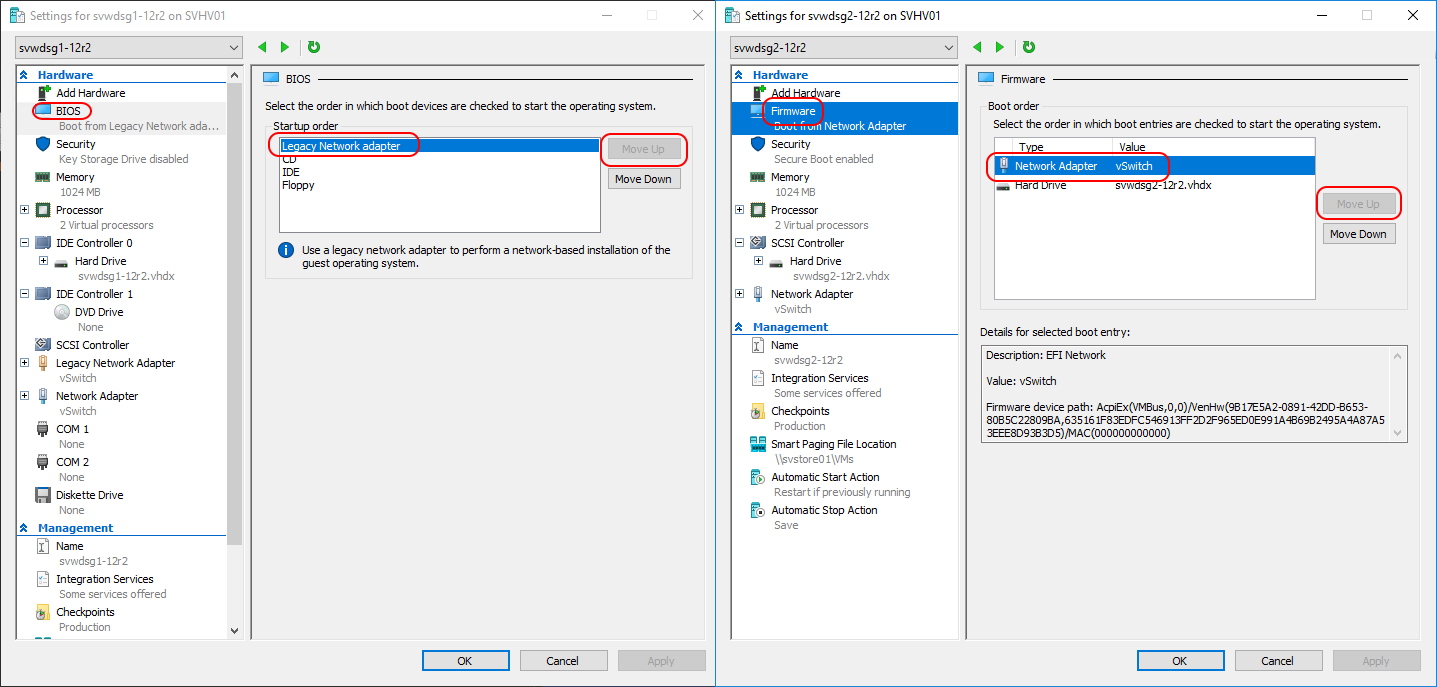
- Generation 1 only: Attach a legacy (emulated) network adapter. The virtual machine must be turned off.
- PowerShell: Add-VMNetworkAdapter -VMName svwdsg1-12r2 -SwitchName vSwitch -IsLegacy $true
- In the GUI, use the Add Hardware tab:
- Change the boot order so that the network adapter is at the highest position. As much as I like PowerShell, you’ll have an easier time doing this through the GUI. For Generation 1, use the BIOS tab. For Generation 2, use the Firmware tab. Highlight the adapter and use Move Up until it’s at the top.

- Optional: follow the instructions under the section titled “Linking Systems to Active Directory Accounts in WDS” above to pre-stage the virtual machine’s OS account in Active Directory. If you do not, then the guest operating system will be given a default generic name and placed in the directory’s default OU.
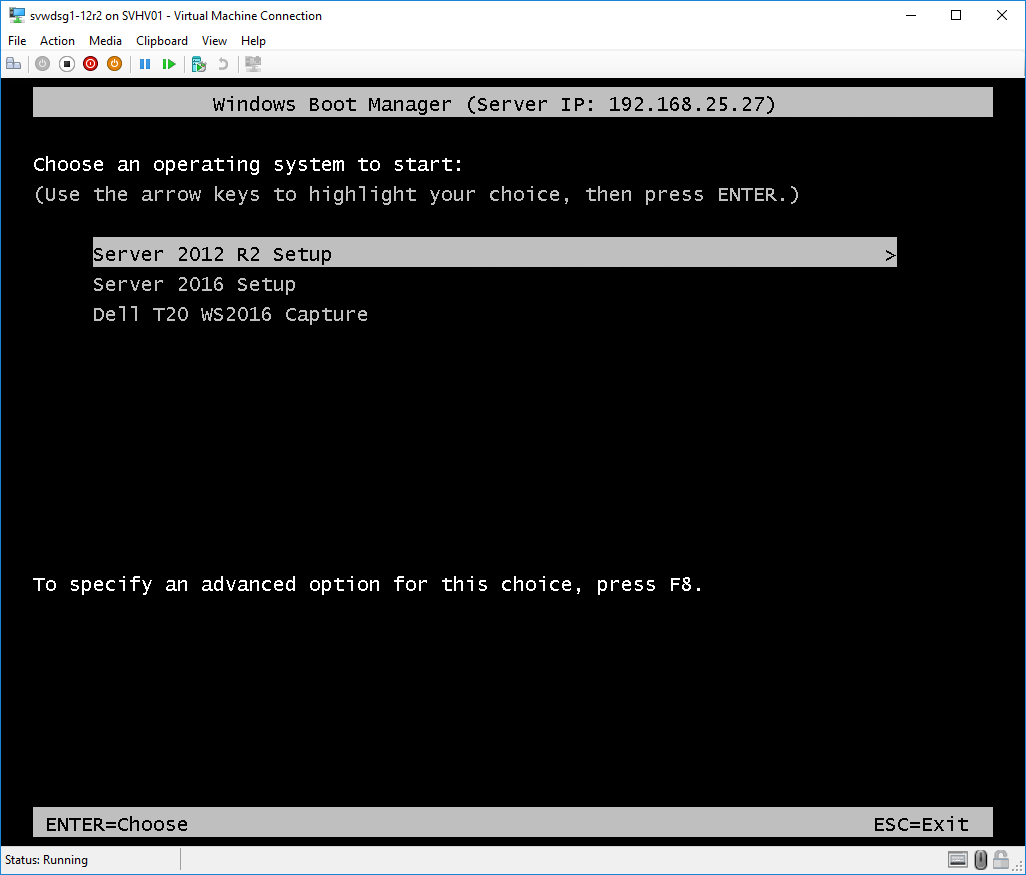
- Open the VM’s console (Connect on its right-click menu). For Generation 2 VMs on 2016 or later, do not use the Shielded VM feature until after installation. The Shielded VM feature blocks console access.
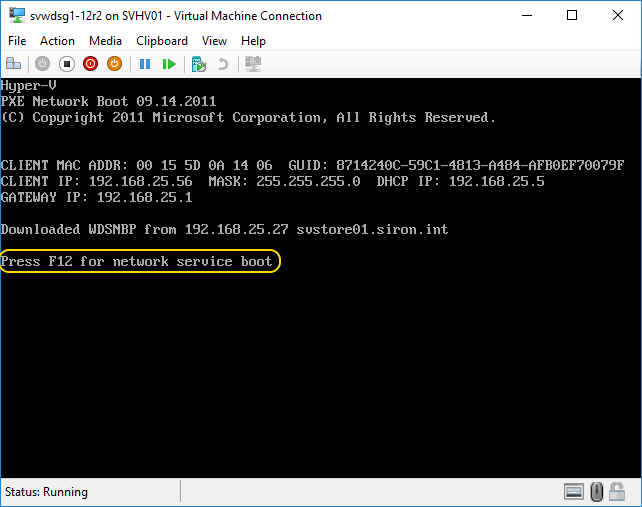
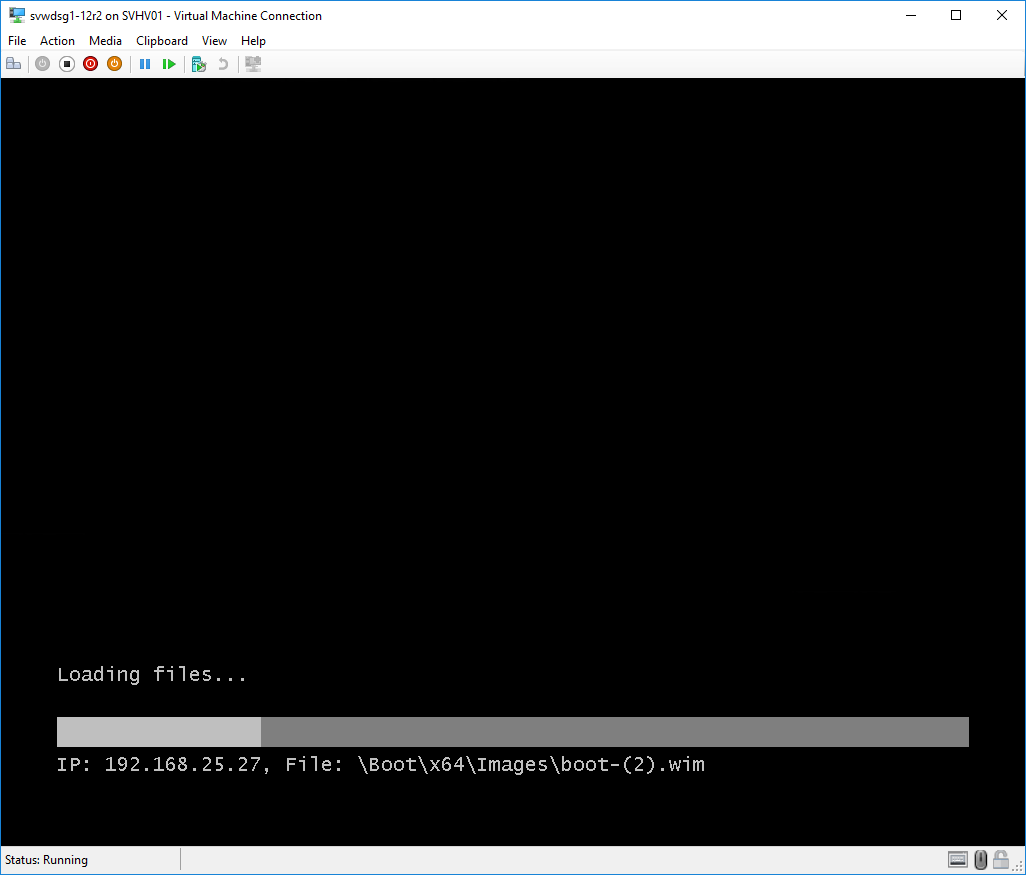
- Start the virtual machine. Watch the console carefully, as you may need to press a key in order to accept the network boot option and start the installation:
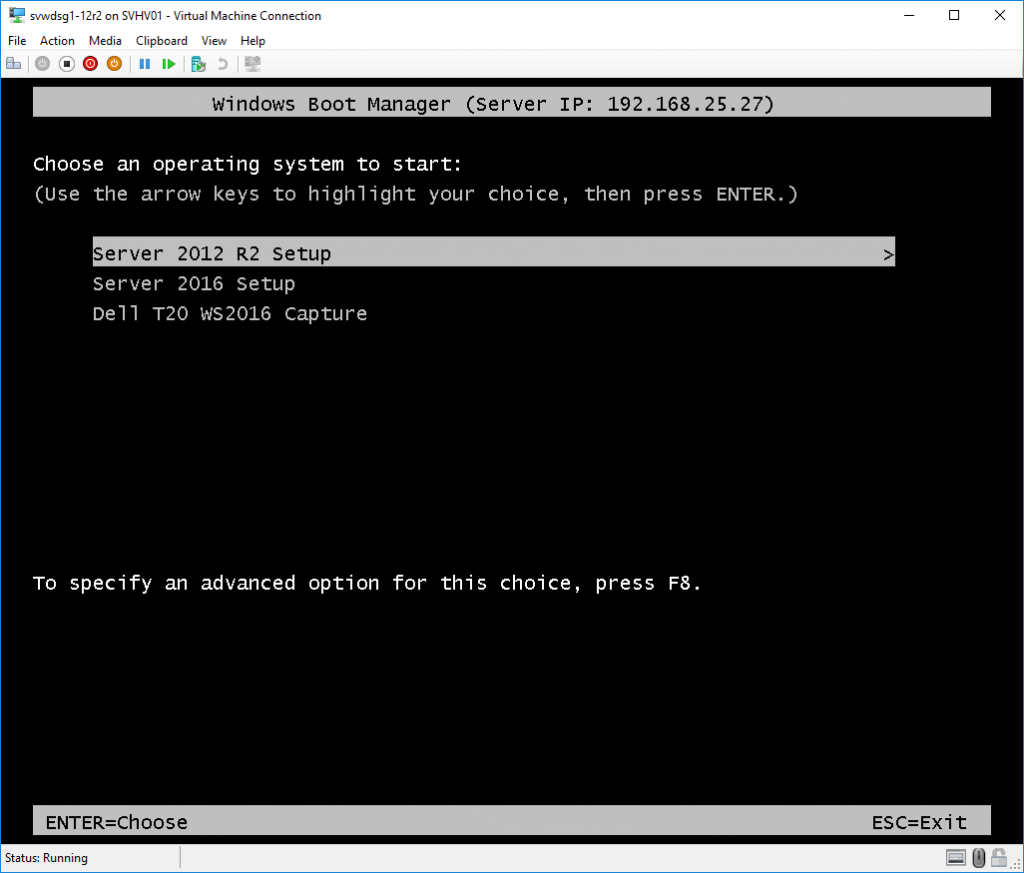
- Choose the operating system boot image to use.
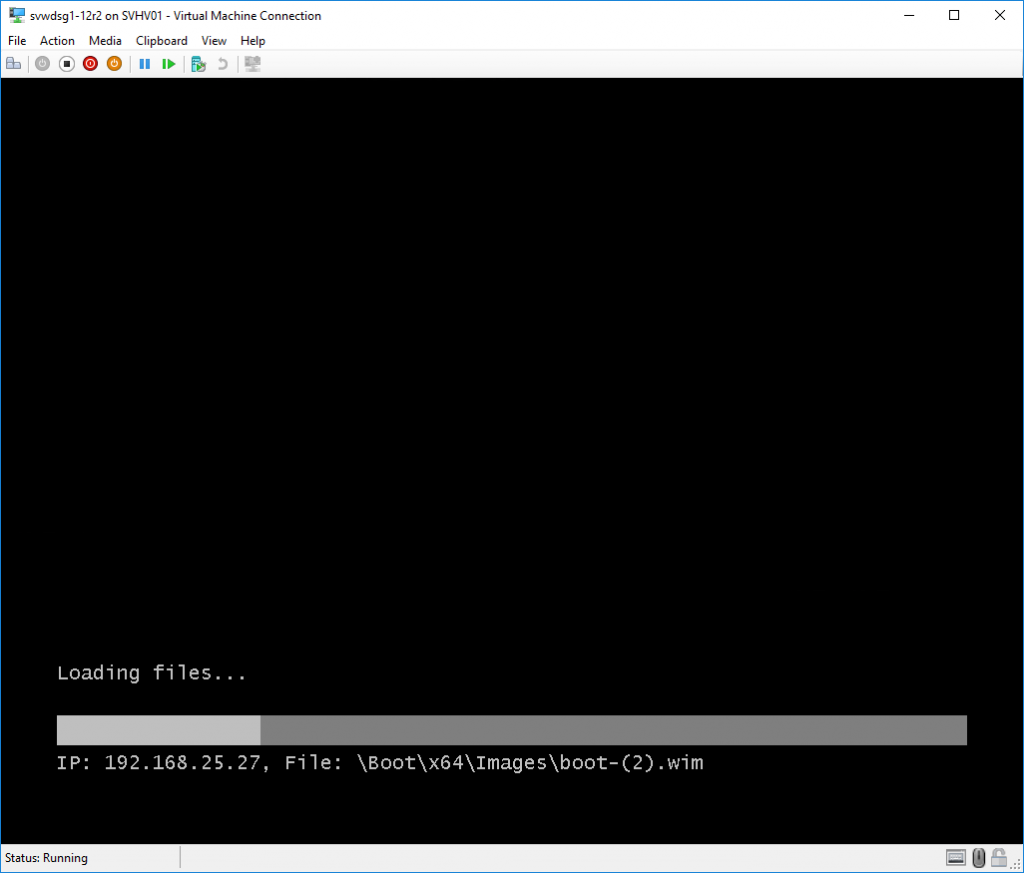
- The selected boot image will be transferred to your system.
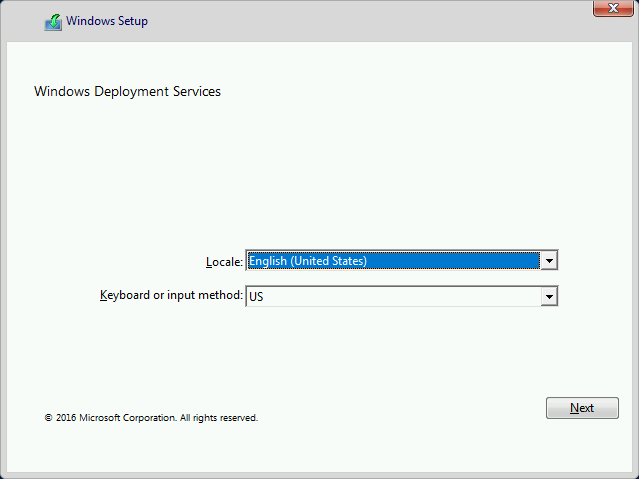
- Setup will start by asking you which language you wish to use.
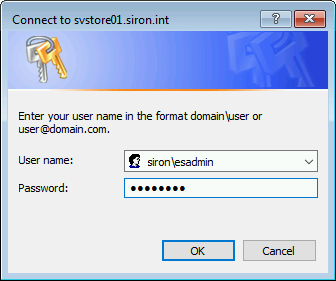
- Next, you will be asked for credentials.
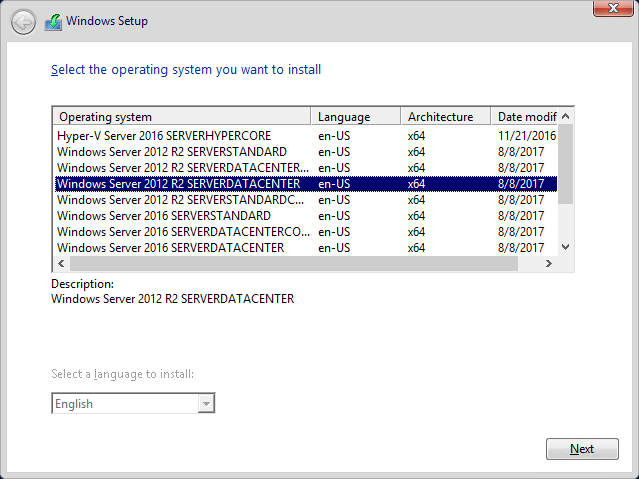
- Next, select the operating system to install. Take care to use one that aligns with the boot image that you chose; I’m not sure what happens if they don’t match.
- From this point onward, installation works the same as it would from DVD/ISO/USB media. I trust you have enough experience with that to not need my help.
- Once installation completes, you may want to reconfigure your virtual machine to not boot from the network first. If you’re using a Generation 1 VM, you might want to shut it down and remove that legacy network adapter altogether.
Add Driver Packages to a WDS Server
This section does not align well with the total stated purpose of this article. A Hyper-V virtual machine has no use for additional driver packages. However, this article does present the usage of generic images straight from install media. For physical systems, such images pair very well with driver packages in WDS.
You will encounter one problem, though. You can only use driver packages that provide the basic inf, cat, and sys files (some driver packages will have some additional files). WDS cannot use drivers that only deploy from EXE or MSI.
To install a driver package:
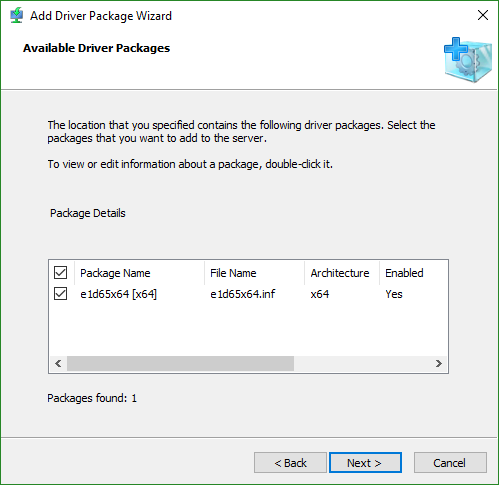
- Right-click Drivers and click Add Driver Package.
- Select the location and whether or not to load all drivers from that location (and sub-folders) or to open up a specific inf. I’m only going to walk through the single INF route. The primary difference is that we’re picking one driver instead of many.

- Assuming that the wizard detects that you have selected a valid driver inf file, you will be asked to verify it. If you chose the option to load all driver packages, then you might have a longer list.
- The next two screens verify and install the files that you selected.
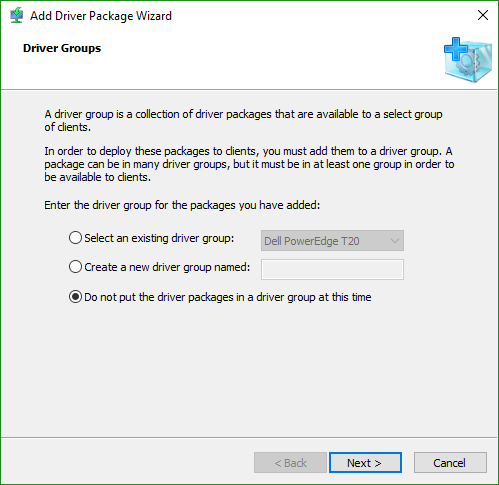
- Next you will be asked to select a driver group. I will use a subsection to introduce new driver groups. If you create one now, it will be quicker, but you’ll need to set up options later.
- The final screen includes a checkbox for you to modify the driver group filters if you chose to create one. The filters work much like those for install images.
Add Driver Groups
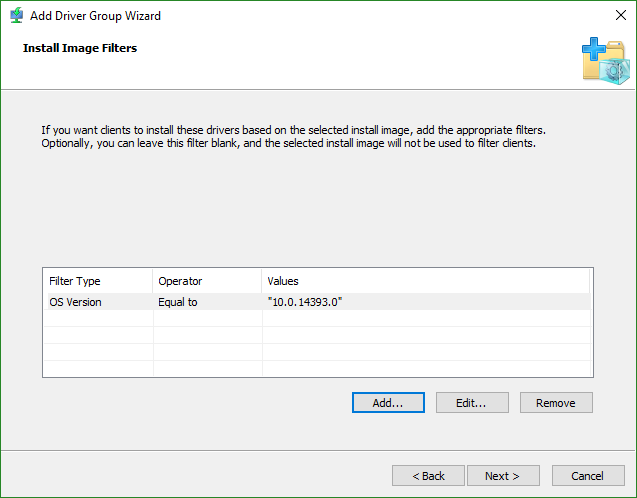
You need at least one Driver Group for your drivers. Like boot and install images, driver groups will be available to all systems unless you create filters specifying otherwise. Use Driver Group filters to restrict sets of drivers to particular hardware. It’s not always a good idea to restrict drivers like that, so think carefully about the consequences of setting up group filters.
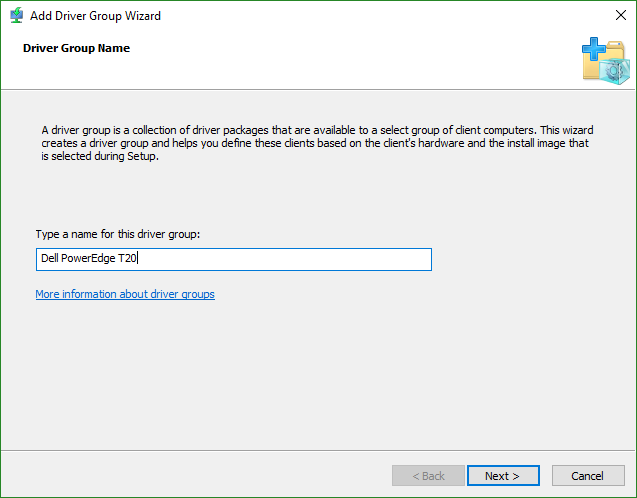
- Right-click Drivers and click Add Driver Group.
- Name the driver group.
- Set hardware filters, if desired. These will match by WMI. The fields shown in this screenshot were obtained from gwmi win32_computersystem.
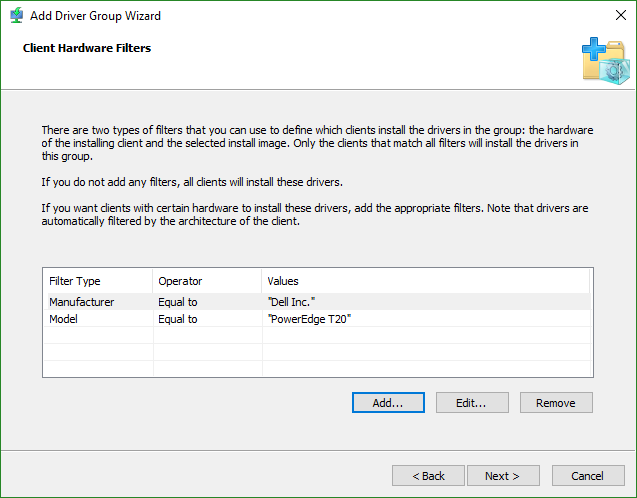
- Set operating system filters, if necessary. I used gwmi win32_operatingsystem to get the operating system version, but I had to had a 0 (zero) for the service pack version before it would accept it. This can be useful if you have driver pacs that might work for 2012 R2 and 2016, but want to ensure that you control exactly which get installed.
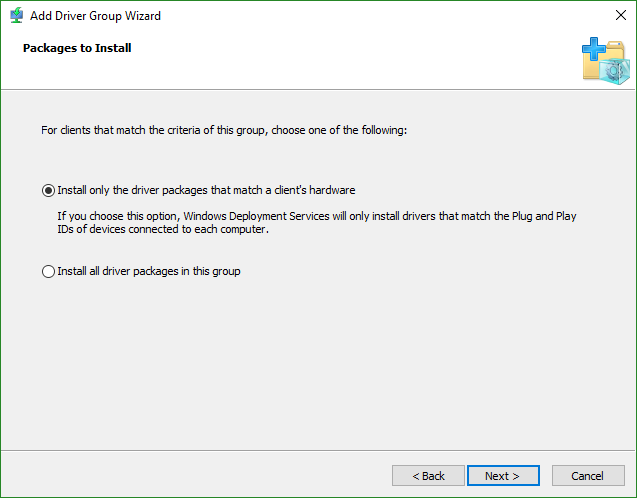
- Select the action to follow — should it install every driver in the package regardless of detected hardware, or should it only install drivers when the system has that hardware? This can be useful if the hardware makeup of a deployed system might change later.
Add Driver Packages to a WDS Boot Image
By default, WDS driver packages are available during the install phase. If you need them available during the boot phase (for example, RAID drivers), then you can add them to the boot image. Be aware that adding a driver package to a boot image is permanent. I recommend that you not even try this until you have verified that WDS cannot install to a specific system due to a driver problem. If you have done that, then I highly recommend that you either make a copy of the boot image and import it back in or just reimport the base install.wim from media as a separate line item. This will protect your existing boot image in the event that something goes awry. If a boot image contains a corrupt driver, the image might become completely unusable for anyone.
To add a driver package to a boot image:
- Right-click the boot image and click Add Driver Packages to Image.
- Click Next through the warning (it’s essentially what I just told you).
- By default, the wizard pre-selects some filters to ensure you get a solid match for driver types. If you want, modify the filters that it chose. Once you’re happy with them, click Search for Packages. The lower part of the screen will then populate with driver packages that match that criteria.
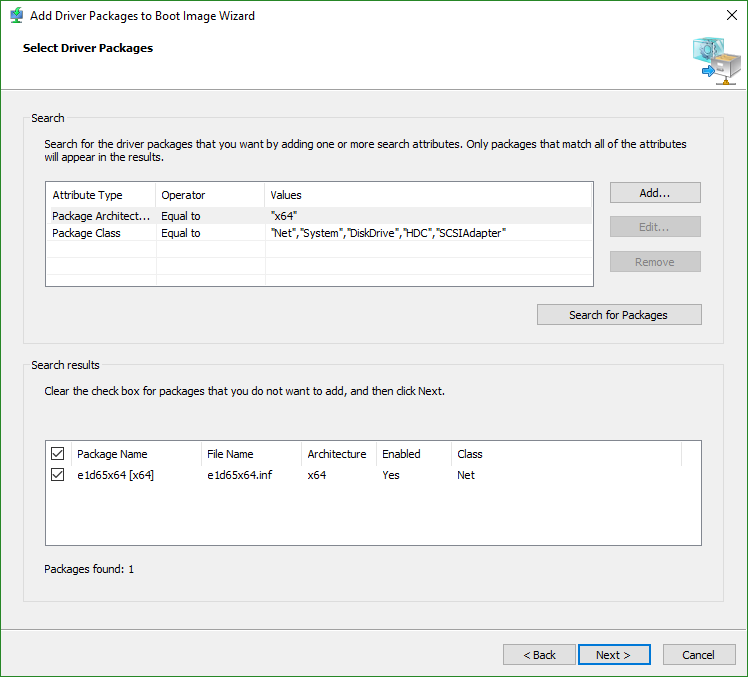
- Continue through the wizard to add the driver(s).
Enjoy Your WDS Installation!
You now have all of the basic information that you need to get positive results from WDS. You have more to discover if this didn’t quite seem like enough. Whether you do more or stick with what I’ve shown you, you now have a much more robust deployment system than you could possibly get from media installs alone. As a bonus, you won’t need to dig for media anymore.
This guide is part of a 2-part series. The other guide focuses on How to Deploy Hyper-V Hosts using WDS.


Not a DOJO Member yet?
Join thousands of other IT pros and receive a weekly roundup email with the latest content & updates!
More in this category


About the Author

Eric Siron


37 thoughts on "How to Deploy Hyper-V Guests with Windows Deployment Services"
Hi Eric, all your images (links) are missing or broken after: Creating WDS Boot Images !!
No idea what happened there, thanks for the heads up! Everything should be fixed now. Please let me know if you have any troubles following the instructions.