Save to My DOJO
Table of contents
A great new feature found in vCenter Server Appliance 6.5, is the ability to back up a vCenter instance natively. Native backup takes a file-based backup approach where the resulting files are transferred to a remote repository using any of the following protocols; HTTP, HTTPS, FTP, FTPS and SCP.
In this post, I go over the details of setting up an FTPS repository using an IIS Web Server running on Windows Server 2012. Alternatively, you could use something like the FileZilla FTP server which is an equally valid solution. For the record, FTPS is an extension of the FTP protocol which includes TLS / SSL support making FTP transfers more secure by encrypting traffic during transit.
I’ve split the article into three sections namely,
- Setting up and configuring IIS on Windows Server.
- Setting up an FTPS site on IIS.
- Performing a backup via the vCSA Web Console (VAMI).
Let’s begin.
Installing and configuring IIS on Windows Server 2012
Assuming a Windows Server 2012 machine or VM is available and that you are somewhat familiar with IIS, let’s go ahead and add the Web Server (IIS) and FTP Server roles.
1] Click on the Server Manager icon on the task bar and select Add roles and features from the Quick Start section. Press Next twice and install the features as shown in Figure 1.
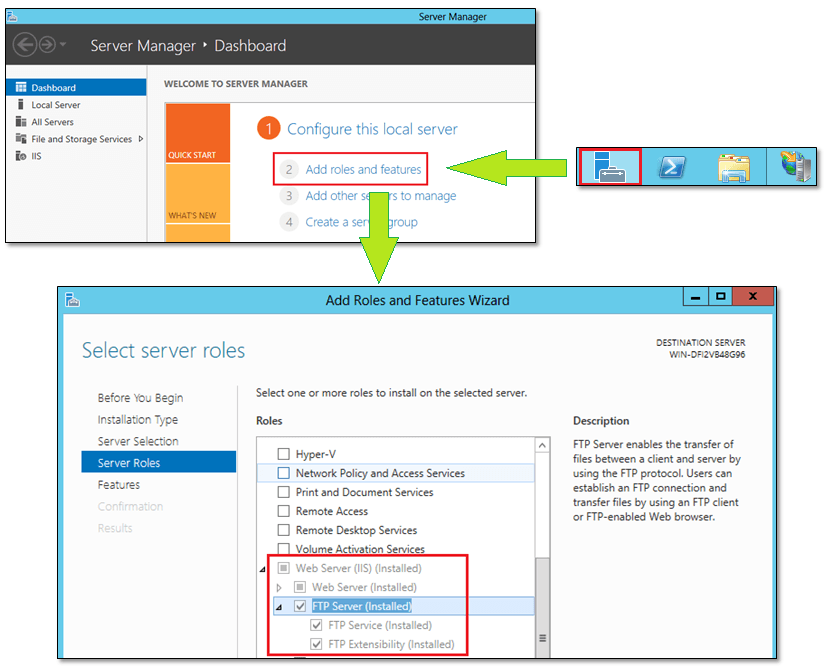
Figure 1 – Adding the Web and FTP server roles on Windows Server
2] Once the install completes, you’ll need to set up two more items.
- Using Computer Manager (Server Manager -> Tools menu), go ahead and create a user account called VCSAUser.
- Finally, create a folder, let’s say c:\FTPSVCSA, where the appliance backup files will be transferred to.
Setting up FTPS on IIS
Creating a certificate
Now that the web server is up and running, it’s time to create the FTP site. But first things first. Since we’re using FTPS, we have to create an SSL certificate as is standard in all SSL/TLS implementations. To do this, follow the steps as listed:
1] Launch IIS Manager from Server Manager as shown in Figure 2.
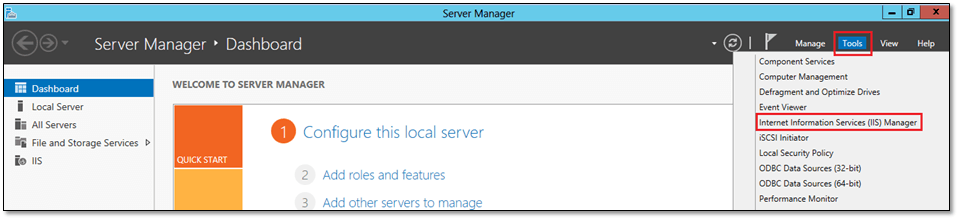
Figure 2 – Launching the IIS Manager from Server Manager
2] Click on the IIS server name in the left pane. From the Home screen, locate Service Certificates and double click on it
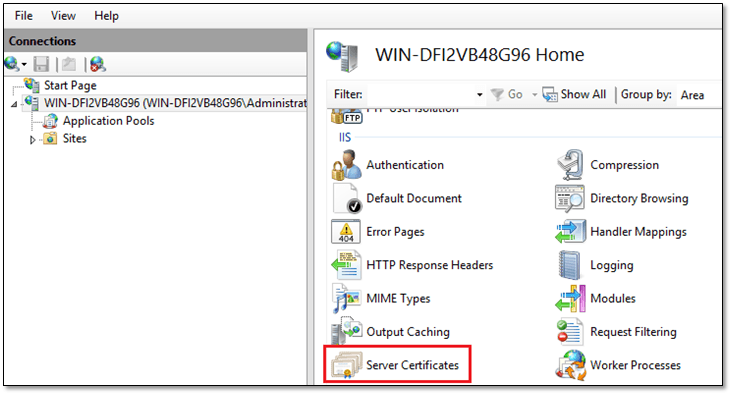
Figure 3 – IIS Server Certificates module
3] Click on Create Self-Signed certificate and follow the wizard. Type in a friendly name for the new certificate and set the certificate store to Web Hosting. Pressing OK completes the procedure.

Figure 4a – Creating a self-signed certificate in IIS
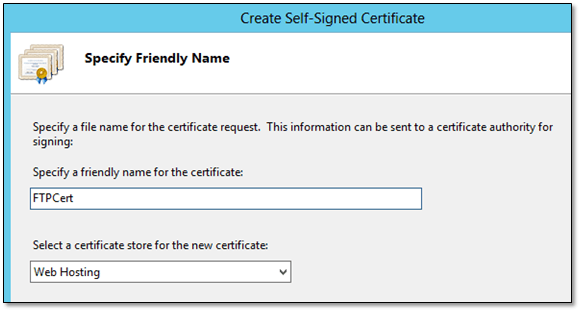
Figure 4b – Creating a self-signed certificate in IIS
Creating and configuring an FTPS site
With the certificate ready and done with, we can now proceed to create the FTP site, the details of which will be used later on while setting up the backup job on vCSA. Here are the steps needed:
1] Using IIS Manager, right click on the server name and select Add FTP Site.

Figure 5 – Adding an FTP site in IIS
2] Specify a name for the FTP site and the corresponding folder, the one previously created. Press Next.
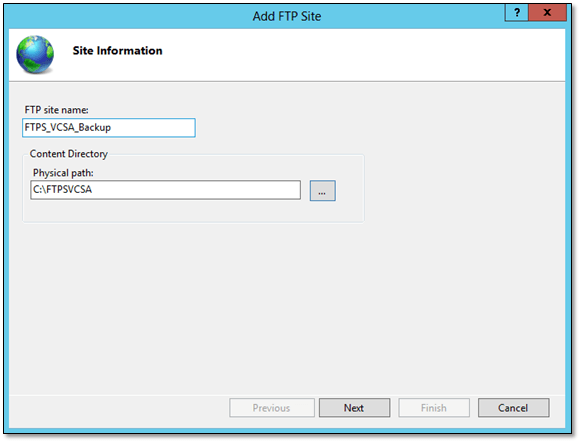
Figure 6 – Specifying the FTP site name and physical path
3] Next, select the IP address assigned to the server leaving port 21 selected as is. Under the SSL section, tick on the Require SSL option and select the certificate previously created from the SSL Certificate drop down box. Press Next.
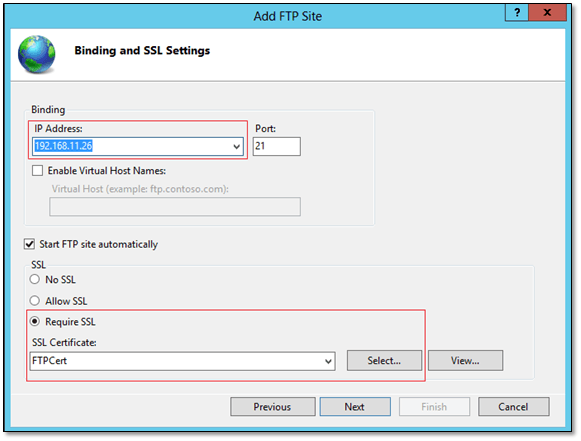
Figure 7 – Configuring the FTP site
4] Select the Basic Authentication option. Under Authorization, select Specified Users and type in the name of the user account previously created i.e. vcsauser. Tick on both the Read and Write options under Permissions.

Figure 8 – Setting up access to the FTP site
5] Finally, right-click the FTPS site, select Edit Permissions and assign the vcsauser user account read and write access or, if you prefer, full control.
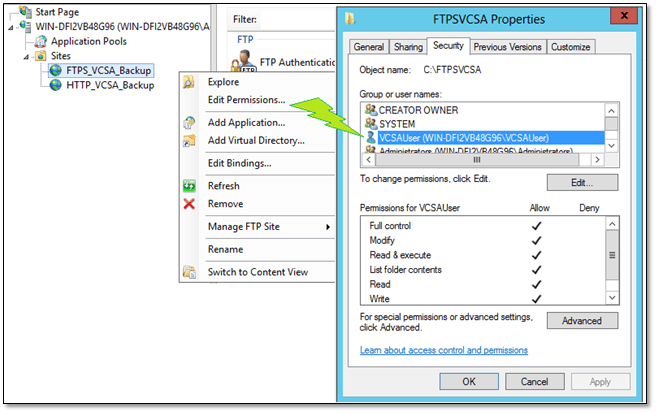
Figure 9 – Setting NTFS permissions on the FTP folder
If required, you can always change any of the FTP site settings at a later stage by simply clicking on the FTP site name and selecting any from the grouped settings as shown in Fig. 10.
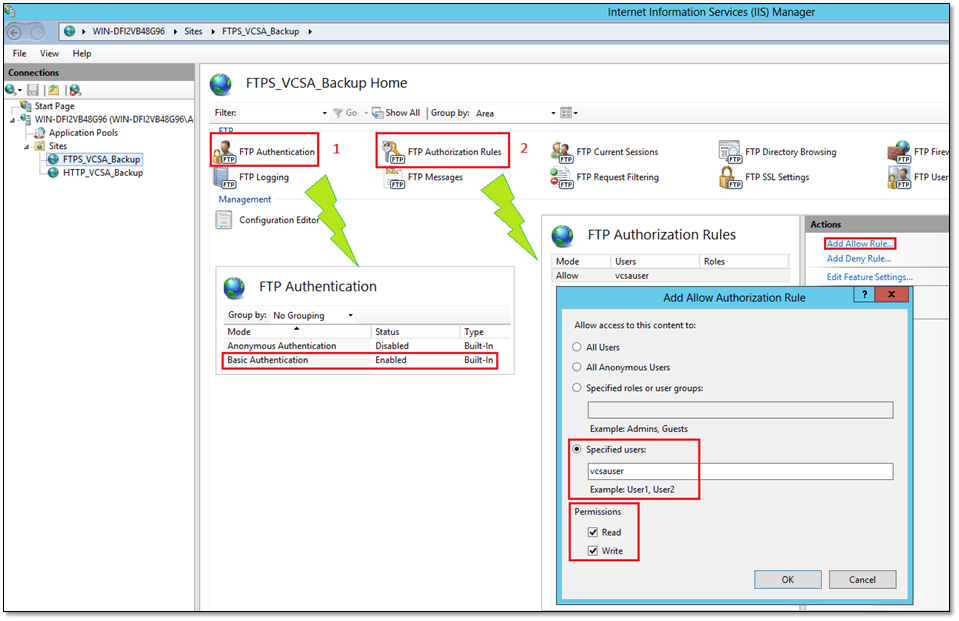
Figure 10 – Tweaking the FTP site’s settings at a later stage
At this point, the FTPS site should be fully accessible. As mentioned earlier, one could use other FTP servers such as FileZilla. The software is open-source, free to use and easy to set up. I used FileZilla to test out the procedures in this post and I only needed to create a user and enable FTP over TLS to have vCSA natively backup to it using FTPS.
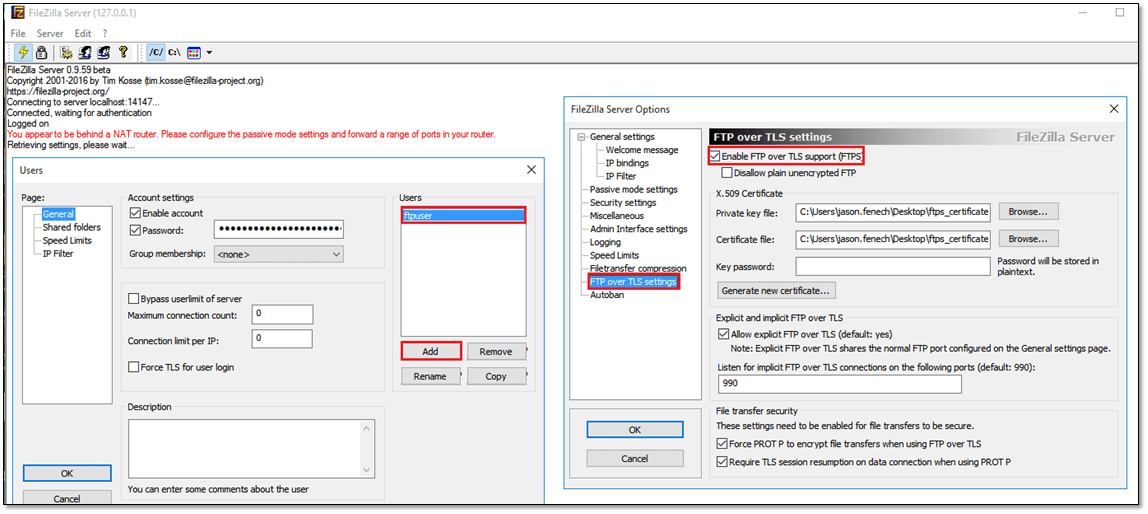
Figure 11 – Using an alternative FTP server to IIS
Using the Appliance Management tool to back up the vCSA
To perform a backup, we will use the Appliance Management tool (or VAMI) the URL for which is https://<appliance name or IP address>:5480. Log in as root using the password set during the vCSA installation process.
The following steps will take you through the procedure that backs up the vCSA and transfers the backup files to the IIS server using FTPS.
1] Once you log in, click on the Backup button on the Summary page.
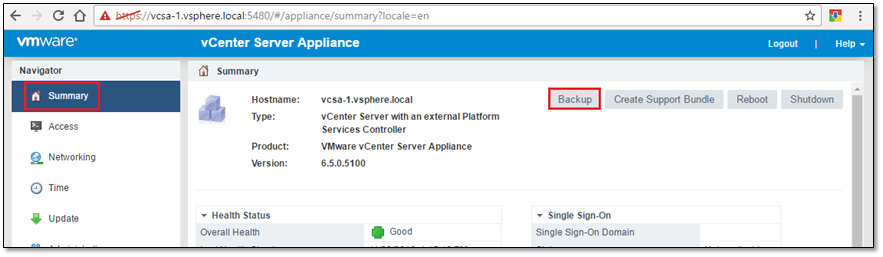
Figure 12 – Launching a vCSA backup from the Appliance Management tool
2] Figure 13 shows at the which stage the transfer protocol is selected along with a number of parameters. Additionally, you will include the following:
- Set the protocol to FTPS
- Type in the IP address or FQDN of the FTP server. Make sure to add ‘/’ at the end.
- The default port is 21 but this may differ according to how you set it up.
- The ftp user account created earlier which in our case is vcsauser.
- The password for the ftp user account.
- To encrypt the backup files, just tick the Encrypt Backup Data option and specify a passphrase. The passphrase will be asked for when carrying out a restore job, so make it a point to remember it. Keep in mind that FTPS simply secures the channel over which the data is being transmitted. Data is only encrypted to disk when the Encrypt Backup Data option is selected (Fig. 13).
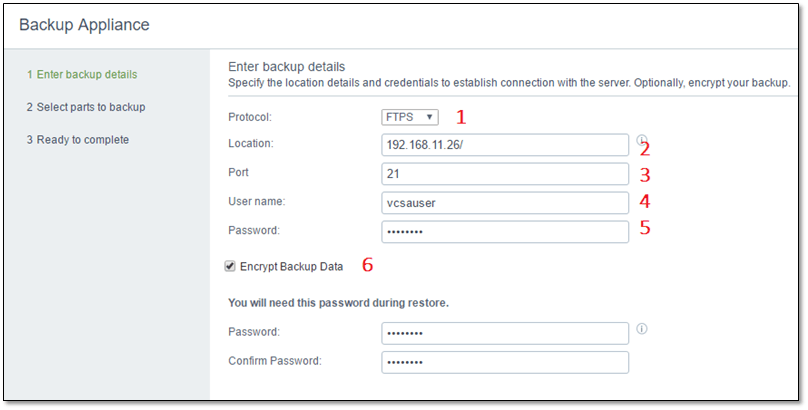
Figure 13 – Specifying the FTPS parameters for the backup job
3] HTTPS, along with FTPS and SCP, is another protocol supported by native backup. Avoid using HTTP and FTP since data is sent in the clear. This holds especially true if the backup files are transmitted over unprotected WAN links. I will not be covering how to set up HTTPS and SCP in this post but the procedure should be very similar to setting up FTPS. In the end, it all depends on the OS and solution you are using.
In theory, HTTP is superior to FTP in terms of speed and reliability but I haven’t had the chance to test this out thoroughly. Here’s a good article comparing the two protocols.
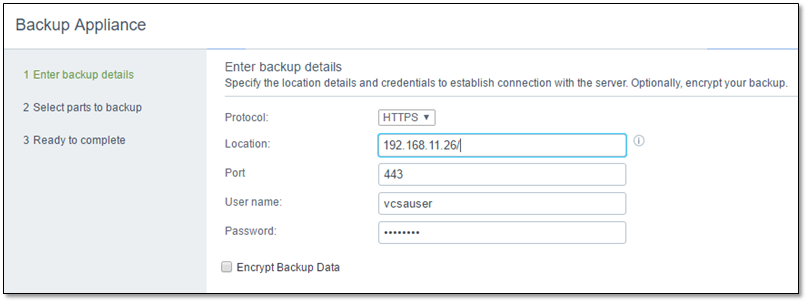
Figure 14 – Using HTTPS as the transfer protocol
4] Make sure that the folder created earlier to hold the backup files is empty. I’m not sure why this is a requirement but you will receive the following error message if it is not. The downside to this, of course, is that you have to empty the folder each time a backup has to be taken.

5] Here you can select which items you want backed up. You are also given the total amount of data that will be backed up and eventually transferred. Press Next to continue.
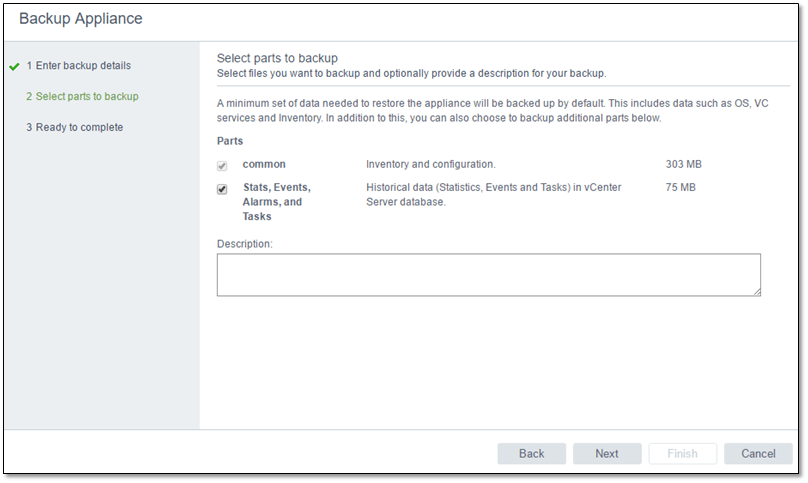
Figure 15 – Selecting what to backup. The amount of data to be transferred is also given.
6] At this screen, just press Finish to start the backup.

Figure 16 – Finalizing the backup job
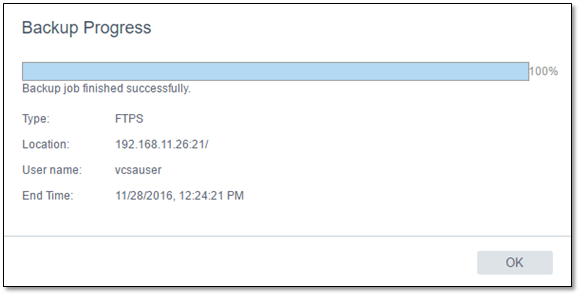
7] You can follow the progress as shown. Press OK when the backup job completes.
If the backup completes successfully, you should see a number of files created under the backup folder. The enc file extension tells us that the encryption option was selected. The only exception to this is the JSON backup configuration file which needs to be in clear text, presumably to retrieve backup and server information during a restore job.
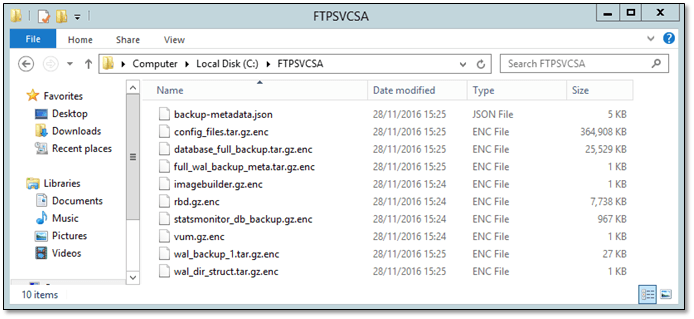
Figure 17 – Backup job files successfully transferred to the FTP server using FTPS
If the backup fails, you can refer to the backup logs on the appliance to troubleshoot what went wrong. Some of the issues I faced included an Error 413, request entity too large entry which I fixed as per the referenced instructions. To view the contents of the log file on the appliance, proceed as follows:
- Using putty or similar, SSH in as root on the appliance.
- Type Shell at the prompt.
- Type cd /var/log/vmware/applmgmt.
- Type more backup.log or tail backup.log.
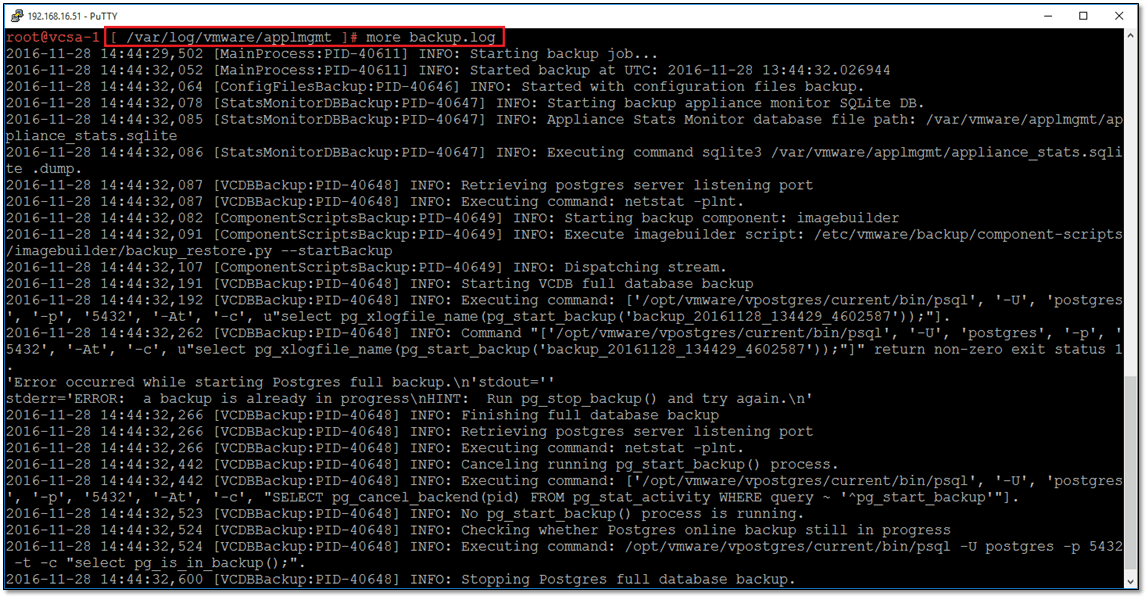
Figure 18 – Viewing the backup jobs log file on the VCSA
And just in case the instructions weren’t clear enough, here’s a video showing how I set up FTPS on IIS and successfully backed up vCSA to it.
Conclusion
The ability to backup a vCSA natively is a welcome addition to any admin’s toolkit. Security wise, it is important that one is able to ensure the safe transit of data and storage, hence the importance of using secure protocols and data encryption. VMware went to great lengths in this respect, not only with native backup but in many other security related areas encompassing vSphere 6.5.
I haven’t touched on the subject of restoring from backup since I’ll be covering this topic in a future post. However for completeness sake, do know that to restore from backup you have to run the vCSA installer and select Restore from the list of options.

I hope you found this post useful and as always watch this space for more interesting stuff to come.
[the_ad id=”4738″][the_ad id=”4796″]


Not a DOJO Member yet?
Join thousands of other IT pros and receive a weekly roundup email with the latest content & updates!
More in this category


About the Author
Jason Fenech


7 thoughts on "Backing up vCSA 6.5 natively using FTPS"
You have to create a virtual directory to get this to work using FTP or at least I did.
Hi,
I’m a newbee using VMware 6.5 as I’m starting to build a cluster of 3 ESXi.
Once started and due to network issue on the NFS datastore used to store all the VMs and the vCenter as well, my vCSA has been corrupted (FS issue)with no way to recover it. And because I had not yet backup of my vCSA.
So after the vCSA reinstallation done right now, I used to this post to set up the FTP site and then do the vCSA backup very easily.
So thanks you for providing detail steps to do this.
Regards
Great to hear the backup/restore procedure worked for you. Thanks for the feedback!
Hey, I am using sftp port 990 to configure the ftp site and getting the error “failed to connect to the remote FTPS location.”
SFTP and FTPS are two different protocols. SFTP is not supported for backup of VCSA 6.5, it is only supported for versions 7.0 and above.