Save to My DOJO
Welcome to part 3 of this series. If you haven’t read through parts 1 and 2, now would be a good time to since this post builds on the material already covered. In today’s post, I will show you how to prepare a Windows 7 template and deploy Windows based VMs off it which are then automatically configured and joined to Active Directory.
Using GOSCs to add Windows based VMs to Active Directory
In part 1, I covered how to create a GOSC using the vSphere Web client. Similarly, I’ll create one which will allow me to join Windows VMs to an Active Directory domain.
As previously explained, run the customization wizard:
1. On the Specify Properties screen, select Windows as the target OS and type in a meaningful name for the GOSC.
You can optionally include a description to help you find a GOSC when you have a ton of them defined. There’s also the option to import a sysprep answer file, a Microsoft tool used to customize Windows operating systems specifically when creating images for deployment purposes. The sysprep answer file is also used by the VMware customization process to customize the guest OS further than what would be normally possible. More details on how to build answer files are available here.
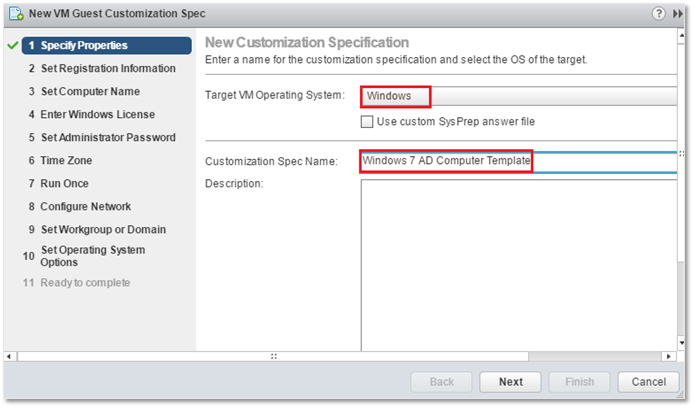
GOSC Properties
2. Next, supply a Name and Organization. Both settings are mandatory.

GOSC – Windows OS Registration details
3. On the Set Computer Name screen, I’ve set the guest OS computer name identical to that assigned to the VM. The VM name is the one you’ll find displayed in vSphere client.
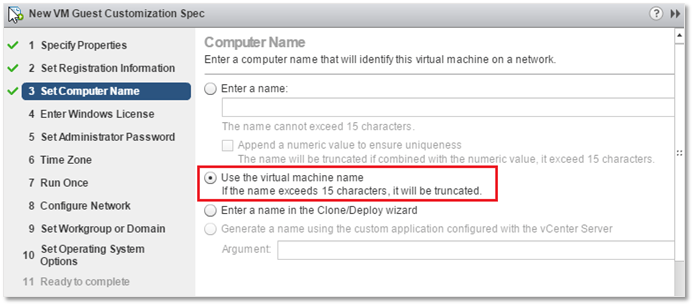
GOSC – Setting the VM machine name
Note: I’ve included a screenshot to single out the difference between the VM name (left) and the guest OS computer name (right) since I know this sometimes tends to confuse some people.
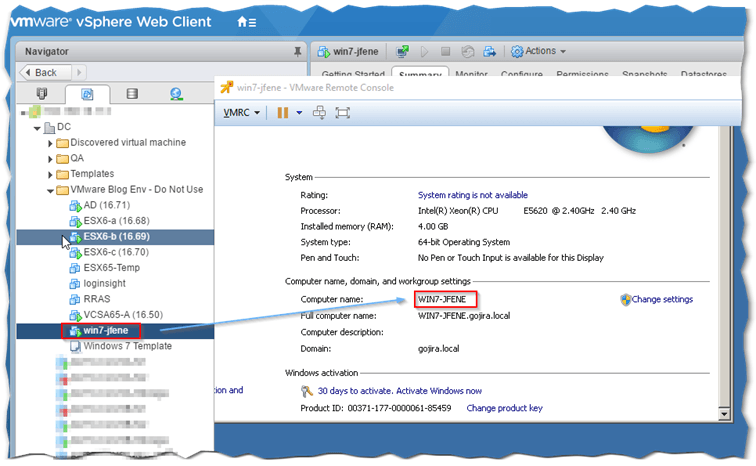
Comparing the VM display name with that of the OS
4. If you have a valid license key, type it in. Otherwise, skip this part and license your installation at a later stage. If this were a Server OS, you’d leave the Include Server License … option ticked on in addition to selecting the licensing mode. As shown in the next screenshot, the option is ticked on by default. You can disable it for non-Server operating systems.
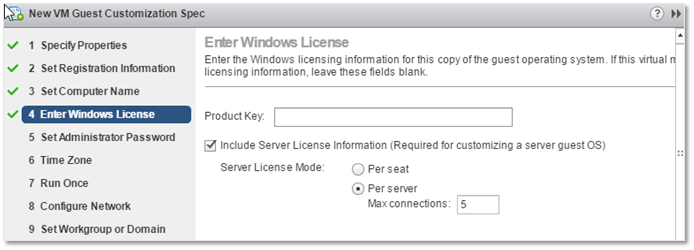
GOSC – Supply a Windows OS Product key and licensing details
5. Type in the password for the Administrator account. Note that administrator password IS NOT changed unless it is set to be blank. You can also enable the option to have Administrator automatically log in for a number of specified times. I set this to 1 to allow me to follow the customization process by having the process automatically log on but in reality you don’t need to do this. One thing you should be weary of is that sysprep will disable the administrator account. You can counteract this by adding an entry in the sysprep answer file or use a script to execute the net user administrator /Active:yes command.
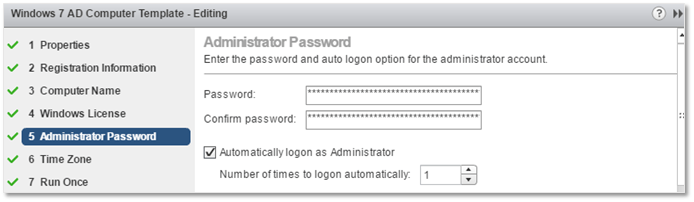
GOSC – Setting the administrator password
6. Here, you just need to set the Time Zone.
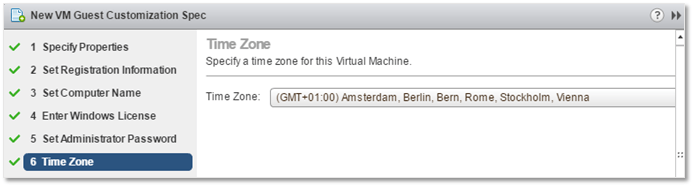
GOSC – Setting the time zone
7. On the Run Once screen you can set any number of commands to execute the first time a user logs in. Any included entries can be found in the Windows Registry under the RunOnce key.
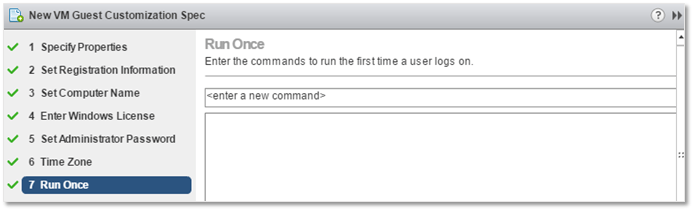
GOSC – Setting up RunOnce commands (a Windows Registry setting)
8. This part, in my opinion, is crucial. Get it wrong, and the deployed VM will not be able to join the AD domain. When you have DHCP set, it is then just a matter of selecting the Manually select custom settings option and configure IPv4 and IPv6 accordingly. Make sure that the VM’s primary network card (vnic) is named Network Adapter 1. You must also take care to remove any hidden (defunct) network interfaces from the Windows guest OS template. This can happen when you add network cards on the fly to the VM and delete them at a later stage when the VM is powered off. When you do this, these interfaces persist even though no longer visible in Windows.
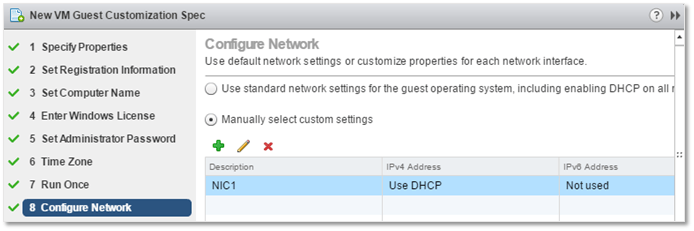
GOSC – Manual NIC configuration
I’ve entered static settings for IPv4 since I don’t have DHCP present in my test environment.
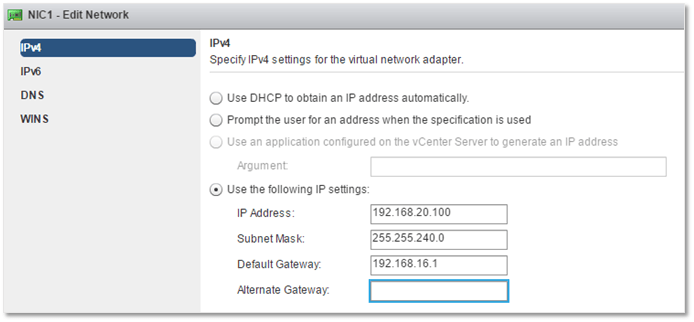
GOSC – Configuring IPv4 settings
Since I don’t use it, I decided to disable IPv6.
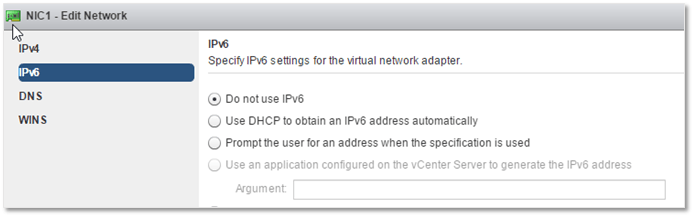
GOSC – Disabling IPv6 for the selected nic
On the DNS page, set the Preferred DNS server. This must be an IP address for a DNS server that can resolve or hosts records for the AD domain. Also, set the domain suffix to match that of the AD domain the VM is being joined to. Note that that these settings are mandatory.
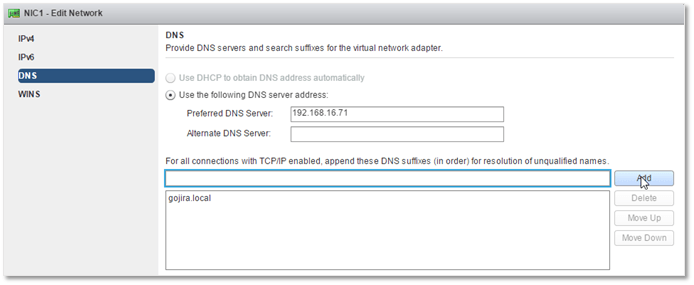
GOSC – Configuring DNS settings
9. Here is where the details of AD domain the VM (guest OS) will become a member of are specified. Type in the domain’s FQDN in the Windows Server Domain field and supply a set of credentials with enough rights to be able to add a computer to a domain (ex. administrator). Note that the username must be in the format shown i.e. <account name>@<domain FQDN>.
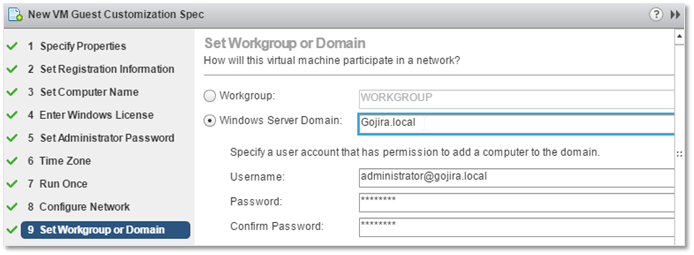
GOSC – The AD details and credentials required to join an AD domain
10) Ticking on this option, will have Sysprep generate a new SID. Technically, this is not required for computers joined to AD unless one is logged in using a local account as opposed to domain one. You must however generate a new SID for VMs whose guest OS is part of a workgroup or, as already mentioned, when local user accounts are used. This topic is an ongoing debate with some conflicting information thrown in between. This, however, should set the records straight! I suggest ticking on the option regardless, just to make sure any SID conflict related issues are kept at bay.
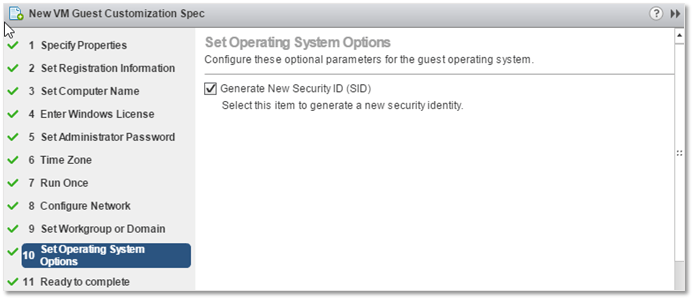
GOSC – Generating a new SID
11) Finally, press Finish to save the GOSC.
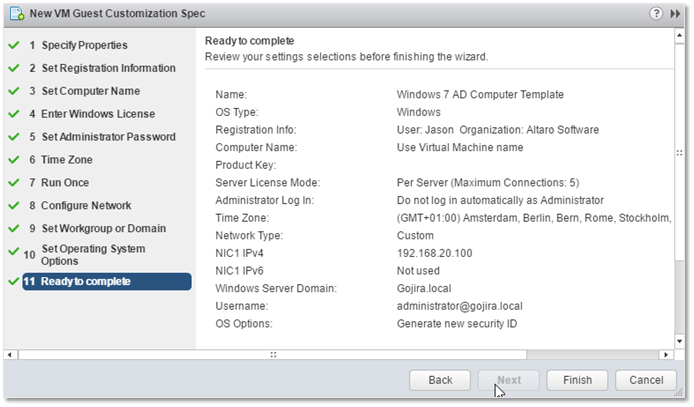
A finalized GOSC ready to be saved
Here’s the GOSC just created as seen in Customization Specification Manager.
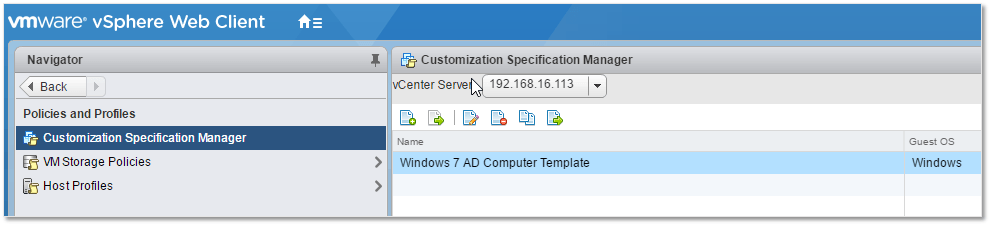
The new GOSC now listed in CSM
Preparing the Windows 7 template
In part 1, I covered how to prepare a template and gave links to a couple of good walkthroughs. I won’t repeat myself or replicate what’s already available. Instead, here are a few tips I think are worth sharing.
Tip 1: Create an administrative account and leave it enabled. If the VM successfully joins the domain, you won’t be needing it since you can then log in using a Domain account. However, if for any reason, the domain addition process fails, you will end up being locked from the VM’s guest OS since Sysprep recreates the administrator account and disables it as per default. Having a secondary admin account allows you to rectify matters painlessly.
Tip 2: While doing some research, I came across the VMware OS Customization Tool which is freely available and is used to optimize VMs for VMware Horizon. This tool when run on a VM takes care of a few things such as disabling unused services and removing redundant software. In essence, it tweaks a virtualized Windows OS to work at optimal performance. You control what gets changed by modifying the template applied.
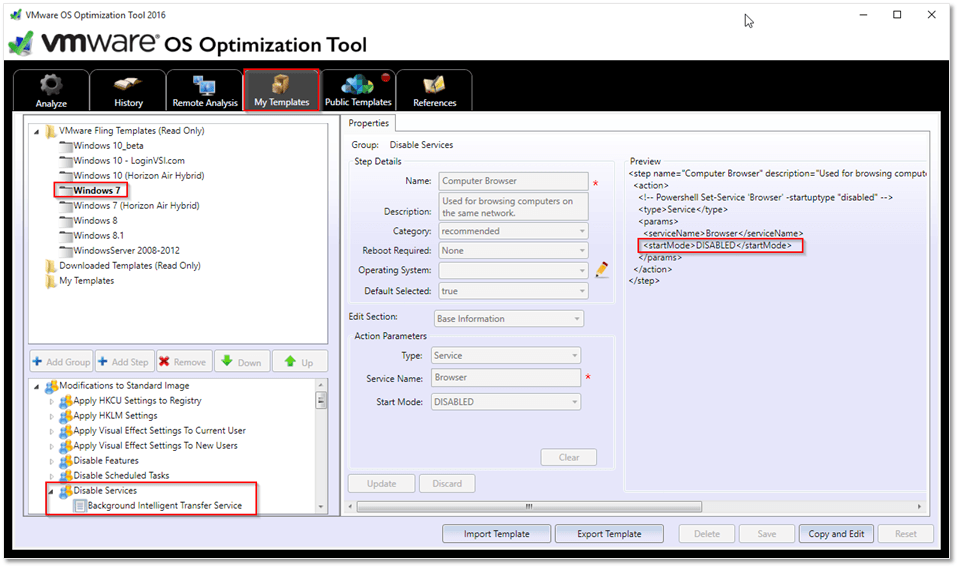
VMware OS Optimization Tool – Selecting a template and which settings to apply
Once you select the template matching the installed guest OS, click on Analyze to see which settings are applicable followed by Optimize to commit the selection.
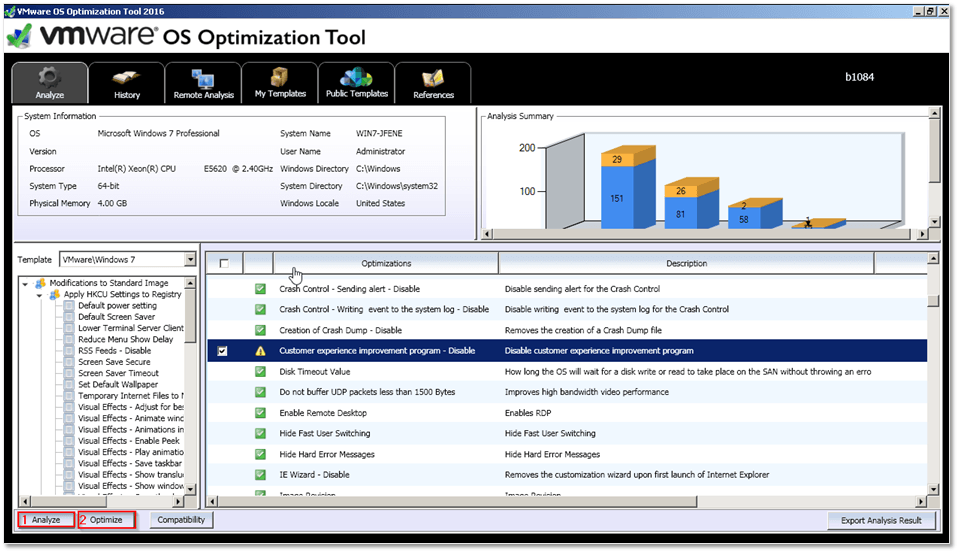
VMware OS Optimization Tool – Analyzing and optimizing an OS
The comprehensive guide tells you all there is to know about the tool. It’s worth a try since I reckon it to be faster, and a better solution, than having to carry out optimization manually. Then again, it’s been a while since I last created images for provisioning so I stand to be corrected in respect to what’s available nowadays.
Tip 3: Previously, I mentioned the requirement of having the VM’s primary name set to Network Adapter 1. The same applies to the network card setup in Windows. Make sure to remove defunct networks interfaces as explained. Your primary interface in Windows should be labelled Local Area Connection. If it’s anything else, it might be that you have one or more hidden nics.
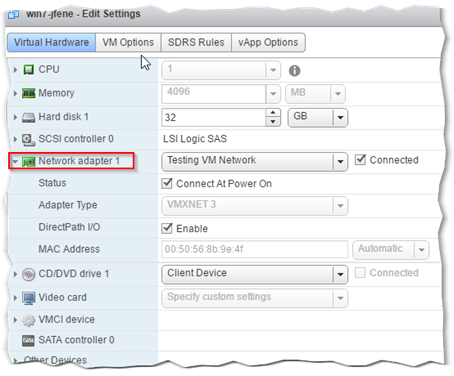
Checking that the VM’s primary vnic is set to Network adapter 1
The next screenshot illustrates such a case. I added a number of virtual nics while the VM was powered on. I then powered it down and removed the recently added nics and powered it back on. The network connection renamed itself to Local Area Connection 2. In addition, the deleted nics are listed as defunct in Device Manger.
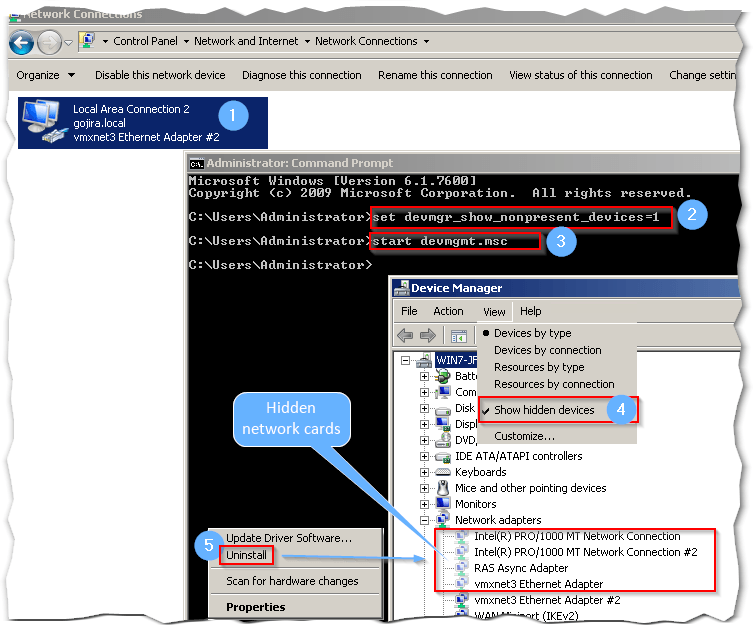
Displaying hidden defunct nics in Windows
You need to ensure this is not the case before closing off your template. One method to check for defunct network interfaces under Windows is as follows:
From an administrative command prompt type:
- set devmgr_show_nonpresent_devices=1 and press Enter.
- start devmgmt.msc.
When Device Manager loads do the following:
- Select Show hidden devices from the View menu.
- Expand Network adapters and verify if there are any nics listed a ghosted out icon.
- Delete any such nics by right-clicking and selecting Uninstall. Do not uninstall the driver for vmxnet3 if prompted to.
Tip 4: Double check that VMware Tools are installed.
Tip 5: Do not run Sysprep manually from Windows if joining the VMs to Active Directory. Instead, enable the Generate new Security ID option from the GOSC wizard.
Deploying Windows VMs and adding them to Active Directory
Now that the Windows 7 template is ready as is the GOSC, deploying and joining Windows VMs to AD should be a piece of cake. Here’s how to do it the manual way.
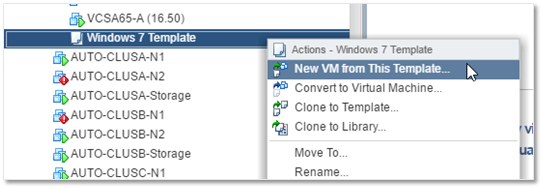
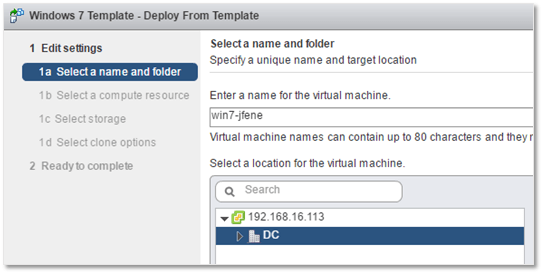
1) Using the vSphere Web Client, locate the template and right-click on it. Select New VM from the Template. You’ll need to click on the Next button on every screen from hereon save for the last.
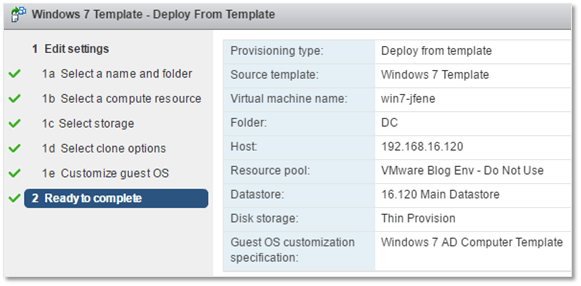
2) Type in a name for the VM. Remember that the guest OS computer name will be identical to the VM name as per the naming rule specified in the GOSC created. You should also select a location for the VM.
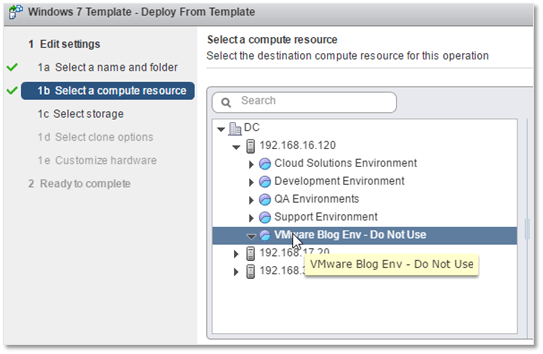
3) Select the ESXi host and a resource pool under which the VM will be created.
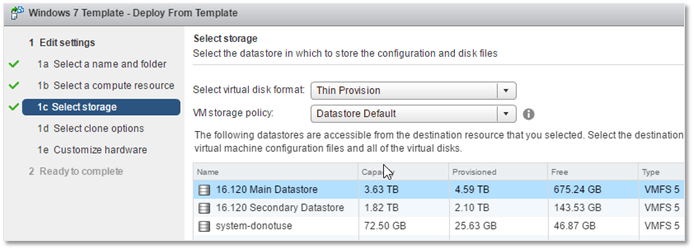
4) Select the datastore where the VM will be created, set the virtual disk format and assign a storage policy where applicable. For this example, I chose the Thin Provision disk format and the Datastore Default storage policy.
We want to customize the OS once the VM has been deployed and have it power on automatically. Hence, select options 1 and 3 as shown.
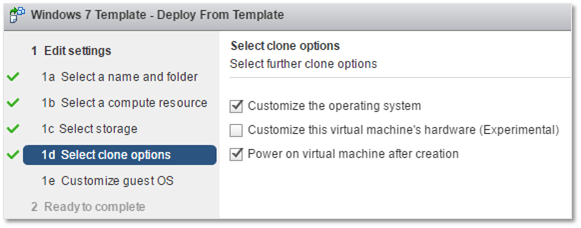
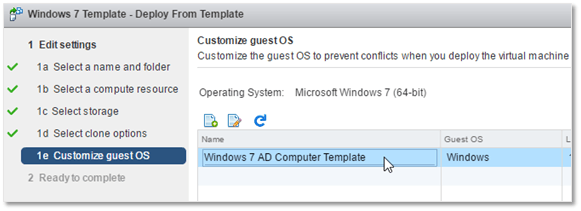
Select the GOSC previously created. This contains all the settings that will be applied after the VM is created and is powered on.
Press Finish to start the provisioning process.
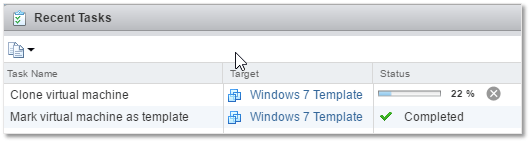
You can actually see that this is, after all, a cloning process by looking at the recent tasks pane in vSphere Web Client.
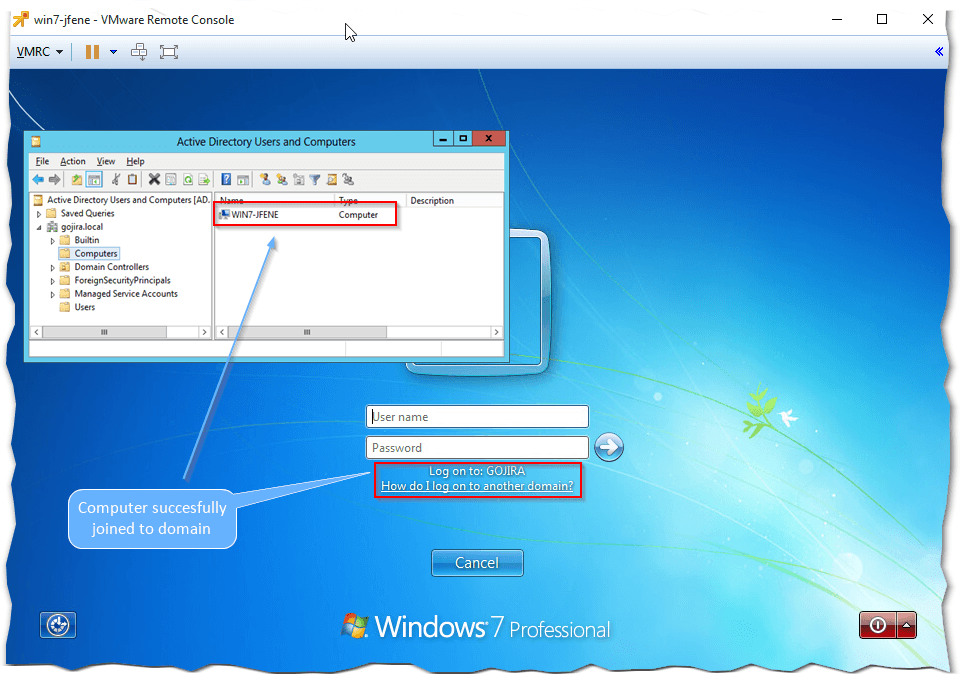
Using my test environment, the process took roughly 10 minutes. I believe the VM rebooted a couple of times – sorry I did not keep count as I grabbed a quick coffee while it was deploying – after which I found the VM readily joined to my test domain as shown in the next screenshot.
The domain addition step failed the first time round because I forgot to check for defunct nics which is why I mentioned how important it is to check for any before finalizing the template. In addition, to help you troubleshoot, the VMware customization process writes to a log file called guestcust.log created under c:\windows\temp\vmware-imc. Most of the entries are related to the Sysprep utility which is invoked by the VMware customization process. A snippet of the log file is shown next.

Conclusion
Using a Windows 7 template and a corresponding GOSC, we’ve seen how you can deploy VMs and have them automatically join Active Directory. You still need to carry out a couple of steps manually to get this going but it can all be fully automated with PowerCLI which, as promised, is a topic I’ll be covering in the 4th and last post of this series.
[the_ad id=”4738″][the_ad id=”4796″]


Not a DOJO Member yet?
Join thousands of other IT pros and receive a weekly roundup email with the latest content & updates!
More in this category


About the Author
Jason Fenech

